How to make adorable skull-shaped, iced sugar cookies for Halloween or Día de Muertos!
This post contains affiliate links.
As the spooky season draws near, I just can’t resist conjuring up sweet treats in my kitchen that really match the feeling of this time of year. One of these wickedly tempting treat recipes is this one for Skull-shaped Halloween Sugar Cookies! But these spooky cuties aren’t just for celebrating Halloween, they are perfect for Día de Muertos or Day of the Dead, cookies! Dazzled with bright colors and fun designs, these cookies are absolutely perfect for adding a spooky yet cute aura to any celebration!
These skull cookies can be fully prepared ahead of time to be ready for serving on the day of your festivities, or the decorating part can actually be saved for the perfect craft project for a Halloween party! This is an especially fun Halloween kitchen activity to do with kids of all ages. Once the sugar cookies are ready to be decorated, just whip up and bag the icing, cover your decorating surface with a protective layer, and let the kiddos decorate their cookies however they want! My step-by-step process makes it easy for you to know what to expect throughout the whole recipe so you can be prepared to let the spooky times roll!
Skull Cookie Equipment
This fancy cookie recipe is a bit of an intricate process so you will need quite a few specific tools for this spooky kitchen project. Most of the equipment needed for this cookie process is commonly found in many household kitchens, especially in the home of frequent bakers like myself. Anything you don’t have in your kitchen collection can easily be found online or at your local grocery store.
Skull Cookie Equipment:
- Electric hand mixer
- Baking sheet
- Silicone Baking Mat
- Cooling rack
- Adjustable rolling pin
- Skull Cookie Cutter
- Plastic table cover roll
- Needle Modelling Tool
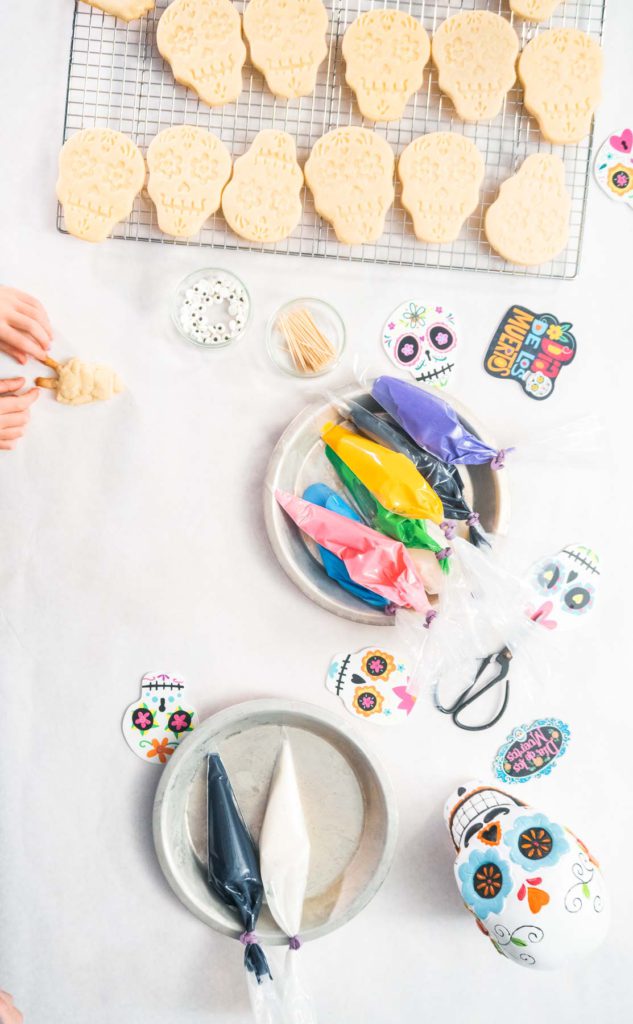
- Royal icing piping bags
- Food coloring
- Glass mixing bowl
- Spatulas
- Blending whisk
Wicked Good Ingredients
Since this wicked good recipe requires quite a few tools, you might also think that it calls for a bunch of complicated ingredients, but surprisingly that’s not the case here! All of the ingredients for this spooky cookie recipe are super common and easy to obtain, both for the sugar cookies and the delightful royal icing!
Sugar cookies:
- 1 cup unsalted butter softened
- ⅔ cup sugar
- 1 egg
- 1 teaspoon vanilla extract
- ½ teaspoon salt
- 2 ½ cups all-purpose flour
Royal icing:
- 2 lb confectioners’ sugar
- 6 tbsp meringue powder
- 12 tablespoon warm water
- 2 tsp vanilla extract
- food coloring: black, pink, blue, green
How to Make Skull Sugar Cookies for Halloween or Day of the Dead
Now, let’s get to the breakdown of this skull cookie process. This process does take quite a while to do from start to finish so I actually spread the process out over a few days to help keep my sanity. I highly recommend doing the same, especially if you’re making these cookies specifically for a decorating party. In that case you definitely want to make the sugar cookies a day or even a few days beforehand and then prepare the royal icing on the day of the actual party. Read through my whole recipe process before starting this cookie project so you know exactly what to expect when it comes to figuring out just how long this recipe takes.
Making the sugar cookie dough:
- First, measure out all of the ingredients, then combine the flour and salt in a medium-sized mixing bowl.
- Next, in a large mixing bowl, beat the butter and sugar together with a hand mixer until smooth.
- Add in the vanilla extract and the egg, then beat the mixture again.
- Then, slowly add the flour and salt mixture into the wet ingredients while still continuously mixing. When the dough is stiff, finish kneading it by hand.
- After kneading, wrap and chill the dough for 3 hours in the fridge before rolling it out.
- After chilling the dough, preheat the oven to 350°F and set the dough out on the counter for 15 minutes.
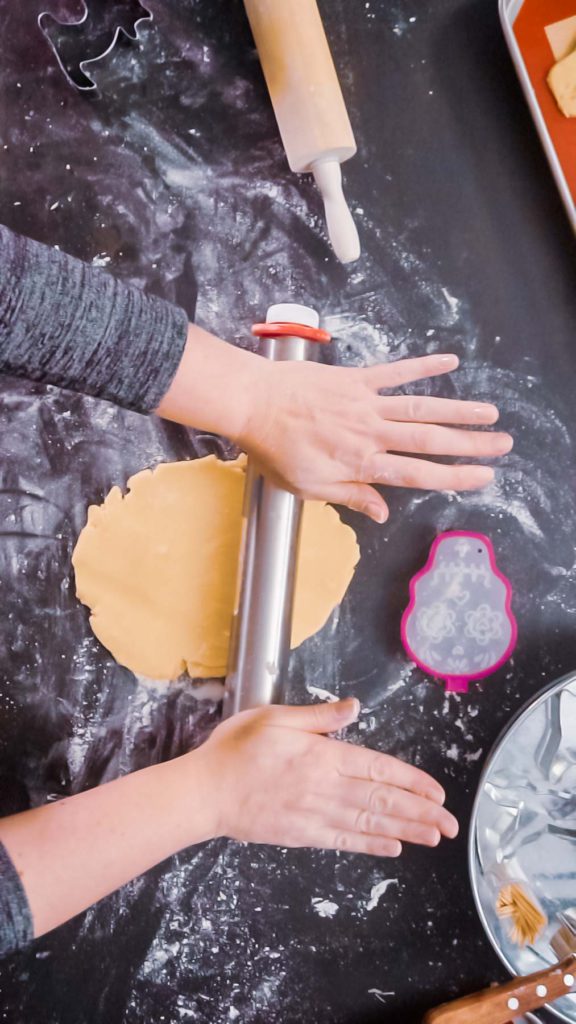
- Then, on a lightly-floured surface, use the rolling pin to flatten the chilled cookie dough out until it is ¼ inch thick.
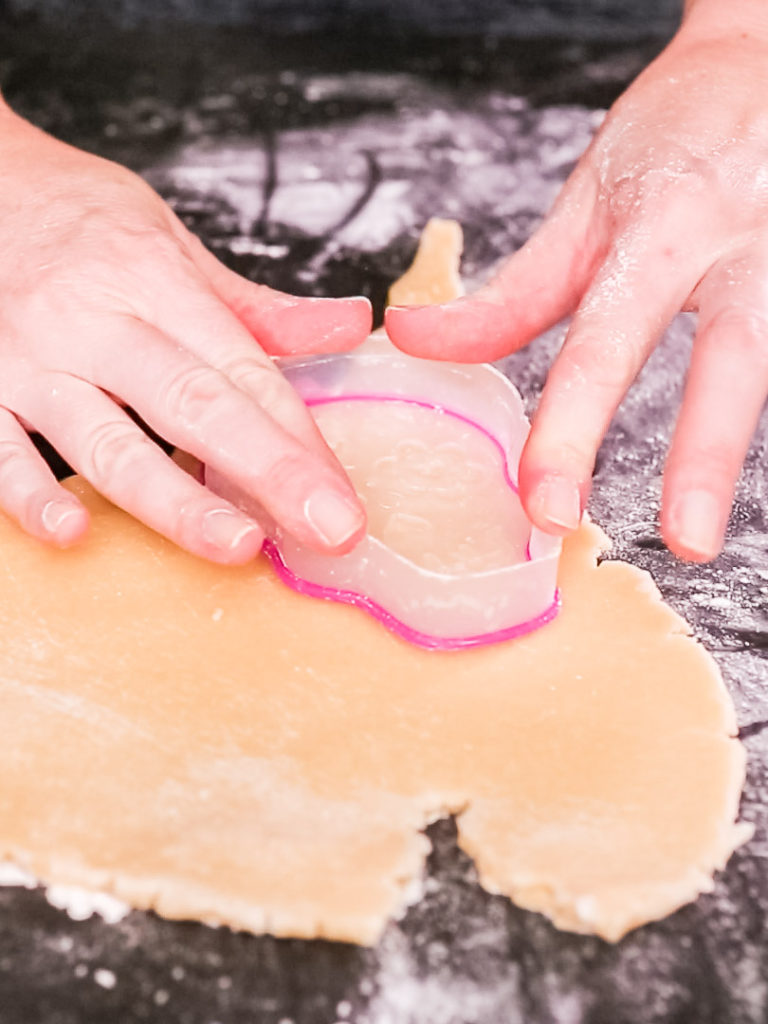
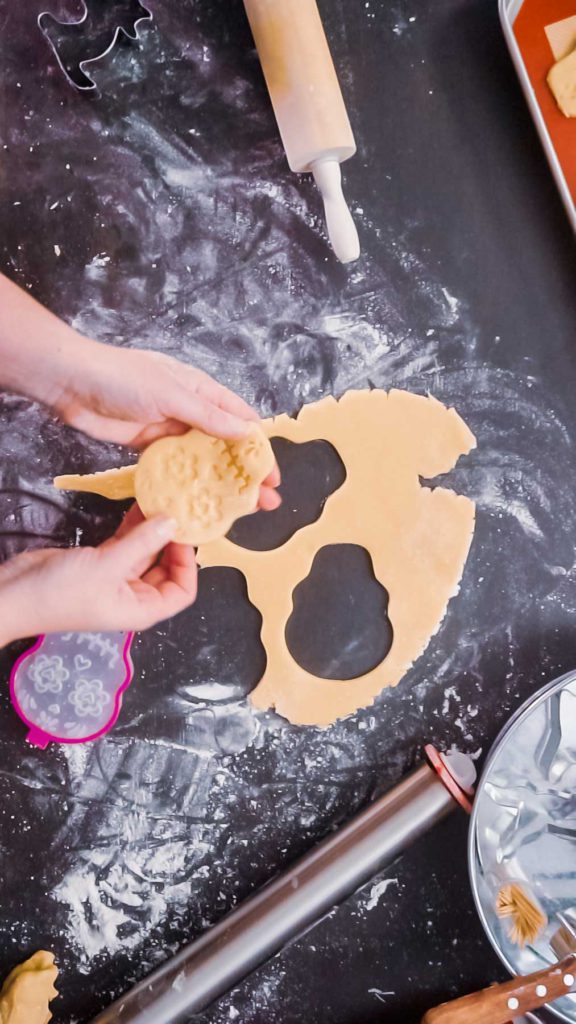
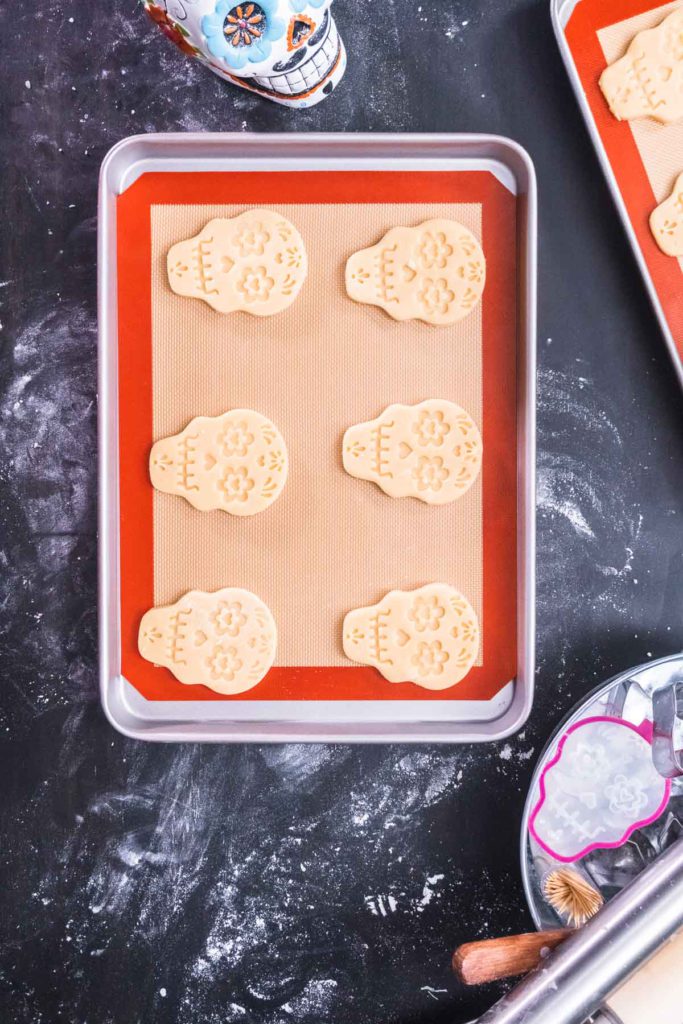
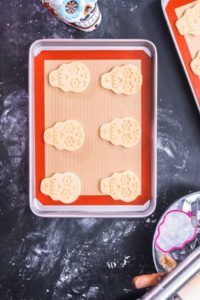
- Next, use the skull cookie cutters to cut out the skull-shaped sugar cookies and transfer the cookie cutouts to a baking sheet lined with a silicone baking mat or sheet of parchment paper.
- Before baking, place the baking sheet of cookie cutouts in the fridge and let them chill for another 5-10 minutes.
- This is so the cookies will keep their form and don’t spread out while baking.
- Bake the sugar cookies for about 8-10 minutes.
- Finally, after baking, let the cookies cool slightly on the baking sheet and then transfer the sugar cookies to the cooling rack and cool completely before decorating.
.
Busy Baker Tip:
Now at this point, I usually store my sugar cookies in an airtight container and wait to decorate them until the next day or a few days after. I like to separate the time between baking the cookies and actually decorating them because it’s just too much work for one day and making the sugar cookie dough is a very time-consuming process.
Making Easy Royal Icing:
- First, combine the confectioners' sugar and meringue powder in a large mixing bowl.
- Then, add in the water, one spoon at a time, while mixing with a hand mixer on the low speed setting. Drop in the vanilla extract and continue to mix, on low, until the mixture is shiny.
- Bump up to the high speed setting and beat the icing mixture for 5-7 minutes.
- Next, scoop ⅔ of the icing evenly into 4 separate bowls to add colors into, but be sure to keep ⅓ of the white icing like it is.
- Then, use a few separate, clean toothpicks to drop in a little bit of food coloring into each of the 4 smaller bowls of icing: one black, one pink, one blue, and one green.
- Mix each colored frosting until the desired color is reached.
- Then, transfer each colored frosting into its own royal icing piping bag and tie off each bag with a knot. Cut ⅛ inch from the tip of the bag to start decorating.
Icing the Sugar Skull Cookies:
- If this is a family decorating project then I highly recommend using some kind of protective layer on your surface like this plastic table cover. Start with completely cooled cookies.
- First, use the piping bag of white royal icing to fill in the basic skull shape on the sugar cookies. Let the icing dry before adding any colors on top.
- Next, use the pink, blue, and green icings to fill in the Day of the Dead skull patterns and details. Use the Needle Modelling Tool to pop any icing air bubbles and to help with fine or small details.
- Finally, use the black and white icings to fill in the skull eyes and use the black to draw out the skull teeth.
- If desired, add Halloween sprinkles before the icing starts to dry.
- It will probably take about 30 hours for the icing to completely dry well enough for storage or packaging.
How to Store Sugar Cookies with Royal Icing
To store sugar cookies decorated with royal icing, seal the cookies up tightly in an airtight container or in a ziplock bag and store either on the counter for up to 1 week, or in the fridge for up to 2 weeks. If desired, these cookies can be frozen at any point of the process whether it’s the dough, fully decorated cookies, or undecorated baked cookies.
To freeze decorated sugar cookies:
- Decorated cookies must be frozen slowly. Start by placing cookies in a flat, spaced out layer on a baking sheet and freeze for ½ an hour.
- Then, cover the cookies with a layer of parchment paper and stack similar shapes on top.
- Wrap the stacked cookies in plastic food wrap and then again with aluminum foil.
- Mark the date on the outside of the wrapping with a marker.
- Frozen sugar cookies will stay good for 4 months.
Freezing royal icing:
- If desired, the royal icing can be frozen separately, all on its own!
- Just transfer the icing to a ziploc bag and remove all of the air.
- Mark the date on the outside of the bag and store in the freezer for up to 3 months.
- To thaw the icing just bring to room temp and afterwards, if needed, add a little water to moisten back up.
Spooky Good Serving Ideas
Whether you’re baking a batch of these skull-sugar cookies for a Halloween party, a Día de Muertos celebration or a cookie decorating party for the kids, these cookies are surely not going to disappoint! From decorating to devouring, these skull cookies are an absolute treat to make and enjoy! Want to celebrate Halloween with more of a fairytale theme? Then you are going to love some of my other magical-themed recipes!
Enchanting Halloween party recipes:
- Black Candy Apples
- Mermaid Cake Popsicles
- Mermaid Pretzel Rods
- Chocolate Mermaid Tails
- Mini Mermaid Chocolate Bars
- Unicorn Chocolate Chip Cookies
- Unicorn Meringue Pops
- Unicorn Meringue Cookies
- Unicorn Rainbow Cupcakes
For more fairytale-themed Halloween fun, check out these simple holiday projects:
Skull sugar cookies
Equipment
Ingredients
- 1 cup unsalted butter softened
- ⅔ cup sugar
- 1 egg
- 1 teaspoon vanilla Extract
- ½ teaspoon salt
- 2 ½ cups flour
Royal icing
- 2 lb confectioners sugar
- 6 tablespoon meringue powder
- 12 tablespoon warm water
- 2 teaspoon vanilla extract
- food coloring black, pink, blue, green
Instructions
Sugar cookies
- First, measure out all of the ingredients, then combine the flour and salt in a medium-sized mixing bowl.
- Next, in a large mixing bowl, beat the butter and sugar together with a hand mixer until smooth.
- Add in the vanilla extract and the egg, then beat the mixture again.
- Then, slowly add the flour and salt mixture into the wet ingredients while still continuously mixing. When the dough is stiff, finish kneading it by hand.
- After kneading, wrap and chill the dough for 3 hours in the fridge before rolling it out.
- After chilling the dough, preheat the oven to 350°F and set the dough out on the counter for 15 minutes.
- Then, on a lightly-floured surface, use the rolling pin to flatten the chilled cookie dough out until it is ¼ inch thick.
- Next, use the skull cookie cutters to cut out the skull-shaped sugar cookies and transfer the cookie cutouts to a baking sheet lined with a silicone baking mat or sheet of parchment paper.
- Before baking, place the baking sheet of cookie cutouts in the fridge and let them chill for another 5-10 minutes.This is so the cookies will keep their form and don’t spread out while baking.
- Bake the sugar cookies for about 8-10 minutes.
- Finally, after baking, let the cookies cool slightly on the baking sheet and then transfer the sugar cookies to the cooling rack and cool completely before decorating.
Royal icing
- First, combine the confectioners' sugar and meringue powder in a large mixing bowl.
- Then, add in the water, one spoon at a time, while mixing with a hand mixer on the low speed setting. Drop in the vanilla extract and continue to mix, on low, until the mixture is shiny.
- Bump up to the high speed setting and beat the icing mixture for 5-7 minutes.
- Next, scoop ⅔ of the icing evenly into 4 separate bowls to add colors into, but be sure to keep ⅓ of the white icing like it is.
- Then, use a few separate, clean toothpicks to drop in a little bit of food coloring into each of the 4 smaller bowls of icing: one black, one pink, one blue, and one green.
- Mix each colored frosting until the desired color is reached.
- Then, transfer each colored frosting into its own royal icing piping bag and tie off each bag with a knot. Cut ⅛ inch from the tip of the bag to start decorating.
Icing the Sugar Skull Cookies
- If this is a family decorating project then I highly recommend using some kind of protective layer on your surface like this plastic table cover. Start with completely cooled cookies.
- First, use the piping bag of white royal icing to fill in the basic skull shape on the sugar cookies. Let the icing dry before adding any colors on top.
- Next, use the pink, blue, and green icings to fill in the Day of the Dead skull patterns and details. Use the Needle Modelling Tool to pop any icing air bubbles and to help with fine or small details.
- Finally, use the black and white icings to fill in the skull eyes and use the black to draw out the skull teeth.If desired, add Halloween sprinkles before the icing starts to dry.It will probably take about 30 hours for the icing to completely dry well enough for storage or packaging.
Notes
Food Photography & Video Tips from My Studio
Here’s a peek at the tools, gear, and camera setups I use to film my recipe videos and photograph food at home. Over the years, I’ve tested dozens of different setups, and now I’m sharing what actually works for me—whether I’m filming overhead shots for YouTube or styling still photos for my blog. If you’re curious about how I create the content you see here, these posts are a great place to start.






















Leave a Reply