|
 |
This post contains affiliate links.
Every Christmas season, I love bringing a little whimsy to the dessert table—and this Grinch Fudge has quickly become one of my holiday traditions. It’s bright, playful, and always gets people smiling. The fun green fudge with a single red candy heart on top looks like it came straight out of Dr. Seuss’ world, but it couldn’t be easier to make. With just a few simple ingredients and no oven required, it’s a treat that anyone can pull together in minutes. If you’ve ever enjoyed my Christmas Hot Chocolate Bombs or my Chocolate Ginger Sugar Cookies, you’ll know how much I love recipes that combine fun presentation with simple steps, and this fudge fits right in.
The first time I made this fudge, I remember being surprised by how much everyone loved it. It disappeared faster than anything else on the dessert table. People kept asking how I made it look so perfect, and I realized that sometimes the simplest recipes are the ones that make the biggest impression. Now, I make it every December—not just for cookie boxes, but also for holiday parties, teacher gifts, and those last-minute moments when I need something festive and quick. I’ve even added it to dessert spreads alongside my Gingerbread Man Chocolates and Classic Chocolate Fudge, and it always manages to steal the show.
Why You’ll Love This Recipe
- Kid-friendly – No oven, no stress, and perfect for little helpers.
- Festive & fun – That Grinchy green with the red heart is instantly recognizable.
- Make-ahead friendly – Stays fresh for up to 2–3 weeks.
- Crowd-pleasing – Sweet, creamy, and melts in your mouth.
Watch how I make this recipe
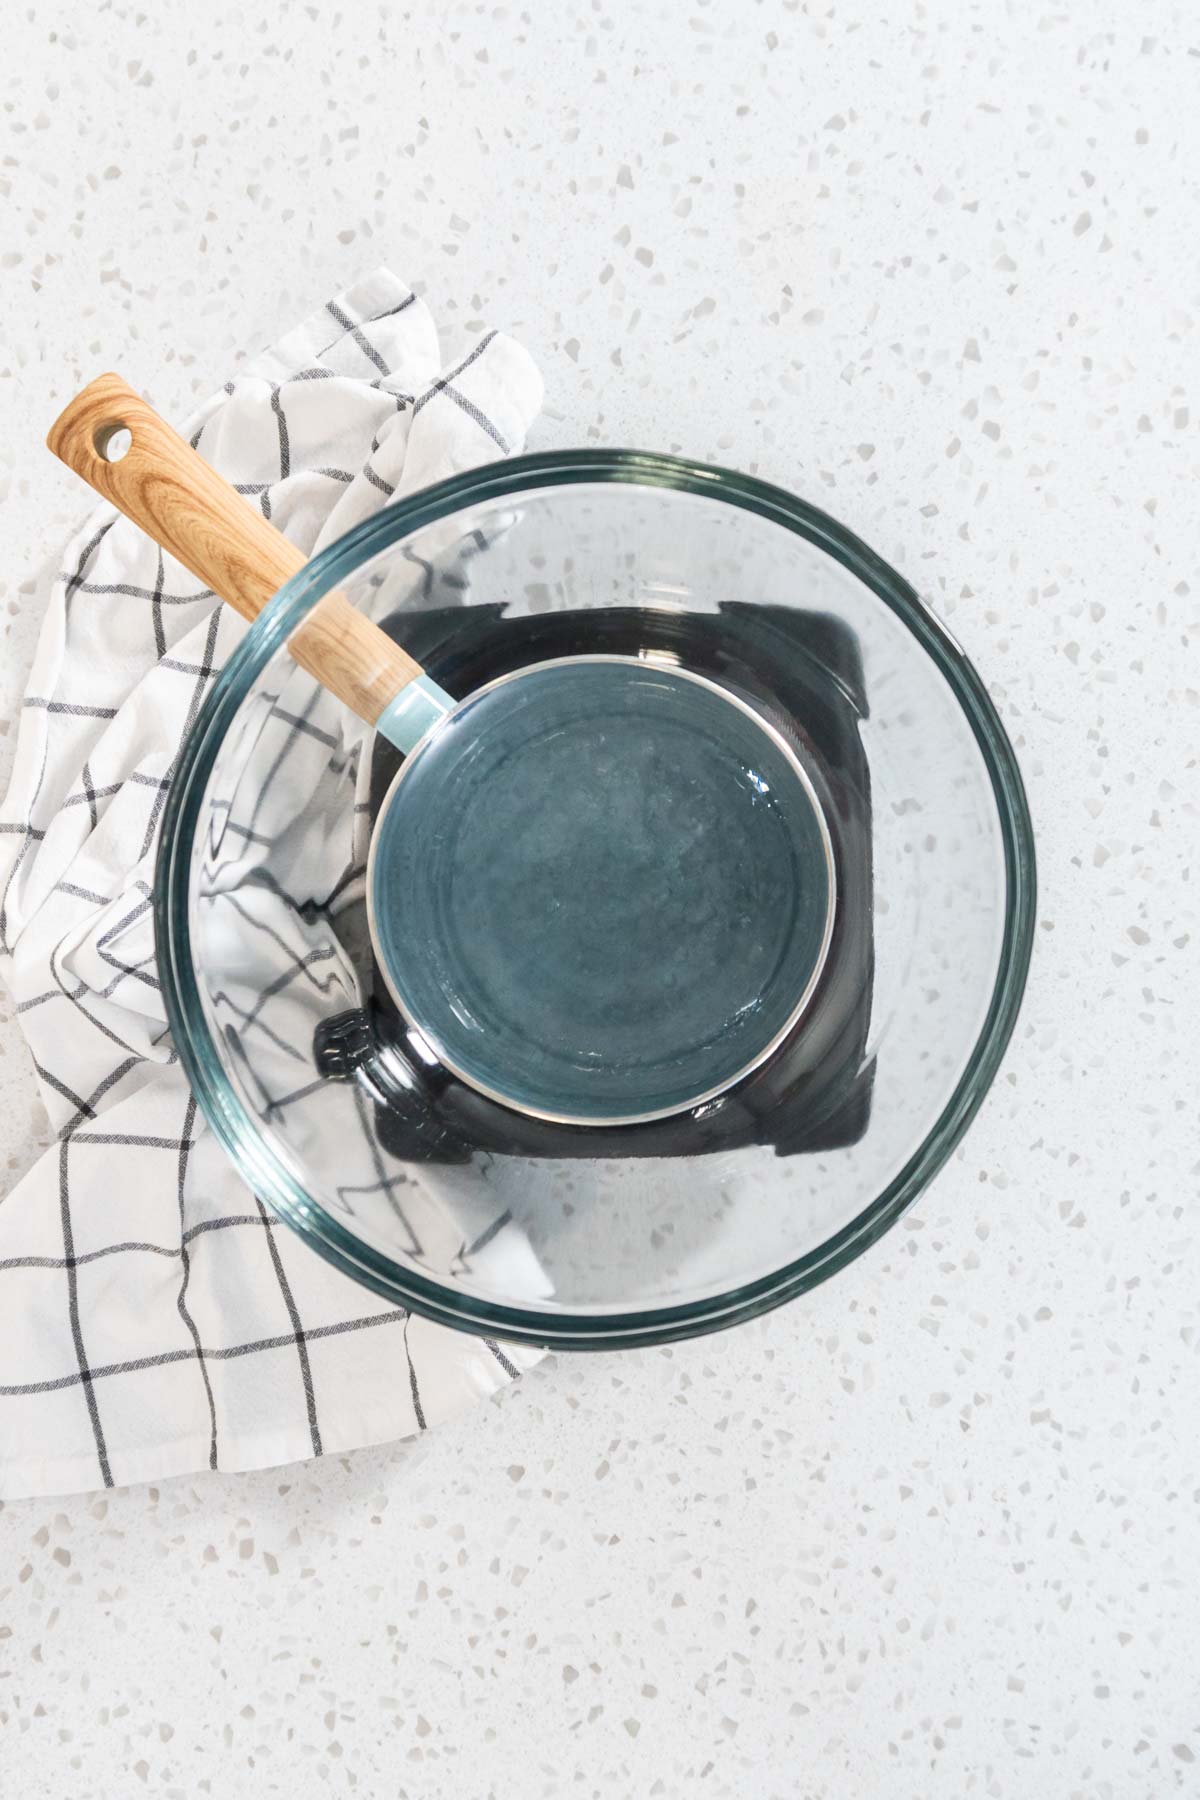
Easy DIY Double Boiler for Melting Chocolate or Butter

Tools That Make It Easier
- Glass mixing bowl – Works perfectly for a double boiler.
- Silicone spatula – My favorite tool for smooth stirring and scraping.
- 8x8 square pan – The ideal size for fudge squares.
- Parchment paper – Makes lifting out the fudge simple and mess-free.
- Pastry wheel or pizza cutter – Helps keep the cuts neat and even.
- Heart silicone mold – For those signature red hearts on top.

What You’ll Need From Your Pantry
- 14 oz sweetened condensed milk
- 1 teaspoon vanilla extract
- ½ teaspoon green food coloring
- 3 cups white chocolate chips
- ¼ cup unsalted butter, room temperature
- ½ cup red candy melts (for hearts)

Before You Start: My Quick Tip
- Chill longer for best texture – Overnight chilling makes the fudge easier to cut.
- Use gloves when cutting – Keeps fingerprints off those pretty green squares.
- Warm your knife – Run it under hot water, dry it, and then slice. It makes such a difference (I also cover this in my post on How to Cut Fudge into Smooth Perfect Pieces).
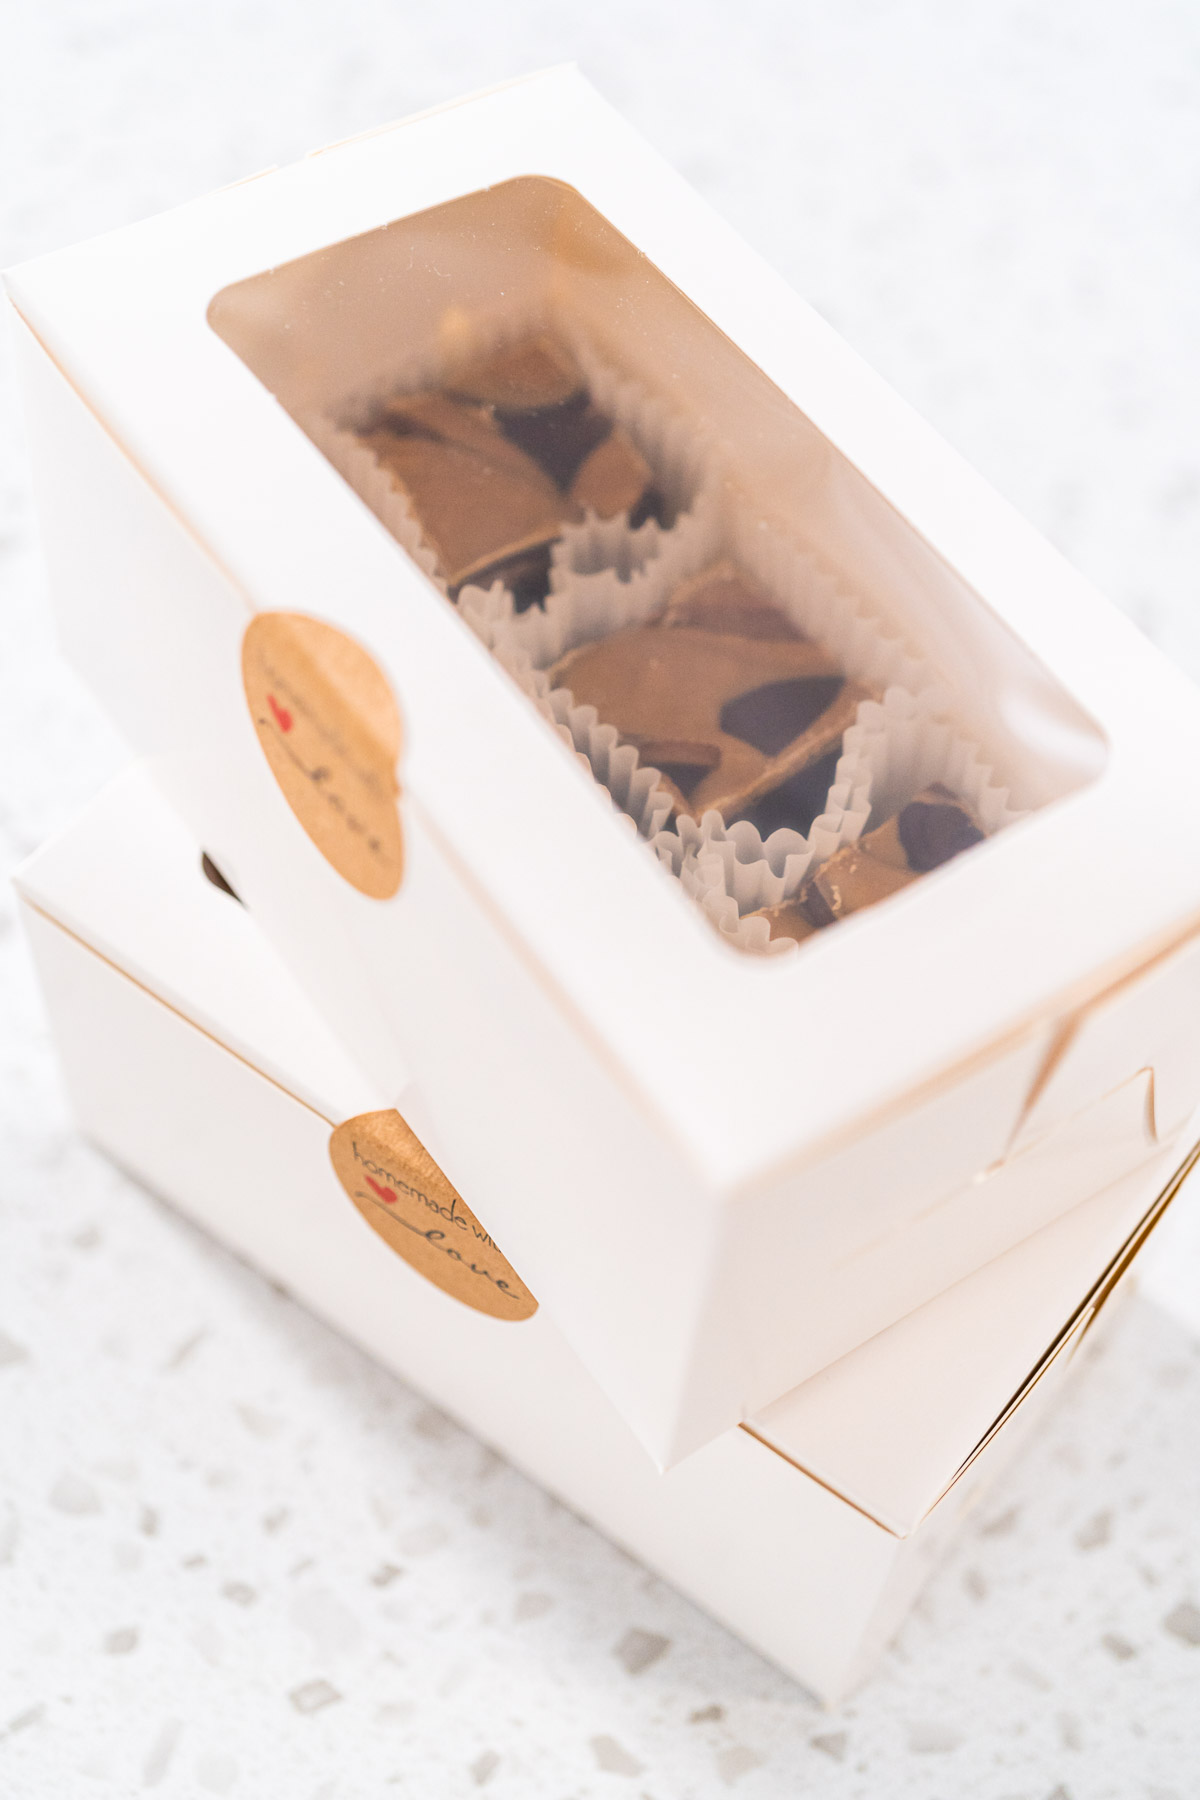
- Gift packaging – Wrap squares in parchment and pack them into tins. I love pairing them with cookies, like in my How to Package Homemade Cookies and Fudge post.
- Holiday helper tip – When making these with kids, let them be in charge of pressing on the red hearts. It’s simple, safe, and they get so excited to see their creation come together.

Latest Video

Let’s Make It Together
Step 1: Make the Fudge
- Stir condensed milk, vanilla, and food coloring together.
- Melt with butter and white chocolate chips in a double boiler.
- Mix until smooth, then pour into a parchment-lined 8x8 pan.
- Spread evenly with a spatula and refrigerate for 2 hours or overnight.
Step 2: Make the Hearts
- Melt red candy melts until smooth.
- Pour into heart molds and freeze until firm.
- Pop them out once set.
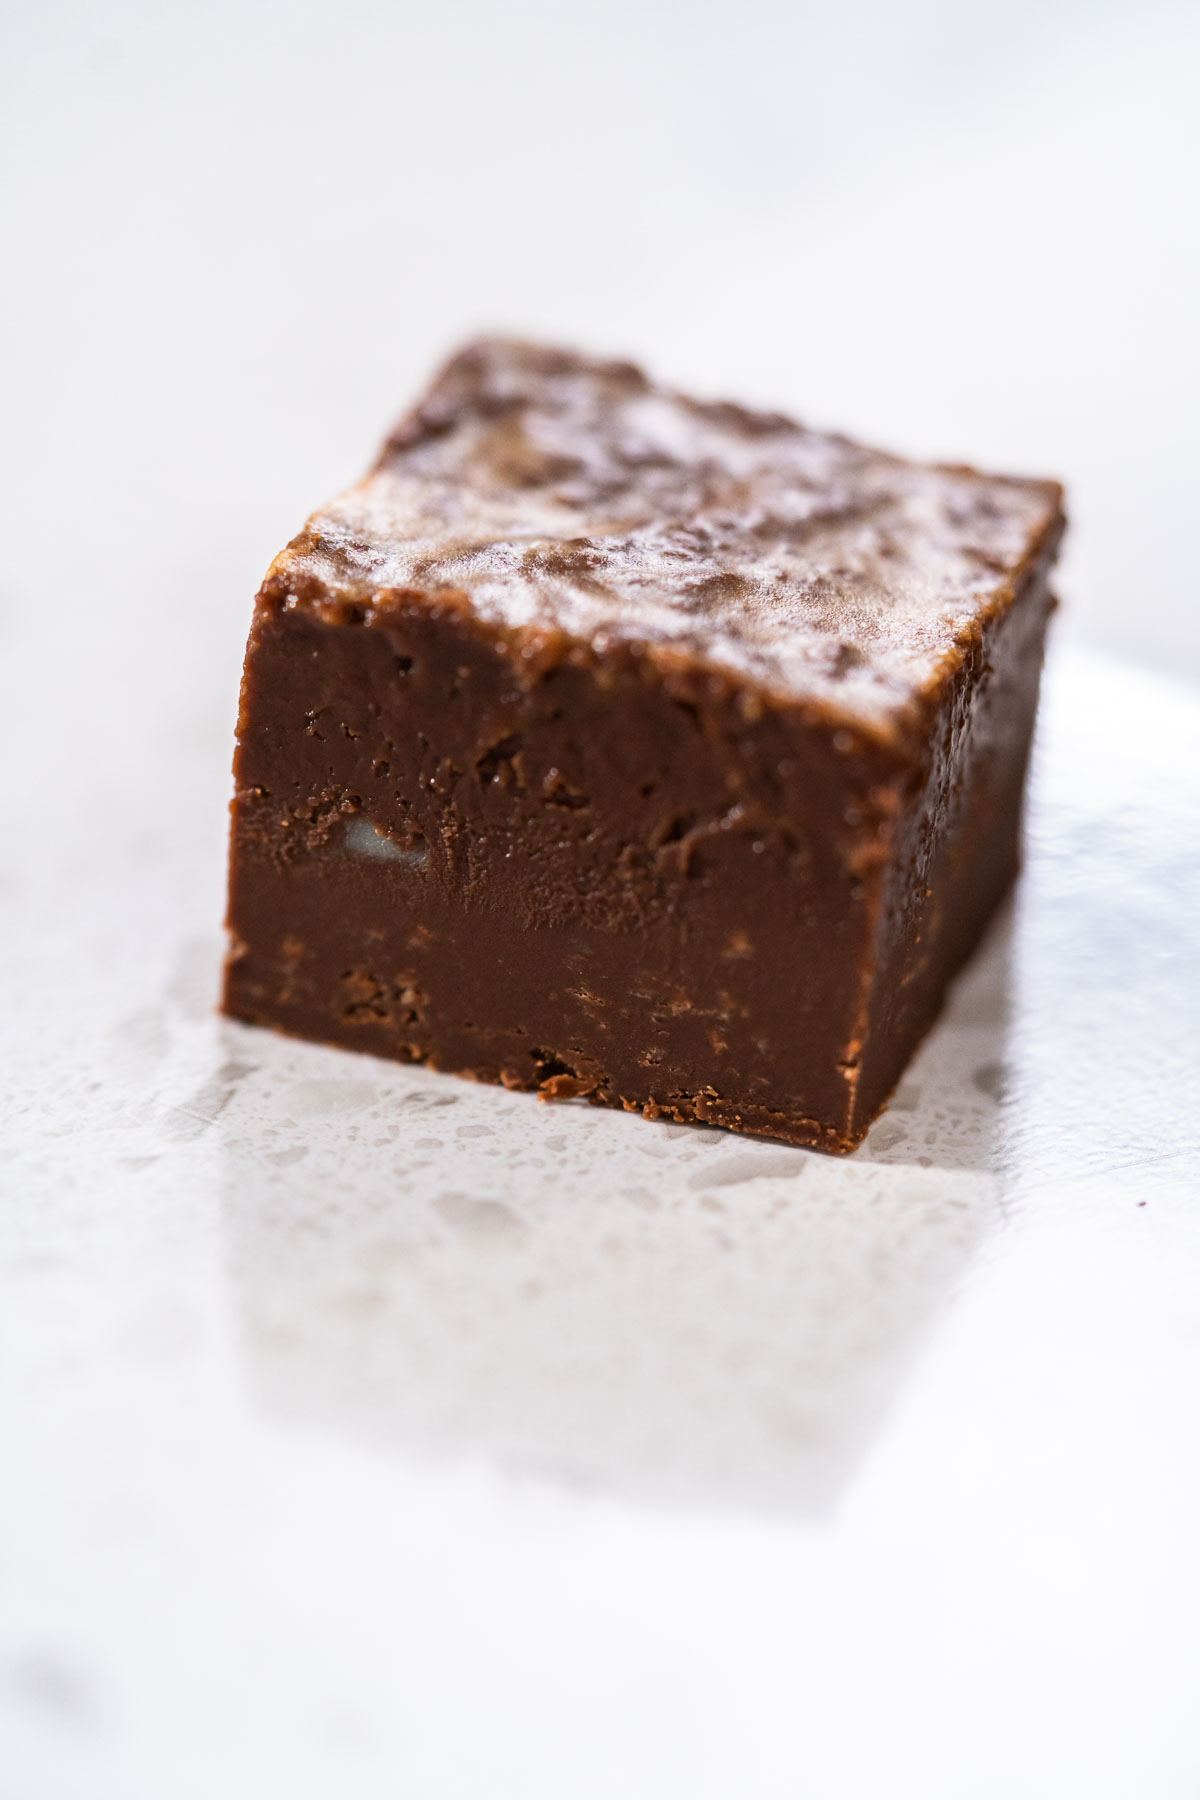
Step 3: Cut & Decorate
- Lift the chilled fudge from the pan.
- Use a pastry wheel or sharp knife to cut even squares.
- Dab with a little melted chocolate and press on a red heart.
And just like that, you’ve got a tray full of festive fudge squares ready to share.

Recipe variations
- Peppermint crunch – Stir crushed candy canes into the fudge before chilling.
- Nutty version – Add chopped pistachios or almonds for crunch.
- Marbled look – Swirl in a little red food coloring for a fun effect.
- Sweet & salty – Sprinkle flaky sea salt over the top before chilling.


Storage Tips
- Room temperature: Store in an airtight container for 2–3 weeks.
- Freezer: Wrap the whole block tightly and freeze for up to 3 months. Thaw in the fridge before cutting.
Serving Ideas
This fudge shines on its own, but I love pairing it with other festive desserts like my Classic Chocolate Fudge, White Chocolate Cranberry Pecan Fudge, and Pistachio Fudge. It also looks adorable in Christmas cookie boxes next to treats like my Gingerbread Man Chocolates or Christmas Hot Chocolate Bombs. Together, they make the ultimate holiday gift spread.


How to Cut Fudge into Perfect Squares (Clean and Even Every Time)
More Christmas Treats to Try
- Chocolate Pumpkin Bundt Cake with Toffee Glaze
- Classic Chocolate Fudge
- White Chocolate Cranberry Pecan Fudge
- Pistachio Fudge
- Gingerbread Man Chocolates
- Christmas Hot Chocolate Bombs
- Chocolate Ginger Sugar Cookies
Grinch Fudge is one of those recipes that makes holiday baking joyful instead of stressful. It’s colorful, whimsical, and easy to make—but still impressive enough to earn compliments every time. I keep it on my Christmas must-bake list because it checks all the boxes: quick, fun, festive, and delicious.
So, crank up the Christmas playlist, grab your spatula, and whip up a batch of this cheerful fudge. It’s the kind of treat that brings both smiles and sweet memories. Merry Grinchmas, friends!

How to Wrap Homemade Fudge for Christmas and Birthdays

Grinch Fudge
Video
Equipment
- 1 Saucepan
- 1 Glass mixing bowl large
- 1 Pastry Wheel Crimper and Cutter or pizza cutter, or small knife
- 1 Knife large
Ingredients
- 14 oz sweetened condensed milk
- 1 teaspoon vanilla extract
- ½ teaspoon Food Coloring green
- 3 cups White Chocolate Chips
- ¼ cup unsalted butter room temperature
Red hearts
- ½ cup Red Wilton Candy Melts
Instructions
Fudge
- Start by measuring out all the ingredients you’ll need for the Grinch fudge.

- In a medium bowl, stir together the condensed milk, vanilla extract, and green food coloring.

- Mix with a silicone spatula until smooth and well combined.

- Fill a pot about ⅓ full with water and bring it to a simmer, then reduce the heat to low.

- Set a large glass or metal bowl on top of the pot, making sure the bottom of the bowl doesn’t touch the water.

- Add the condensed milk, butter, and white chocolate chips to the bowl.

- Stir regularly as everything melts.

- Keep mixing until the mixture is completely melted and silky smooth.

- Line a baking pan with parchment paper, then pour in the fudge mixture.

- Spread it evenly with a clean silicone spatula.

- Chill in the fridge for at least 2 hours, or overnight for best results.

Red Chocolate Hearts
- While the fudge sets, prepare the chocolate hearts. Heat a candy melting pot on high and add the red chocolate melts.

- Stir often with a silicone spatula until fully melted and smooth.

- Place a heart-shaped silicone mold on a small tray.

- Fill the mold with melted chocolate, scraping off any extra with a cake spatula. Freeze for 5 minutes, then repeat the process 5 times until you have 5 filled molds.

- Remove from the freezer.

- Gently pop the chocolate hearts out of the mold.

Cutting the Fudge
- Once the fudge is firm, take it out of the fridge.

- Peel off the parchment paper, set the fudge on a cutting board, and put on disposable gloves to avoid fingerprints.

- Use a 5-wheel pastry cutter to score straight, parallel lines across the fudge.

- Rotate the fudge 90 degrees and score again to make a grid.

- Cut along the scored lines, wiping your knife clean with a damp towel after each cut.

- Push the pieces back together to help them keep their shape.

- Turn the block 90 degrees and finish cutting along the lines.

- You now have neat fudge squares!

- For the final touch, dab a little melted chocolate on each square with a spatula.

- Immediately place a red chocolate heart on top.

- Repeat until every square has a heart—your Grinch fudge is ready to enjoy!

Notes
- At room temperature: Wrap the fudge in parchment or place it in an airtight container. Label the date and store for 2–3 weeks.
- To freeze (uncut fudge): Place the whole block in a freezer-safe Ziploc bag, squeeze out extra air, and label the date. Freeze for up to 2–3 months. When ready, thaw the fudge in the fridge for 2 days before cutting and serving.
Nutrition
From My Kitchen to Yours
More Fudge Recipes
- Layered Caramel Fudge – Chocolate and Caramel in Every Bite
- Swirled Chocolate and Peanut Butter Fudge – No Bake Treat
- How to Wrap Homemade Fudge for Christmas and Birthdays
- How to Make Eggnog Fudge (Easy Holiday No Bake Recipe)
- How to Perfectly Cut Fudge Without a Template (Clean Squares by Hand)
- Peppermint Fudge with Candy Cane Crunch – Holiday Favorite


I’ve Got Answers
Can I make Grinch Fudge ahead of time?
Yes! I actually recommend it. It stores beautifully for up to 3 weeks, and I often make it a few days before a party so I can focus on other holiday prep.
Can I use milk or dark chocolate instead of white chocolate?
You can, but it won’t give you that signature Grinchy green color. I stick with white chocolate chips because they take on the food coloring so well.
How do I get the fudge to cut cleanly?
Chill overnight, use a hot knife (dip in hot water, then dry), and wipe the blade between cuts. Trust me, it makes all the difference.
What if I don’t have heart molds?
No problem! You can use store-bought candy hearts, red M&Ms, or even pipe small red hearts with melted chocolate.
How do you package this fudge for gifts?
I like to layer squares in parchment inside cookie tins or place them in clear cellophane bags tied with ribbon. Sometimes I even mix them with my Pumpkin Spice Fudge or Candy Cane Fudge for variety.
Pin It For Later

Food Photography & Video Tips from My Studio
Here’s a peek at the tools, gear, and camera setups I use to film my recipe videos and photograph food at home. Over the years, I’ve tested dozens of different setups, and now I’m sharing what actually works for me—whether I’m filming overhead shots for YouTube or styling still photos for my blog. If you’re curious about how I create the content you see here, these posts are a great place to start.

What is in my toolbox?

3 ways camera setup for Tasty-style video recipes

Best camera for cooking videos


Leave a Reply