Mastering the Art of Flood Icing: A Step-by-Step Guide to Perfect Royal Icing on Cookies
This post contains affiliate links.
Welcome to the sweet and enchanting world of cookie decorating, where the simple act of flooding cookies with royal icing transforms baked goods into edible art. As a passionate baker and decorator, I've spent countless hours perfecting my technique, eager to share these insights with you. Whether you're a seasoned baker or new to the sugar-coated realm, mastering the art of royal icing is a game-changer for your baking repertoire.
In this comprehensive guide, we'll dive into the essentials of creating perfectly flooded cookies, a technique that elevates ordinary cookies into extraordinary masterpieces. From mixing the right consistency of icing to troubleshooting common pitfalls, I'll walk you through each step, ensuring your cookies are not just treats, but true works of art.
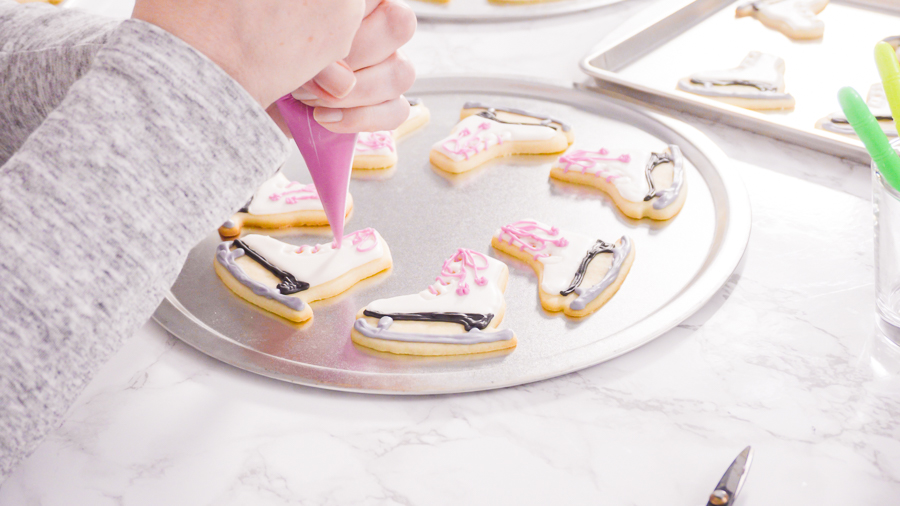
For those of you who've enjoyed my Easter sugar cookies or the whimsical Unicorn sugar cookies, you know the joy that comes from adding that special touch to your baking projects. And who could forget the seasonal favorites, like the Skull Halloween sugar cookies or the festive Ice skate sugar cookies? Each cookie tells a story, and with the right icing techniques, yours are bound to be page-turners.
So, grab your piping bags and favorite cookie cutters, and let's embark on this sweet journey together. By the end of this guide, you'll be equipped to create beautifully iced cookies that will impress your friends, delight your family, and maybe even surprise yourself. And remember, this is more than just a baking tutorial; it's an invitation to experiment, play, and discover the boundless creativity that lies within you. Let's create some magic, one cookie at a time.
What You'll Need
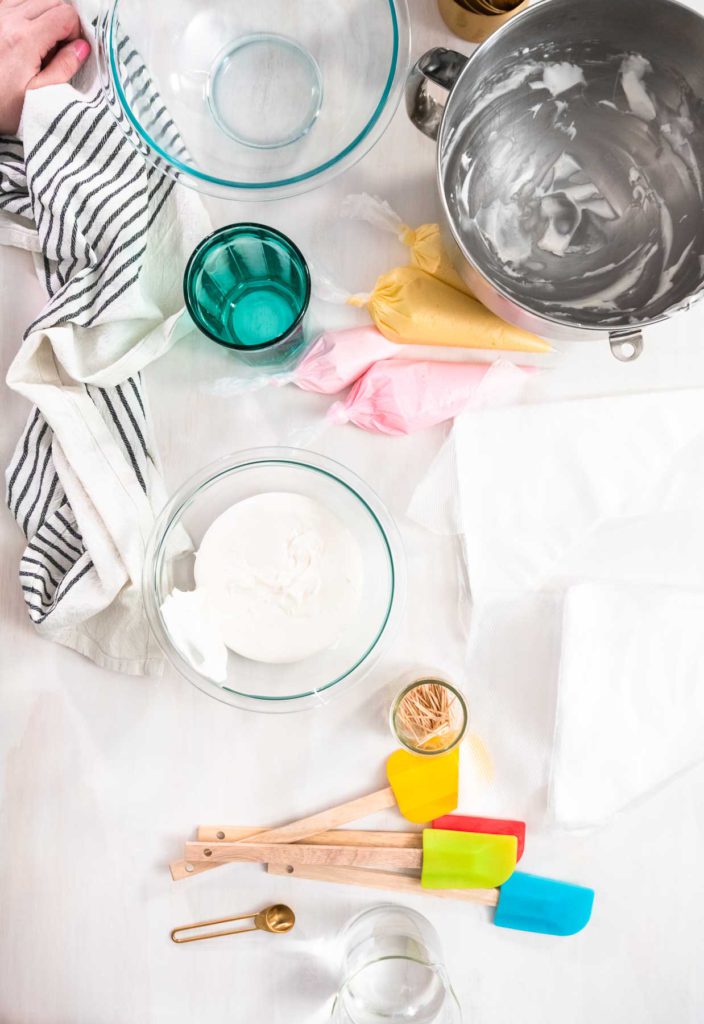
Before we roll up our sleeves, let’s ensure we have everything needed. The right ingredients and tools are pivotal for achieving that flawless finish.
EQUIPMENT
- Sifter is a crucial tool for ensuring your royal icing is smooth and free of lumps. Before mixing your icing, passing the powdered sugar through a sifter can remove any clumps, resulting in a silky-smooth icing that's easier to work with. This step is key to achieving that flawless, professional look on your cookies, as it prevents clogging in your piping tips and ensures an even consistency in your icing.
- Royal iciing piping bags
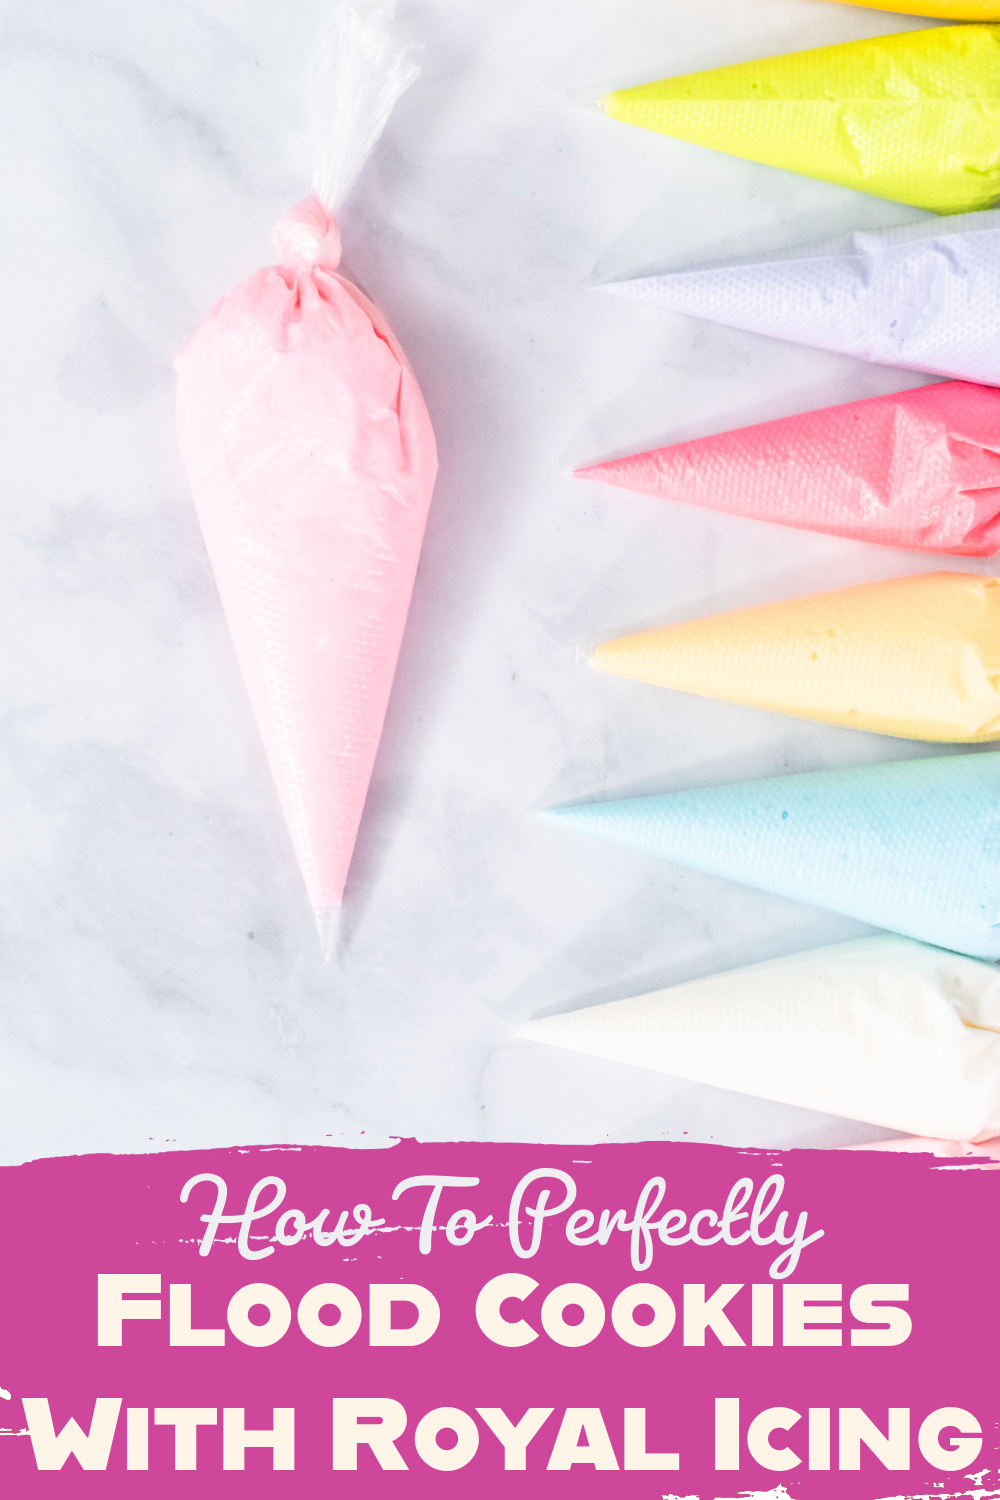
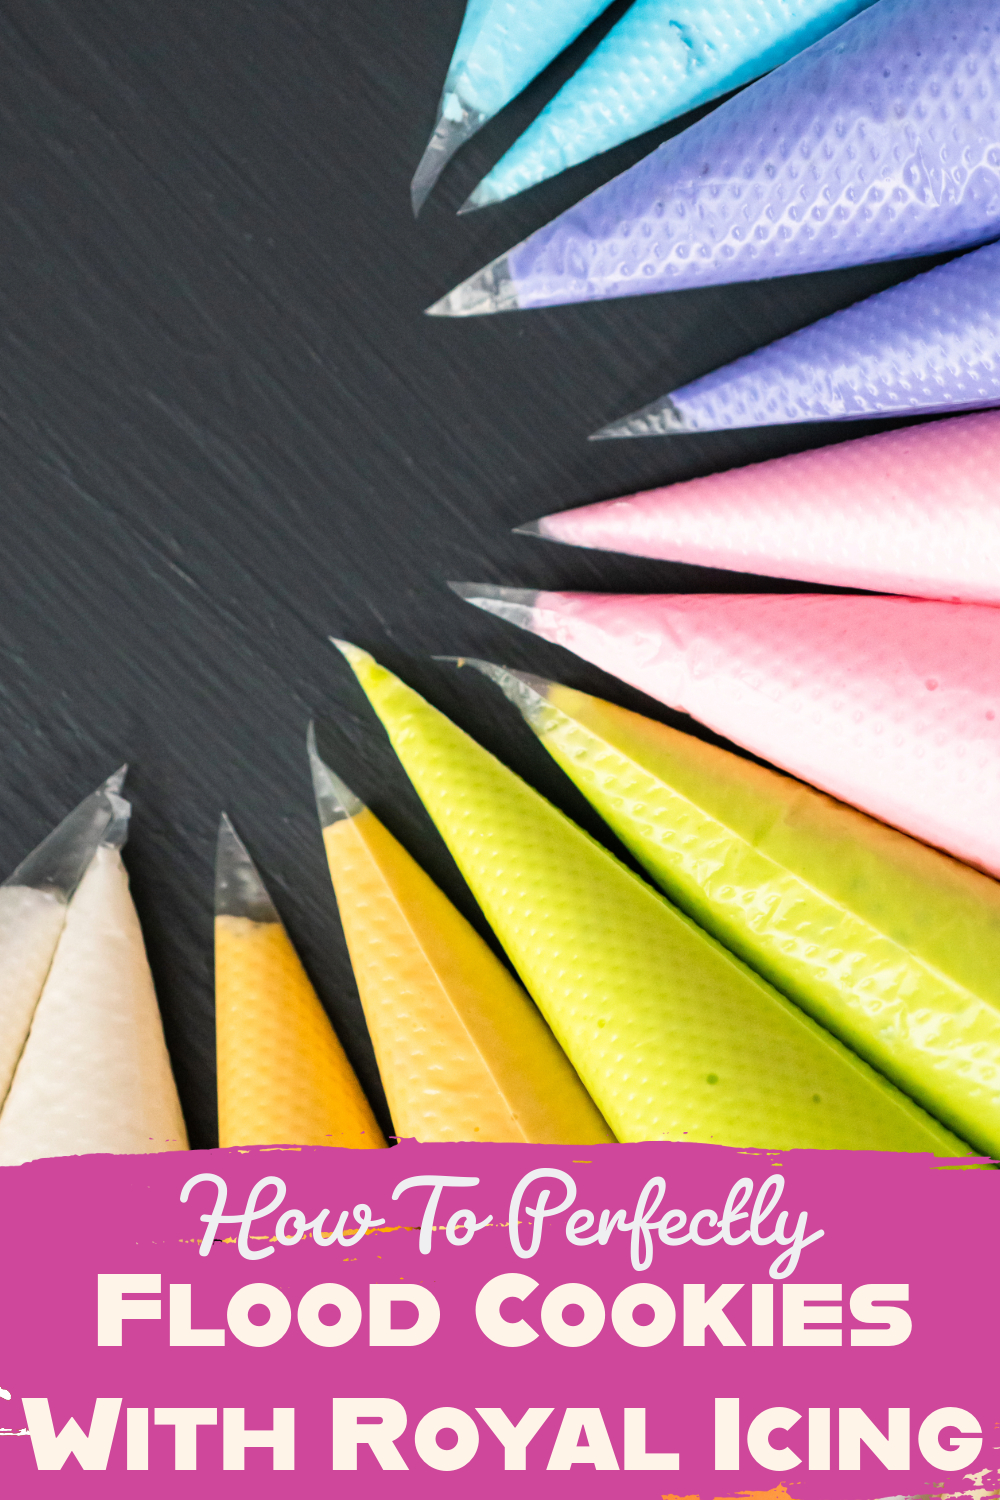
- For my royal icing creations, I specifically choose special thin disposable piping bags. These bags are not only convenient for cleanup but are also designed to handle the delicate consistency of royal icing with unparalleled precision. Their thin material offers a tactile feel, allowing for nuanced pressure control as you outline and flood cookies, ensuring that every curve and edge is flawlessly executed. Ideal for both intricate detail work and filling larger areas, these disposable piping bags are a staple in my decorating toolkit, marrying the ease of use with the finesse required for stunning cookie artistry.
This modification emphasizes the importance of using the right type of piping bags for royal icing work, highlighting your preference for tools that combine practicality with the ability to achieve beautiful results. - Needle Modelling Tool or toothpick. Whether using a Needle Modelling Tool or a simple toothpick, this tool is all about the details. It's perfect for popping air bubbles in freshly applied icing, smoothing out minor imperfections, or swirling colors for marbled effects. The fine point allows for intricate design work, making it an essential tool for decorators aiming for precision and creativity in their cookie designs.
- Heat gun can take your cookie decorating to the next level. By quickly drying the surface of your icing, it helps prevent sinking and cratering, ensuring a smoother finish. The gentle heat accelerates the setting process, giving your cookies a professional sheen and reducing waiting times. This tool is especially useful for decorators working in humid conditions or when time is of the essence.
- 3-Tier Cooling Rack for Cookies Maximize your workspace with a 3-Tier Cooling Rack. This space-saving solution is essential for cooling baked cookies efficiently or drying decorated cookies. By allowing air to circulate freely around each cookie, it ensures they cool down quickly and evenly, preparing them perfectly for the decorating process. It's also invaluable for managing large batches, keeping your cookies organized and accessible as you work.
INGREDIENTS
- 1 lb Confectioners Sugar
- 3 tbsp Meringue Powder
- 6 tbsp Warm water
- 1 tsp vanilla extract
- Food Coloring optional
Step-by-Step Guide to Making Royal Icing
Mixing the Ingredients
- Sift the Powdered Sugar: Start by sifting powdered sugar into a large mixing bowl. This crucial first step ensures that your icing is smooth and free from any lumps, providing the ideal starting point for exquisite cookie decoration.
- Add the Binding Agent: Introduce your selected binding agent to the bowl, choosing either egg whites or meringue powder. If you're using egg whites, it's important they are at room temperature to optimize the icing's volume.
- Begin Mixing: With your electric mixer or whisk on a low speed, start blending the powdered sugar and binding agent. Slowly add a small amount of water, just enough to begin amalgamating the ingredients into a cohesive mixture.
- Incorporate Vanilla Extract: After the water has been thoroughly mixed in, it's time to add a touch of flavor. Mix in a teaspoon of vanilla extract, ensuring it's evenly distributed throughout the icing. The vanilla enhances the icing's taste, adding a layer of complexity without altering its consistency.
- Achieve the Perfect Consistency: Now, increase your mixer's speed to medium. Continue beating the mixture until it reaches a glossy consistency with stiff peaks, typically requiring about 5-7 minutes. Be mindful to mix at this moderate speed to prevent too much air from being incorporated into the icing, as this could affect how it settles and dries on your cookies.
Choosing the Ideal Piping Bag for Cookie Decorating with Royal Icing
Selecting the perfect piping bag is a pivotal step in the cookie decorating process, especially when working with royal icing. It's not merely about holding your icing; it's about finding a tool that enhances your control, accuracy, and enjoyment throughout the decorating journey. Here’s what you need to know to pick the right piping bag for the job, including some essential tips for storage and usage.
1. Importance of Material:
Piping bags come in various materials, including cloth, silicone, and plastic. Each type has its benefits, but for decorating cookies with royal icing, thin plastic bags are preferred for several reasons:
- Control and Feel: Thin plastic bags offer an unmatched level of control and sensitivity, allowing for precise movements and a better feel of the icing flow. This control is essential for the intricate details often required in cookie decorating.
- Thickness Variance: Plastic bags vary in thickness. For royal icing work, not every bag will make the cut. Thicker bags might be durable but can compromise your control and feel for the icing. Thin bags strike the perfect balance, providing enough strength to hold the icing while ensuring that you maintain excellent control over your decorations.
2. No Tip Necessary:
When decorating cookies with royal icing, using a metal or plastic tip can sometimes be more cumbersome than beneficial. Instead, cutting the very tip of a thin plastic piping bag creates a small opening that allows for direct and controlled icing application. This method offers simplicity and versatility that traditional tips cannot match, allowing you to easily adjust the size of the opening by cutting more or less from the tip.
3. Size Does Matter:
Choosing the right size for your piping bag is key. Medium-sized bags are often the most versatile, providing enough capacity for icing multiple cookies without being too bulky to handle. A bag that’s too large can become unwieldy, especially when trying to execute fine details.
4. Comfort and Durability:
During extended decorating sessions, comfort becomes paramount. Thin plastic bags are lightweight and easy to maneuver, reducing hand fatigue and making the decorating process more enjoyable. Despite their thinness, high-quality plastic bags possess sufficient durability to handle the pressure of squeezing without bursting, ensuring a mess-free decorating experience.
5. Economical Choice:
Thin disposable plastic bags offer a great balance between quality and affordability. They allow decorators to work with fresh bags for each project without incurring significant costs, all while maintaining high standards of hygiene and convenience.
Extra Tips for Success:
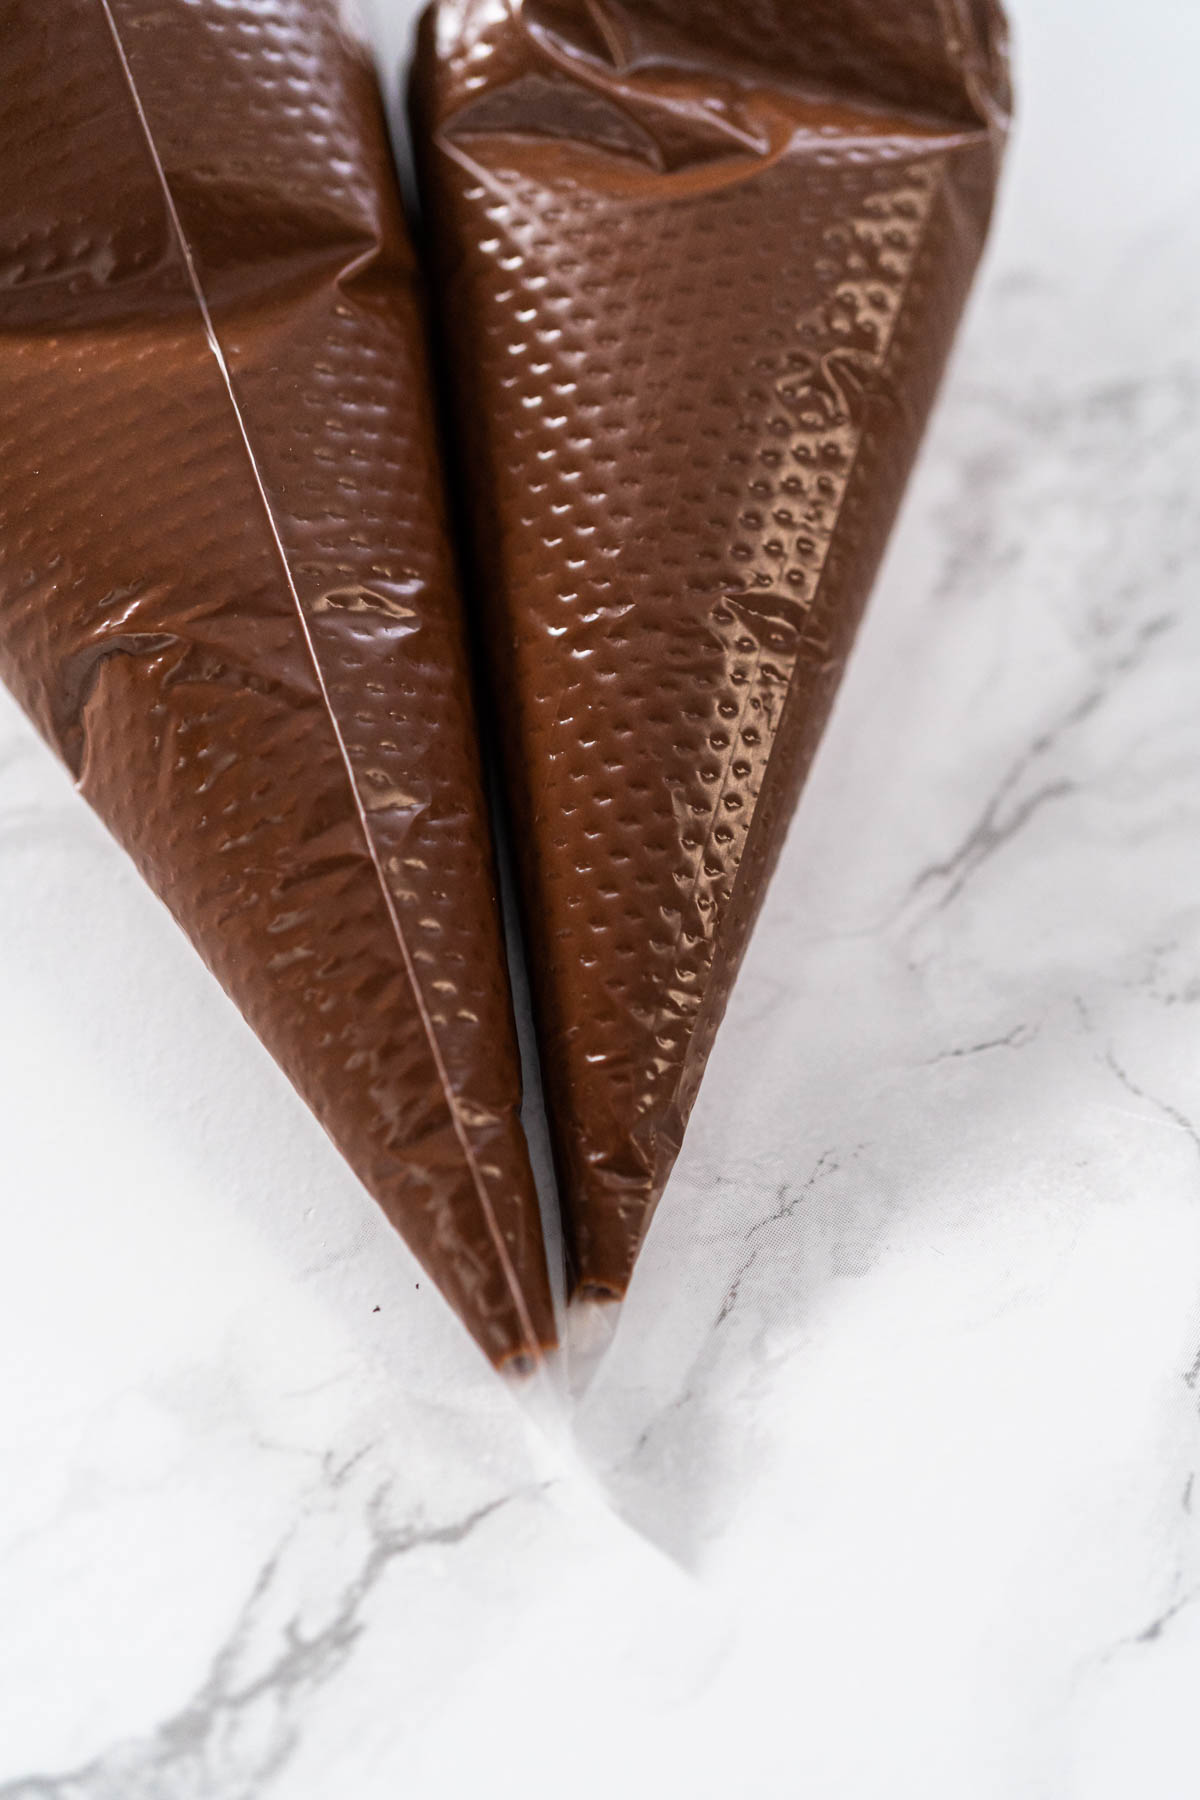
- Storing Royal Icing: You can store royal icing for a few days in an unopened piping bag. Simply fill your bag with icing, secure it by tying a knot at the end instead of using ties or clips, and place it in the refrigerator. This method keeps the icing fresh and ready for your next decorating session.
- No Tie Piping Bags Needed: For added convenience, choose piping bags that don’t require special ties. After filling the bag with icing, a simple knot at the open end is sufficient to keep everything in place, ensuring that your icing is secure and ready to use.
In summary, selecting a thin, disposable plastic piping bag is crucial for cookie decorating enthusiasts working with royal icing. These bags provide the finesse and control needed for detailed work, allowing you to go tip-free for maximum decorating efficiency and offering practical storage options. Remember, the right bag not only makes your decorating easier but also elevates the final appearance of your cookies, turning each batch into a masterpiece.
Achieving the Right Consistency
For successful cookie decorating, mastering the consistency of royal icing is key, especially when it comes to outlining and flooding your cookies. The right consistency not only affects the appearance but also the ease with which you can work. Here's a deeper dive into what you should aim for:
For Outlining (Edging) Cookies: When outlining cookies, the goal is to have royal icing that is thick enough to maintain its shape without spreading, similar to the consistency of toothpaste. This thicker consistency allows you to create defined borders around your cookies, acting as barriers for the flood icing.
- Visual and Tactile Cues: The icing should hold a peak when lifted with a spoon or spatula and not immediately smooth out. It should flow slowly from the tip of your piping bag, allowing for precise control as you draw lines.
- Piping Bag Tip Size: For the thicker consistency used in outlining, a very small opening is crucial for those fine, precise lines. Snipping just a tiny bit off the tip of the piping bag, about 1-2mm in diameter, is usually sufficient. This small opening gives you the control needed to create sharp, defined outlines that set the stage for the next step.
For Flooding: Flooding icing consistency is thinner, designed to flow and fill in the areas outlined on your cookies smoothly and evenly. This consistency should be like honey or shampoo, easily pourable but still able to hold its form.
- Visual and Tactile Cues: When you lift a spoon or spatula out of the icing, it should smoothly flow back into the bowl, and any peaks or ridges formed should settle back into a flat surface within seconds. This ensures it can spread into all nooks and crannies without leaving gaps or bubbles.
- Piping Bag Tip Size: For flooding, a larger opening in your piping bag is necessary to allow the icing to flow out freely but controlled. Cutting the tip to create an opening of about 3-4mm in diameter is ideal. This size allows the icing to spread evenly, covering larger areas efficiently while being manageable so it doesn’t escape your control.
Adjusting the cut of your piping bag according to the consistency of your royal icing and the task at hand—whether outlining or flooding—is essential. This ensures that your cookie decorating process is both efficient and enjoyable, leading to beautifully decorated cookies that are as pleasing to the eye as they are to the palate.
Coloring Your Icing
Transforming your royal icing with color is an exciting step that brings your cookie designs to life. Opt for gel or paste food colorings to achieve rich, vibrant hues without altering the consistency of your icing.
- Preparation: Begin by distributing your royal icing into individual bowls, one for each color you wish to create.
- Adding Color: Carefully introduce the food coloring to each bowl. A toothpick or the tip of a knife is perfect for this, allowing you to add the color gradually. Remember, it's always easier to add more coloring than to correct an overly saturated mix, so start conservatively and adjust as needed.
- Mixing: Stir the icing thoroughly until the color is evenly distributed. Keep in mind that colors can intensify over time, so consider aiming for a shade slightly lighter than your final desired color.
This approach allows for precise control over the intensity of your colors, ensuring that your cookies turn out exactly as envisioned. With a little patience and experimentation, you'll find the perfect hues to make your cookie decorations pop.
Enhancing Precision with a Cookie Decorating Turntable
In the realm of cookie decorating, where every detail matters, introducing a Cookie Decorating Turntable into your toolkit can elevate your precision and ease of decorating to new heights. This section explores the benefits of using a turntable for decorating and my personal approach to achieving perfection in every swirl and line.
The Benefits of a Turntable:
A Cookie Decorating Turntable acts much like its larger counterpart used in cake decorating but scaled down to the fine art of cookie adornment. This ingenious tool offers several advantages:
- 360-Degree Access: With the ability to rotate your cookie effortlessly, a turntable allows for seamless decorating from every angle. This is particularly beneficial when applying intricate details or striving for uniformity around the cookie's perimeter.
- Steady Base: The stable platform of the turntable ensures your cookie remains secure while you work, reducing the risk of slips or smudges that could mar your design.
- Speed and Efficiency: Decorating can be more efficient with a turntable, as it minimizes the need to constantly reposition yourself or the cookie. This can be a real time-saver, especially when working on a large batch of cookies.
Personal Preference: Direct Table Placement:
Despite the clear advantages of using a turntable, I often find myself gravitating towards a more straightforward approach—placing the cookie directly on the table. Here's why:
- Direct Control: Working on a flat surface provides a direct connection with the cookie, offering me a sense of control and precision that feels intuitive.
- Simplicity: By eliminating the need for additional equipment, this method simplifies the decorating process, allowing me to focus entirely on the artistry of my designs.
- Flexibility: Decorating directly on the table gives me the flexibility to quickly move between cookies, which is particularly handy when working with designs that require swift transitions or when incorporating drying times into my workflow.
Incorporating a Cookie Decorating Turntable can undoubtedly enhance your decorating process, offering stability, efficiency, and ease. However, the choice to use one should align with your personal decorating style and the specific demands of your project. For me, the simplicity and directness of working on a flat surface resonate with my approach to cookie decoration, blending control with the artful expression of my designs.
Whether you choose to embrace the turntable or opt for the simplicity of table-top decorating, the key is finding what works best for you, allowing your creativity and skill to shine through in every cookie you decorate.
Preparing Your Cookies for Flooding
When it comes to achieving that sleek, professional look on your cookies, the preparation stage is just as critical as the decorating itself. The foundation of this process begins with selecting the ideal cookie base and preparing it for flooding with royal icing. Here’s how to ensure your cookies are primed and ready for those final, stunning touches.
1. Choosing the Ideal Cookie Base:
The type of cookie you choose as your canvas plays a pivotal role in the outcome of your decorations. Aim for recipes that yield cookies with a smooth, flat surface, devoid of bumps or irregularities. Classic choices like Gingerbread Cookies or Valentine’s Day Sugar Cookies offer the perfect texture and firmness for decorating. These cookies not only taste delicious but also provide a sturdy base that can support the weight of the icing without sagging or distorting your designs.
2. Preparing Cookies for Icing:
Before diving into the mesmerizing world of flooding, it’s essential to lay down the groundwork with an outline. This step involves creating a boundary around the edge of your cookies, serving as a containment barrier for the flood icing to come.
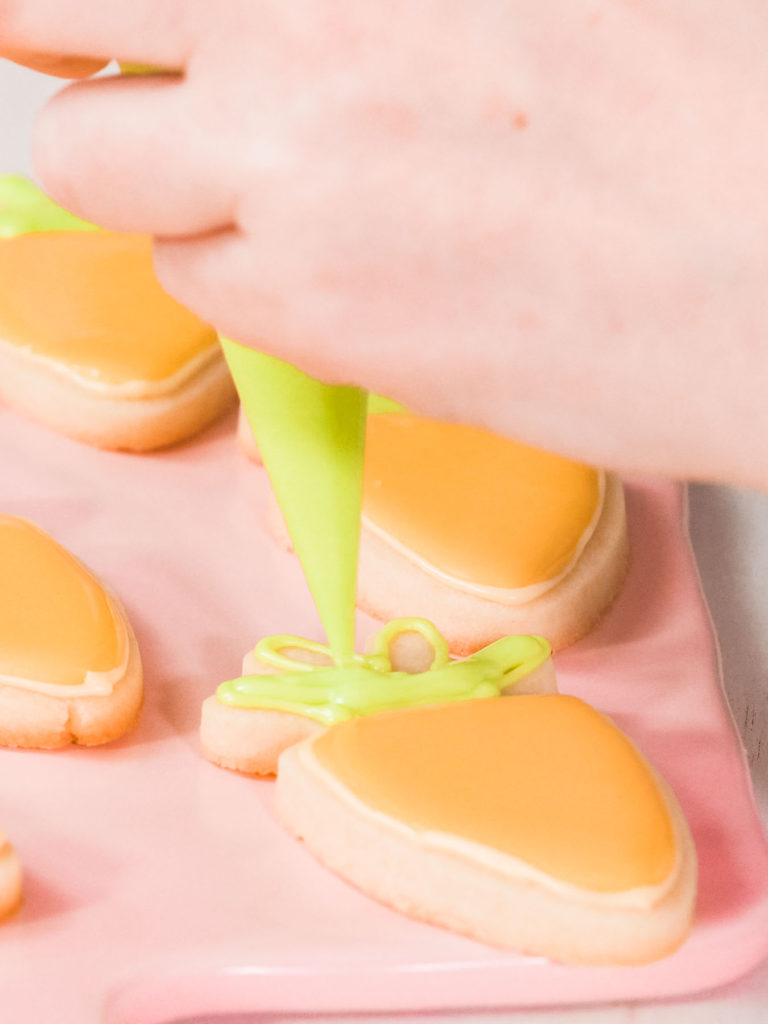
- Outlining: Swap out the traditional nozzle for the simplicity of a precisely cut piping bag tip. By cutting a tiny opening at the tip of your piping bag, you create the perfect tool for applying a thicker icing with precision. This method allows for a more direct and controlled application, giving you the freedom to draw precise lines without the fuss of additional equipment.Fill your bag with a stiffer consistency of royal icing, designed to not only define the aesthetic borders of your cookie but also to act as a dam for the subsequent flood icing. Trace the edges of your cookies with this thicker icing, paying close attention to maintaining an even line that encircles the entire cookie.
- Drying the Outline: After outlining, it's crucial to allow this initial layer to dry slightly. This drying period isn’t just about ensuring the icing sets; it’s about creating a solid barrier that will confidently hold the flood icing in place. The goal is to achieve a semi-hardened dam that is robust enough to contain the flood icing, preventing it from spilling over the edges and ensuring a neat, professional finish.
By carefully selecting your cookie base and meticulously preparing it for flooding, you set the stage for a decorating process that not only goes smoothly but also results in beautifully adorned cookies. These steps might seem minor, but they are the foundation of successful cookie decoration, where precision meets artistry, culminating in edible masterpieces that are as delightful to the eye as they are to the palate.
Flood Icing Techniques
Mastering Flood Icing Techniques for Cookie Decorating
Diving into the world of cookie decorating, mastering the art of flood icing is a pivotal skill that transforms your cookies from simple treats to edible masterpieces. This section expands on the basic technique of flooding and introduces you to more advanced methods, allowing you to unleash your creativity with every batch.
The Basic Flooding Technique:
Starting with the foundation, the basic flooding technique is essential for achieving a smooth, flawless icing surface that serves as both a canvas for further decoration and a delightful texture. Here’s how to perfect this technique:
- Preparing Your Piping Bag: Once your outlines have dried and set, prepare for flooding by using a piping bag. While a larger nozzle can offer more control, cutting a small tip directly from the bag offers simplicity and ease. Aim for a cut that allows the icing to flow freely but with control, approximately 3-4mm in diameter.
- Flooding the Cookie: Begin by gently squeezing the flood icing onto the center of the cookie. Gradually work your way toward the edges without surpassing the outline. The goal is to cover the cookie evenly, creating a smooth surface.
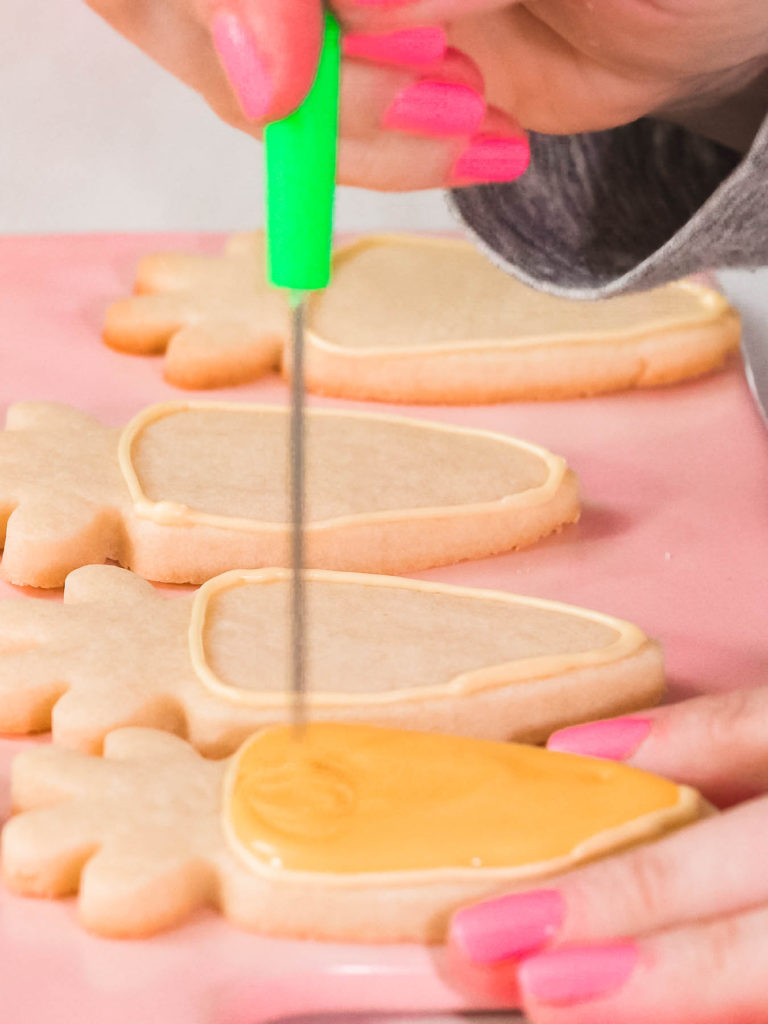
After applying the icing, lightly tap the cookie on the table. This gentle motion helps the icing spread into a more even layer and encourages any air bubbles to rise to the surface, where they can be easily popped. This step is crucial for achieving a smooth finish without imperfections. - Finishing Touches: Use a scribe tool or a simple toothpick to guide the icing into any missed spots or edges, ensuring complete coverage. This tool is also perfect for popping any air bubbles that may have formed, ensuring a smooth finish.
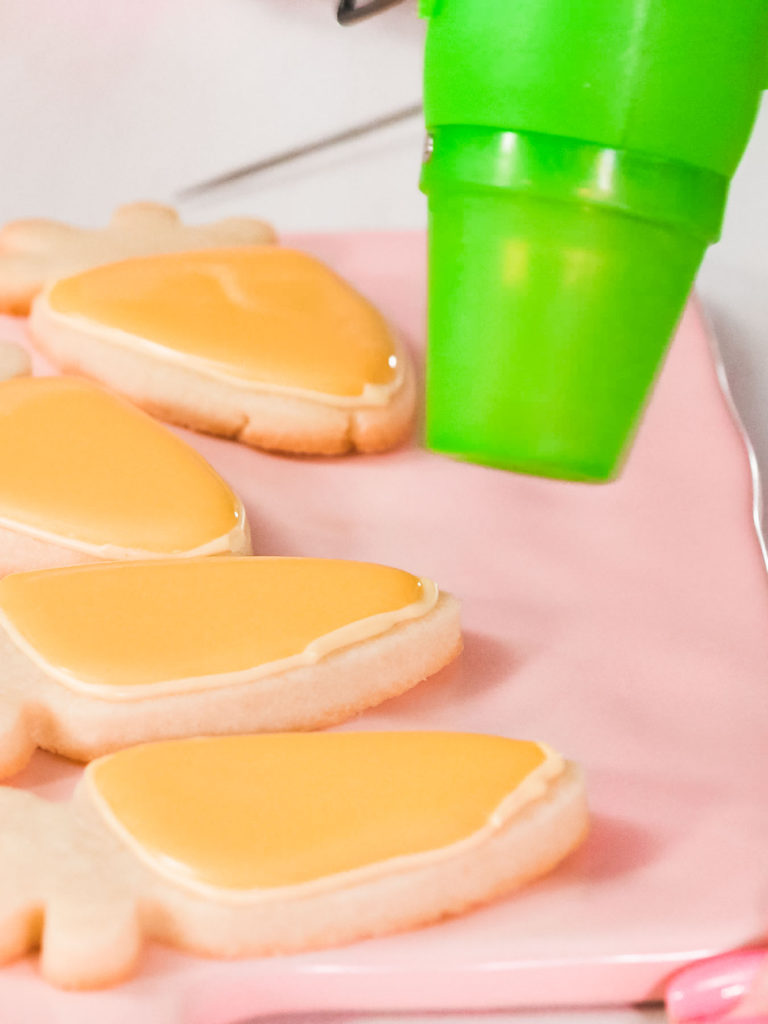
- Drying: While letting the cookies dry naturally, ideally overnight, is effective, incorporating the use of a heat gun can expediently set the icing, especially useful when time is of the essence. After applying the final touches, lightly pass a heat gun over the surface of the cookies. This gentle application of heat helps the icing to set quicker, reducing drying time significantly while still ensuring the icing hardens with a glossy, appealing finish. Remember, the key is to use the heat gun sparingly to avoid melting the icing or causing it to crack.
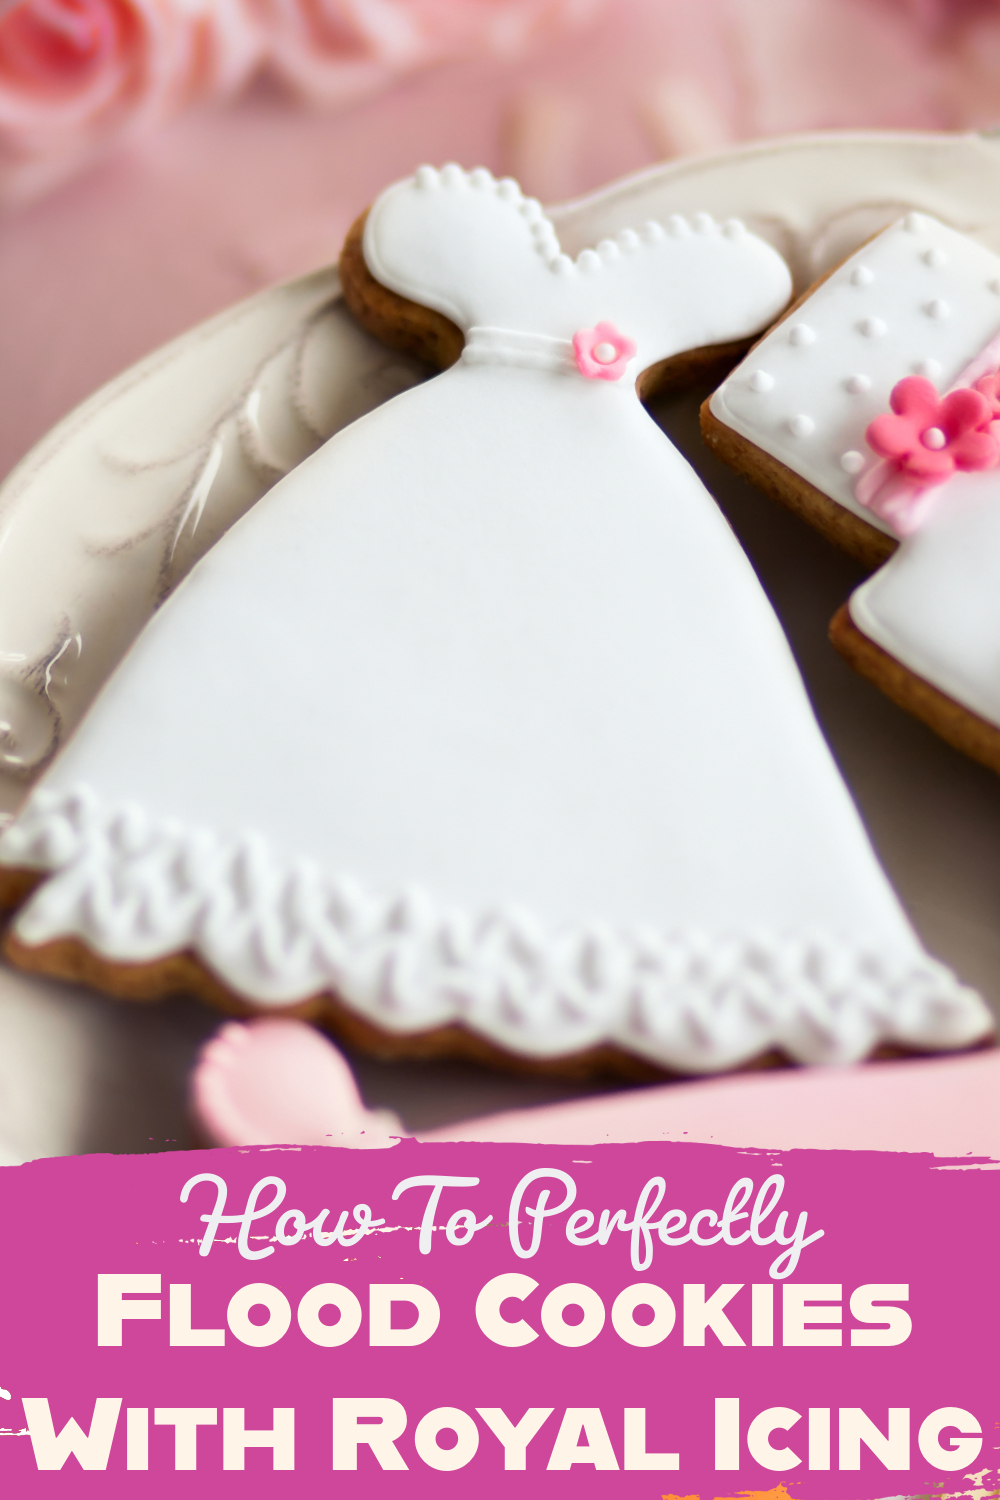
This method not only accelerates the drying process but also enhances the overall appearance of your cookies, making them ready for further decoration or to be admired and enjoyed sooner. Whether you're prepping for an event or simply eager to admire your handiwork, this added step ensures your cookies are display-ready, boasting a hard, shiny icing surface that's as visually stunning as it is delicious.
Advancing Your Technique:
After you’ve mastered the basic flood icing technique, it’s time to explore the boundless possibilities of advanced decorating techniques. These methods allow for an explosion of creativity and complexity in your designs:
- Marbling: Marbling creates stunning, swirling patterns by adding drops of a contrasting color of icing onto the wet flood base and then using a toothpick to swirl the colors together. This technique can produce elegant, organic designs with minimal effort.
- Wet-on-Wet Designs: By applying additional icing designs onto the wet flood icing, you can create seamless, integrated patterns that add depth and interest to your cookies. This technique is perfect for creating simple flowers, dots, or even intricate geometric patterns.
- Layering for Depth and Texture: Once your initial flood layer has dried, adding additional layers of icing can create visual depth and texture. This technique is ideal for more detailed and dimensional designs, such as flower petals or intricate patterns.
- Textured Effects: By manipulating the icing while it's still wet, or by applying techniques such as brushing or dabbing once it's partially set, you can create a variety of textured effects that add a unique touch to your cookies.
Each of these advanced techniques opens up a new realm of possibilities, allowing you to experiment with color, texture, and design. By building on the basic flood icing foundation, you can transform your cookies into true works of art, each one showcasing your creativity and skill.
Remember, the key to successful cookie decorating lies in practice and experimentation. Don’t be afraid to try new techniques, play with colors, and most importantly, have fun with the process. Your cookies are not just treats; they’re canvases for your culinary artistry.
Navigating Through Common Royal Icing Challenges
In the world of cookie decorating, encountering hiccups with royal icing is a shared experience among beginners and seasoned bakers alike. Understanding how to address these issues not only enhances your decorating experience but also ensures your cookies come out looking their best. Here's a deeper dive into troubleshooting common royal icing dilemmas:
Adjusting Icing Consistency:
- For Too Thick Icing: If you find your icing resembles more of a paste than a smooth, flowing consistency, it's too thick. The solution is simple – add water, but only a drop at a time. This precision ensures you don't transition from one extreme to the other, ending up with icing that's too runny. Mix thoroughly after each addition until you reach the desired consistency.
- For Too Thin Icing: Conversely, icing that's too runny can't hold its shape, making precise decorating a challenge. To thicken it, gradually add more powdered sugar, stirring well after each addition. This method allows you greater control over reaching that perfect consistency, whether for outlining or flooding.
Eliminating Bubbles and Smoothing Surfaces:
- Popping Bubbles: Air bubbles in your icing can mar the surface of your beautifully decorated cookies. A scribe tool or a toothpick is your best friend in these situations. Gently use the tool to pop the bubbles, working quickly after you've applied the icing to prevent it from setting with the imperfections.
- Smoothing Uneven Surfaces: If your icing settles into an uneven surface, a gentle shake of the cookie can work wonders. This motion helps the icing find its level, smoothing out any minor bumps or ridges. For larger issues, a scribe tool can help redistribute the icing, filling in gaps and evening out the surface before it sets.
Addressing Color and Texture Issues:
- Preventing Color Bleeding: When using multiple colors, especially with intricate designs, color bleeding can occur. To prevent this, ensure the base layer is completely dry before adding new layers or details. Also, using gel-based colors can help maintain the icing's consistency while providing vibrant hues.
- Achieving the Right Finish: Sometimes, royal icing can dry to a matte finish when you were hoping for a shine. This issue often relates to the icing's consistency and the drying environment. To encourage a shinier finish, try adding a small amount of corn syrup to your icing mixture, and dry your cookies in a well-ventilated area, avoiding humid conditions.
By familiarizing yourself with these troubleshooting tips, you'll be well-equipped to handle any royal icing challenges that come your way. Remember, cookie decorating is as much about creativity and expression as it is about technique and precision. Each challenge is an opportunity to learn and improve, bringing you one step closer to achieving your cookie decorating dreams.
Exploring Alternative Approaches to Royal Icing
Venturing beyond the realm of traditional royal icing opens up a world of creativity and innovation in cookie decorating. Whether due to dietary restrictions, ingredient availability, or simply the desire to experiment with new textures and flavors, seeking alternatives to meringue powder-based icing can be both a necessity and an adventure. Here, we delve into how to achieve beautiful, flood-iced cookies using alternative ingredients that offer unique benefits.
1. Corn Syrup Icing:
Corn syrup icing is a fantastic alternative for those looking to achieve a glossy finish without meringue powder. This variation provides a slightly softer texture, making it ideal for cookies that don't require overly hard icing.
- Benefits: The addition of corn syrup gives the icing a shiny appearance and a smooth texture. It’s perfect for decorators preferring a slightly more pliable finish, allowing for easier eating.
- Preparation: Substitute a portion of the liquid in your traditional royal icing recipe with light corn syrup. The syrup's consistency helps bind the sugar, creating an icing that's easy to manipulate and dries with a beautiful sheen.
2. Lemon Juice Icing:
For those who appreciate a touch of tartness or are looking for a natural alternative to meringue powder, lemon juice icing is an excellent choice. The acidity of the lemon juice acts as a stabilizer, providing the icing with structure and a delightful flavor twist.
- Benefits: Lemon juice not only adds a fresh flavor but also contributes to the icing's setting properties. It's particularly appealing to those seeking a natural approach to cookie decorating.
- Preparation: Replace the water in your icing recipe with an equal amount of lemon juice. Adjust the sweetness and consistency by adding more powdered sugar or lemon juice as needed. This icing works beautifully for both outlining and flooding, offering a zesty flavor that complements a variety of cookie bases.
Achieving Stunning Visual Results:
Regardless of which alternative you choose, the techniques for applying the icing remain similar to those used with traditional royal icing. The key to success lies in adjusting the consistency to suit your decorating needs, whether creating intricate designs or achieving a smooth flood.
- Visual Appeal: Both corn syrup and lemon juice icings lend themselves to vibrant coloring, ensuring your decorated cookies are as visually appealing as they are delicious.
- Texture and Flavor: Experimenting with these alternatives not only diversifies the texture and finish of your icing but also introduces new flavor dimensions that can enhance the overall taste experience of your cookies.
Exploring alternative approaches to royal icing not only expands your decorating repertoire but also invites you to experiment with flavors and textures that can set your cookies apart. Whether you're drawn to the glossy finish of corn syrup icing or the natural tartness of lemon juice icing, the possibilities for creativity are endless. Embrace these alternatives as an opportunity to redefine the art of cookie decorating, making each batch a testament to your innovation and style.
More Cookies Recipes
Wrapping Up Your Cookie Decorating Journey
Embarking on the cookie decorating adventure, especially mastering flooding with royal icing, is a journey filled with creativity, learning curves, and a lot of fun. This craft is about more than achieving perfection overnight; it's about embracing the process, discovering what techniques resonate with you, and expressing your unique style through each batch of cookies you decorate.
As you delve deeper into this art form, practicing and experimenting with different styles, you'll start to see your distinct signature look come to life. The true beauty of cookie decorating lies in the amalgamation of precise outlines, smooth icing finishes, and the personal flair that makes each cookie uniquely yours.
Whether you're gearing up for a festive celebration with Easter Sugar Cookies or capturing the essence of winter with Ice Skate Sugar Cookies, each step from dough to final decoration is an opportunity to infuse creativity and personal expression into your work. Every cookie, from the ones with intricate Valentine’s Day Sugar Cookies designs to the spooky charm of Skull Halloween Sugar Cookies, is a canvas awaiting your artistic touch.
Even when faced with the inevitable hiccups along the way, each challenge is a learning opportunity, pushing you closer to your cookie decorating goals. And as you navigate through the ups and downs, remember to explore my guides on Decorating Cookies with Chocolate Icing and How to Quickly Dry Royal Icing for more tips and tricks to enhance your decorating skills.
I also encourage you to dive into the delicious world of Panda Shortbread Cookies and discover the joy of Packaging Homemade Cookies and Fudge for that extra special touch. For those moments when things don’t go as planned, remember that How Not To Burn The Bottom Of The Cookies and How To Prevent Cookies From Spreading are there to guide you back on track.
In the end, the journey of cookie decorating is about finding joy in each moment of creation, from preparing your first batch of icing to admiring your beautifully decorated creations. For additional inspiration and guidance, don't miss out on exploring the flavorful art of Chocolate Icing For Sugar Cookies and embracing the heartfelt gesture of making I'm Sorry, Sugar Cookies.
Here’s to embarking on this delightful journey, where each cookie is not just a treat but a testament to your creativity and passion for baking. Grab your piping bag, let your imagination run wild, and transform every cookie into an edible masterpiece that tells a story of joy, creativity, and boundless imagination.
Perfectly Flood Cookies With Royal Icing
Video
Equipment
- Needle Modelling Tool or toothpick
Ingredients
- 1 lb Confectioners Sugar
- 3 tablespoon Meringue Powder
- 6 tablespoon Warm water
- 1 teaspoon vanilla extract
- Food Coloring optional
Instructions
Royal icing
- Start by sifting powdered sugar into a large mixing bowl. This crucial first step ensures that your icing is smooth and free from any lumps, providing the ideal starting point for exquisite cookie decoration.
- Introduce your selected binding agent to the bowl, choosing either egg whites or meringue powder. If you're using egg whites, it's important they are at room temperature to optimize the icing's volume.
- With your electric mixer or whisk on a low speed, start blending the powdered sugar and binding agent. Slowly add a small amount of water, just enough to begin amalgamating the ingredients into a cohesive mixture.
- After the water has been thoroughly mixed in, it's time to add a touch of flavor. Mix in a teaspoon of vanilla extract, ensuring it's evenly distributed throughout the icing. The vanilla enhances the icing's taste, adding a layer of complexity without altering its consistency.
- Finally, transfer the colored royal icing to the piping bag and tie it off. Always make sure that the cookies are completely cool before piping the icing on top!
Flood Cookies With Royal Icing
- By cutting a tiny opening at the tip of your piping bag, you create the perfect tool for applying a thicker icing with precision. This method allows for a more direct and controlled application, giving you the freedom to draw precise lines without the fuss of additional equipment.Fill your bag with a stiffer consistency of royal icing, designed to not only define the aesthetic borders of your cookie but also to act as a dam for the subsequent flood icing. Trace the edges of your cookies with this thicker icing, paying close attention to maintaining an even line that encircles the entire cookie.
- After outlining, it's crucial to allow this initial layer to dry slightly. This drying period isn’t just about ensuring the icing sets; it’s about creating a solid barrier that will confidently hold the flood icing in place. The goal is to achieve a semi-hardened dam that is robust enough to contain the flood icing, preventing it from spilling over the edges and ensuring a neat, professional finish.
- Once your outlines have dried and set, prepare for flooding by using a piping bag. While a larger nozzle can offer more control, cutting a small tip directly from the bag offers simplicity and ease. Aim for a cut that allows the icing to flow freely but with control, approximately 3-4mm in diameter.
- Begin by gently squeezing the flood icing onto the center of the cookie. Gradually work your way toward the edges without surpassing the outline. The goal is to cover the cookie evenly, creating a smooth surface.After applying the icing, lightly tap the cookie on the table. This gentle motion helps the icing spread into a more even layer and encourages any air bubbles to rise to the surface, where they can be easily popped. This step is crucial for achieving a smooth finish without imperfections.
- Use a scribe tool or a simple toothpick to guide the icing into any missed spots or edges, ensuring complete coverage. This tool is also perfect for popping any air bubbles that may have formed, ensuring a smooth finish.
- While letting the cookies dry naturally, ideally overnight, is effective, incorporating the use of a heat gun can expediently set the icing, especially useful when time is of the essence. After applying the final touches, lightly pass a heat gun over the surface of the cookies. This gentle application of heat helps the icing to set quicker, reducing drying time significantly while still ensuring the icing hardens with a glossy, appealing finish. Remember, the key is to use the heat gun sparingly to avoid melting the icing or causing it to crack.This method not only accelerates the drying process but also enhances the overall appearance of your cookies, making them ready for further decoration or to be admired and enjoyed sooner. Whether you're prepping for an event or simply eager to admire your handiwork, this added step ensures your cookies are display-ready, boasting a hard, shiny icing surface that's as visually stunning as it is delicious.
Food Photography & Video Tips from My Studio
Here’s a peek at the tools, gear, and camera setups I use to film my recipe videos and photograph food at home. Over the years, I’ve tested dozens of different setups, and now I’m sharing what actually works for me—whether I’m filming overhead shots for YouTube or styling still photos for my blog. If you’re curious about how I create the content you see here, these posts are a great place to start.































Leave a Reply