 By Arina Habich. Updated April 9, 2026
This post contains affiliate links.
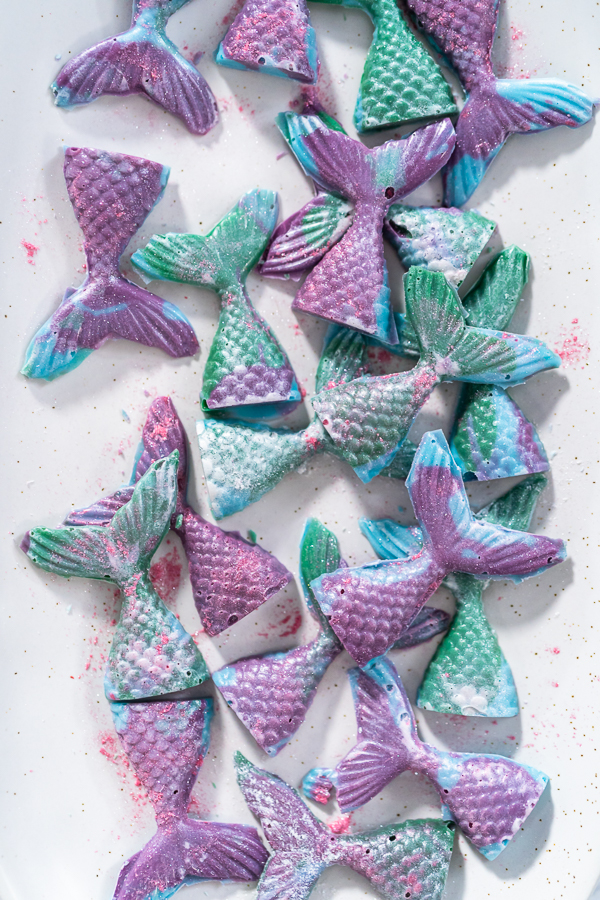
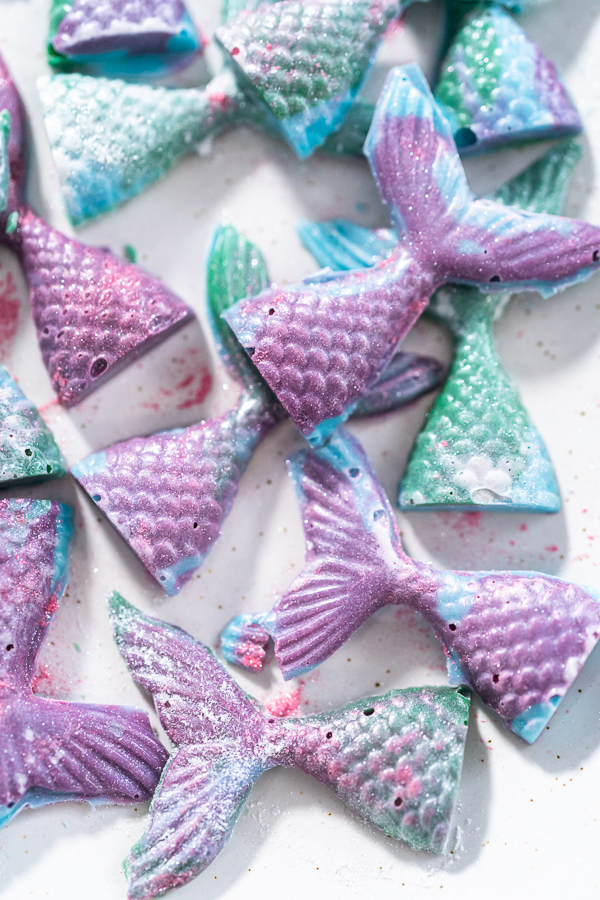
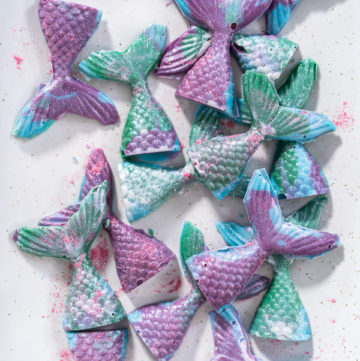
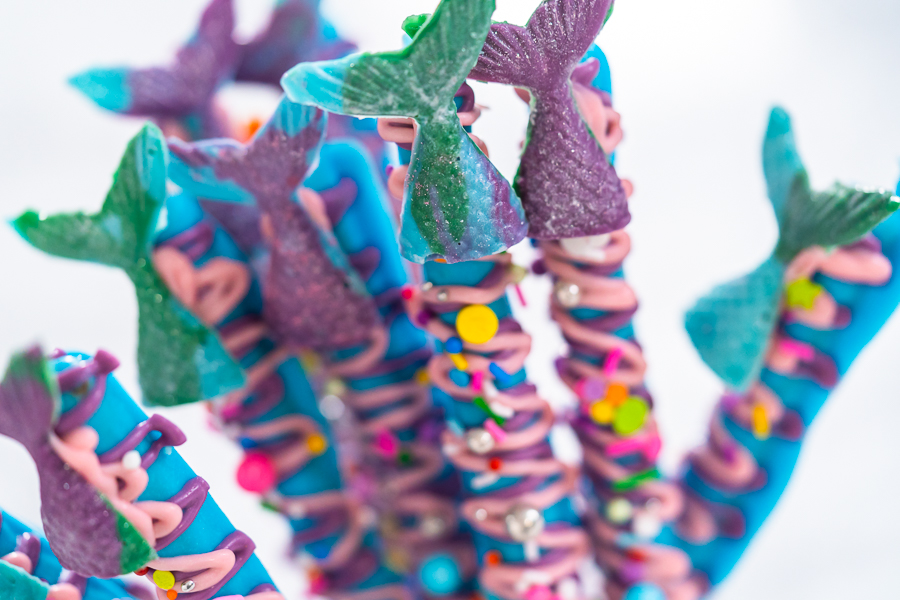
If you have a little one obsessed with mermaids, glitter, and anything fairytale-inspired, this recipe will be a total hit! My daughter went through a phase where everything had to sparkle — from her cupcakes to her cereal (thankfully, we kept the glitter out of that one). So, one day I decided to surprise her with something straight out of a storybook: Chocolate Mermaid Tails. These are colorful, shimmering, and surprisingly easy to make. Plus, they’re the perfect cupcake topper or party treat for birthdays and pool parties.
When I first made them, I didn’t expect how much fun I’d have experimenting with colors and edible glitter. Let’s just say my kitchen looked like a mermaid exploded — and I loved every second of it. Now, these mermaid tails have become one of my go-to party projects. They look fancy but come together so quickly that you can make them the day before your celebration and keep them chilled until it’s party time!
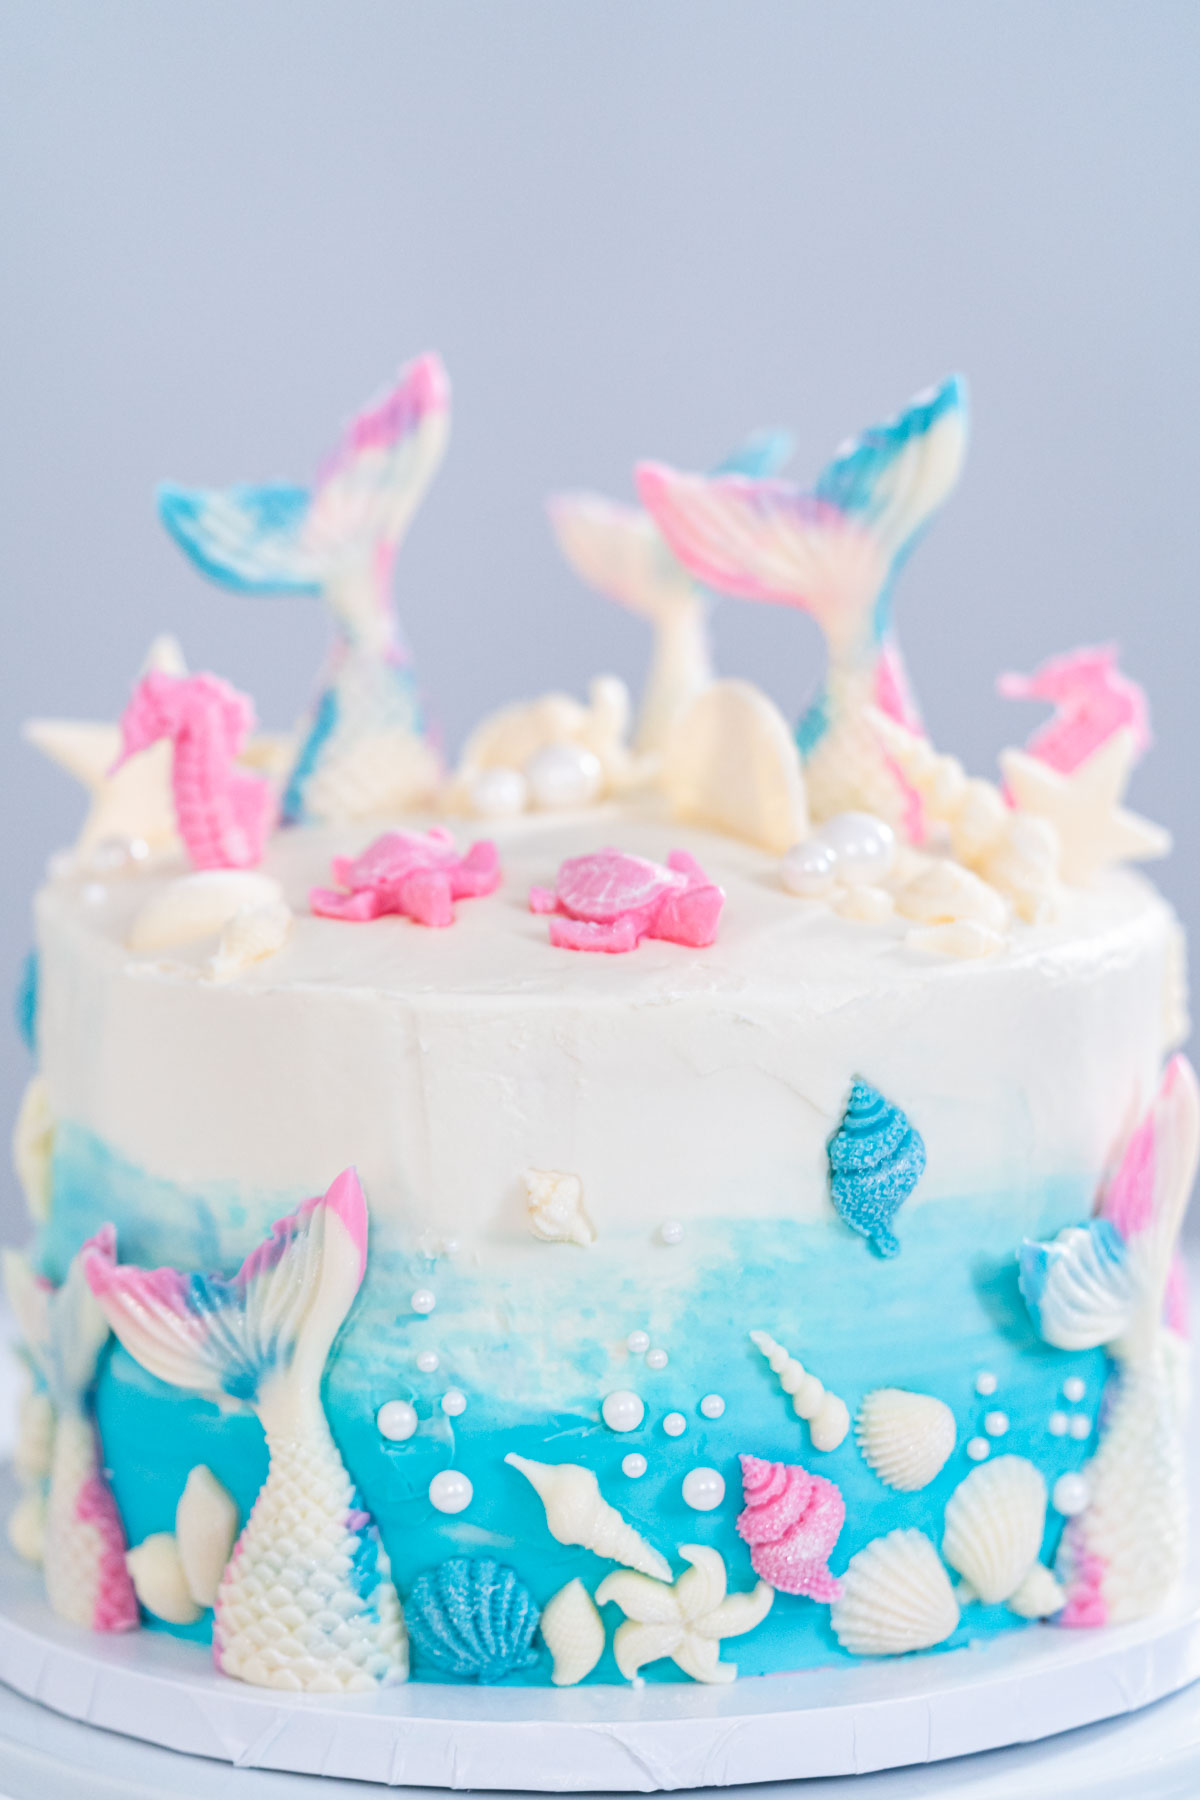
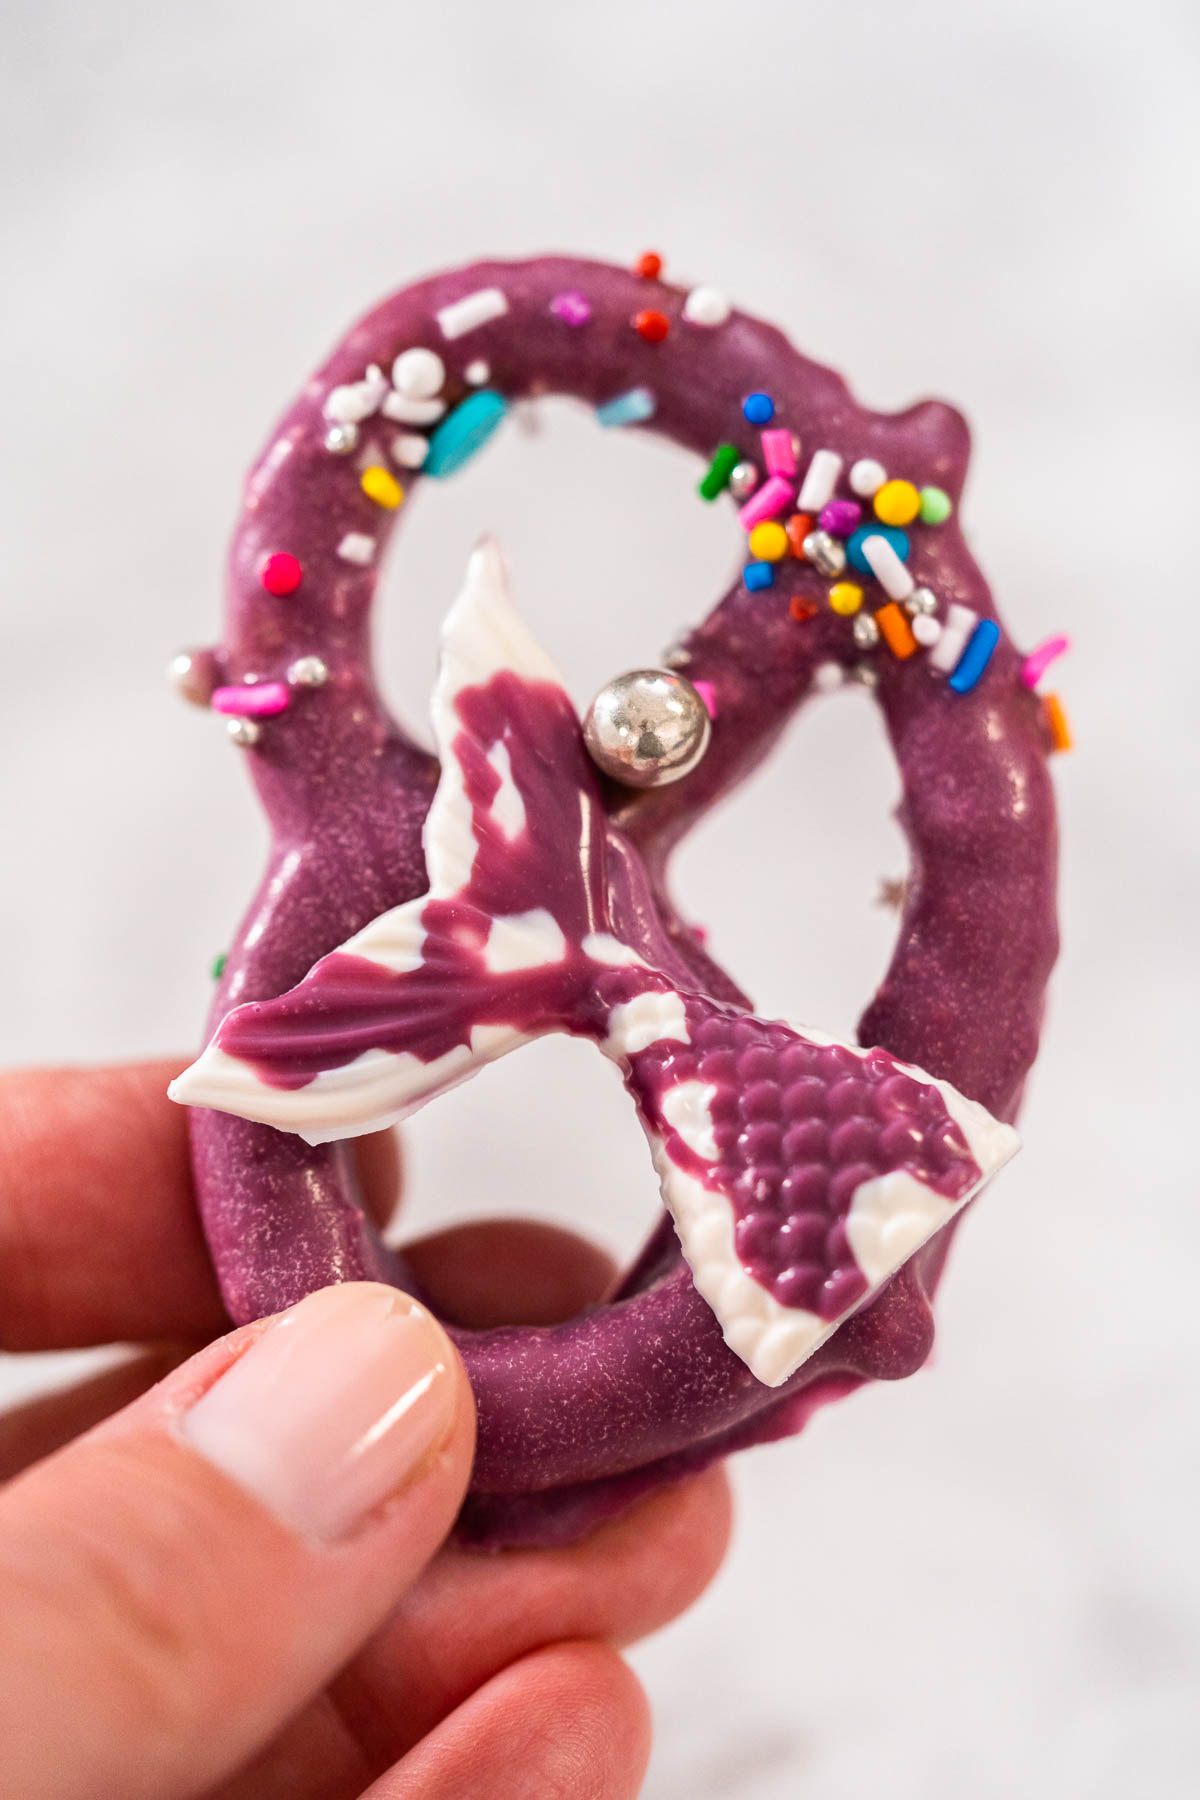
If you love themed treats like this, check out my Mermaid 3-Layer Cake, Mermaid Pretzel Rods, and Unicorn Chocolate Chip Cookies — they all pair beautifully with these tails for a complete ocean-inspired dessert table. For frosting inspiration, try my Italian Buttercream Frosting or Royal Icing for Sugar Cookies, both perfect for decorating your magical creations.
Why You’ll Love This Recipe
- Fast and easy: Only takes about 10 minutes to prep and 10 minutes to chill.
- No baking required: Just melt, pour, and sparkle!
- Perfect for parties: Great for birthdays, baby showers, or summer celebrations.
- Fun for kids: A great project to make together.
Watch how I make this recipe
Tools That Make It Easier
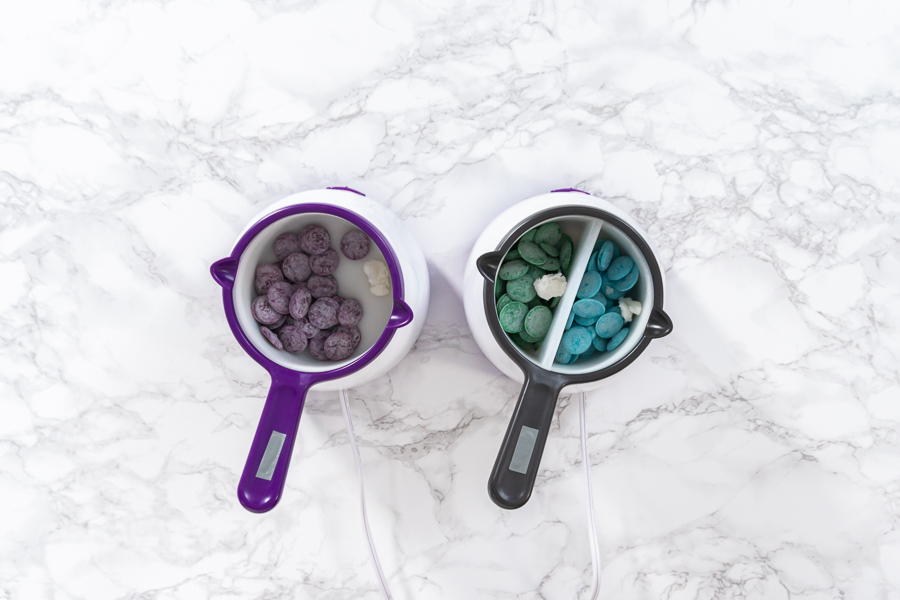
- Candy melt pot – Keeps chocolate perfectly melted without overheating.
- Mermaid tail silicone mold – Gives that perfect detailed tail shape.
- Cake spatula – Helps smooth and level melted chocolate.
- Baking sheet – Keeps molds flat while chilling.
- Food brush – For dusting the glitter.
- Saucier drizzle spoon – Helps control the flow when pouring candy melts.
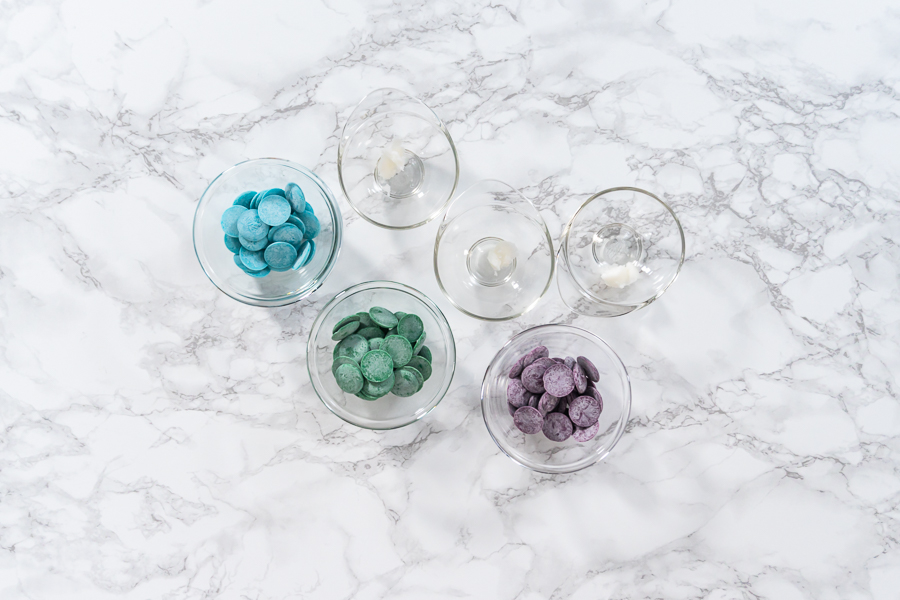
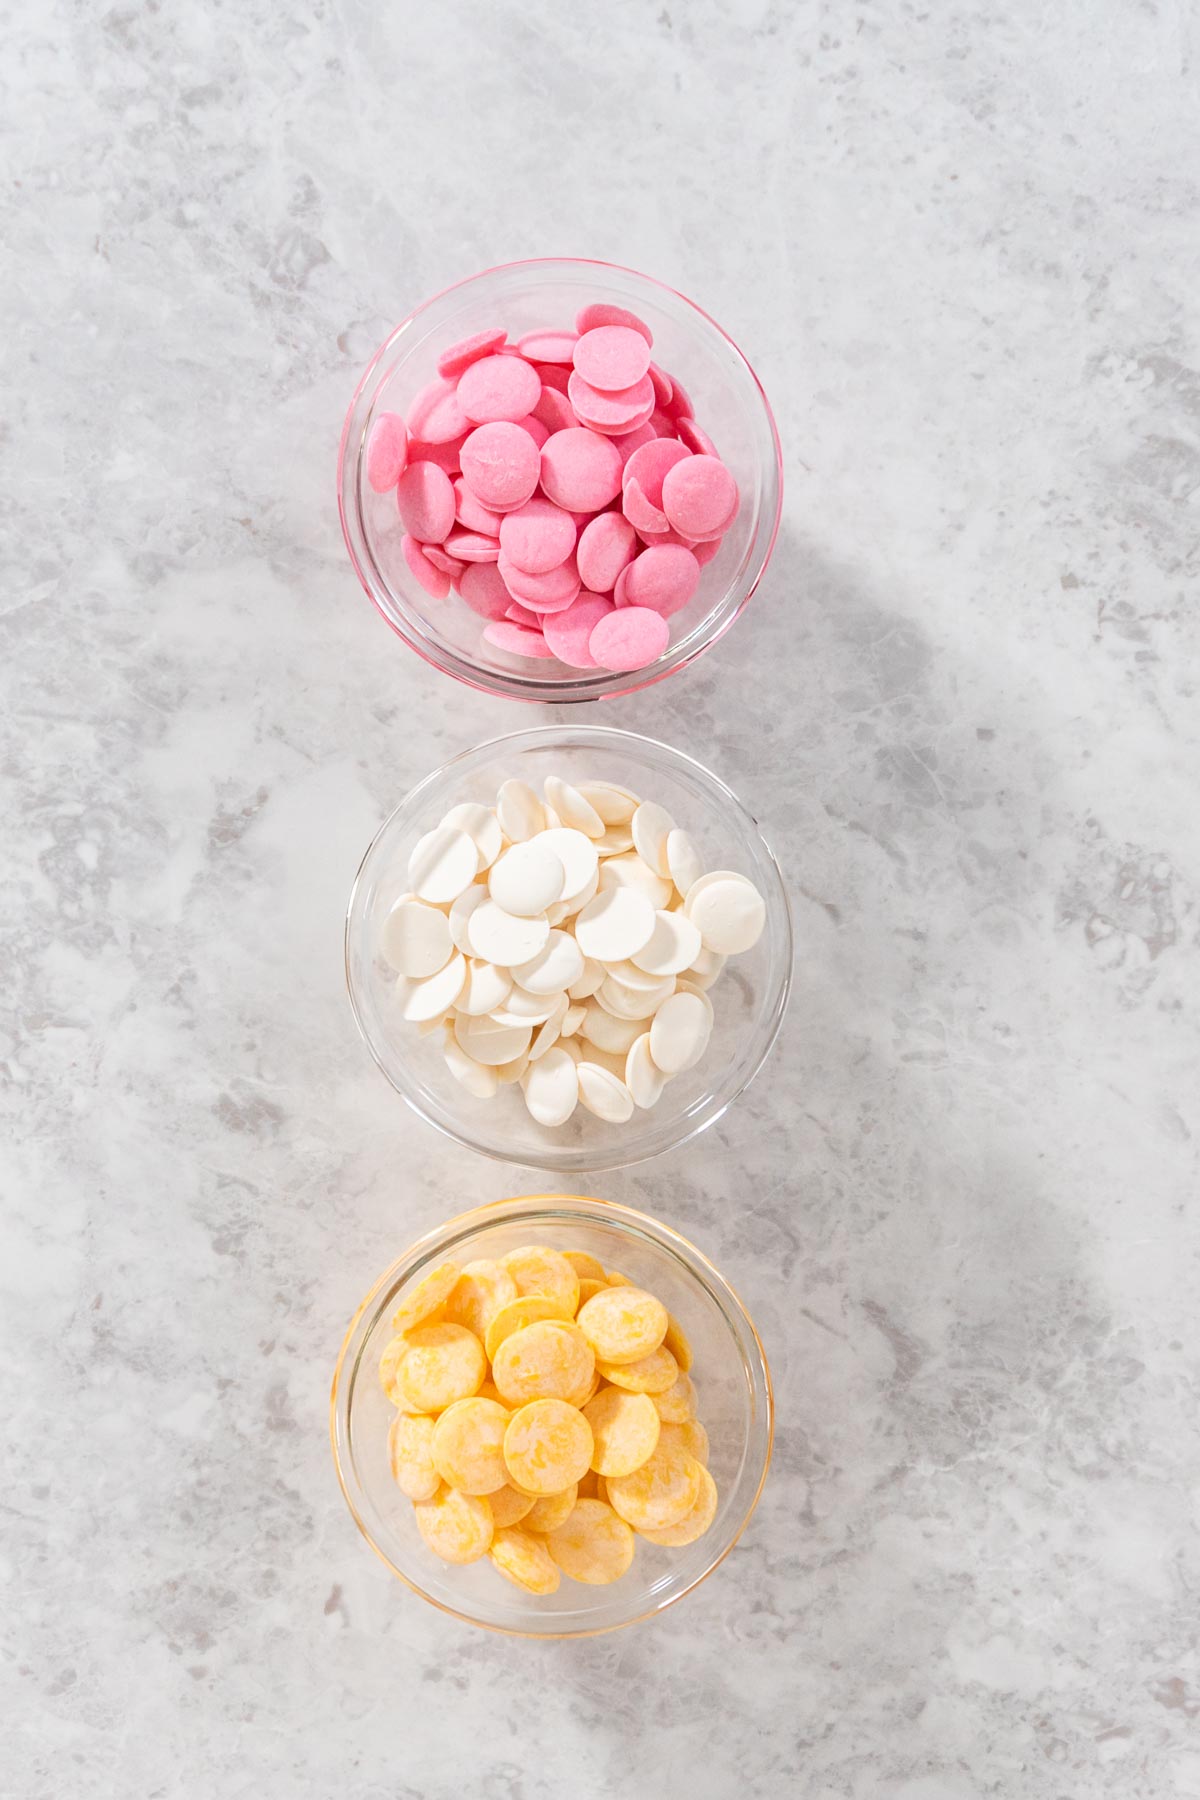
What You’ll Need From Your Pantry
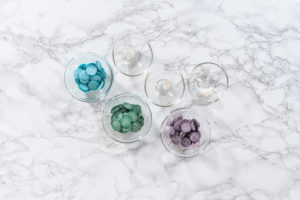
- ½ cup Turquoise Candy Melts
- ⅛ teaspoon Coconut Oil
- ½ cup Green Candy Melts
- ⅛ teaspoon Coconut Oil
- ½ cup Lavender Candy Melts
- ⅛ teaspoon Coconut Oil
- Edible Glitter Dust, for decoration
Before You Start: My Quick Tip
- I love using two candy melt pots so I can melt multiple colors at once — less waiting, more magic.
- If your candy melts are too thick, add a touch more coconut oil to thin them out.
- Always refrigerate your chocolate tails on a flat surface to keep their shape perfect.
- If you’re serving these for a birthday, make them a day ahead — they keep beautifully in the fridge.
- And if you’re photographing them (like I do for my blog), natural light makes that glitter sparkle like ocean waves!

How to Melt Candy Melts: 3 Easy and Reliable Methods
Latest Video
Let’s Make It Together
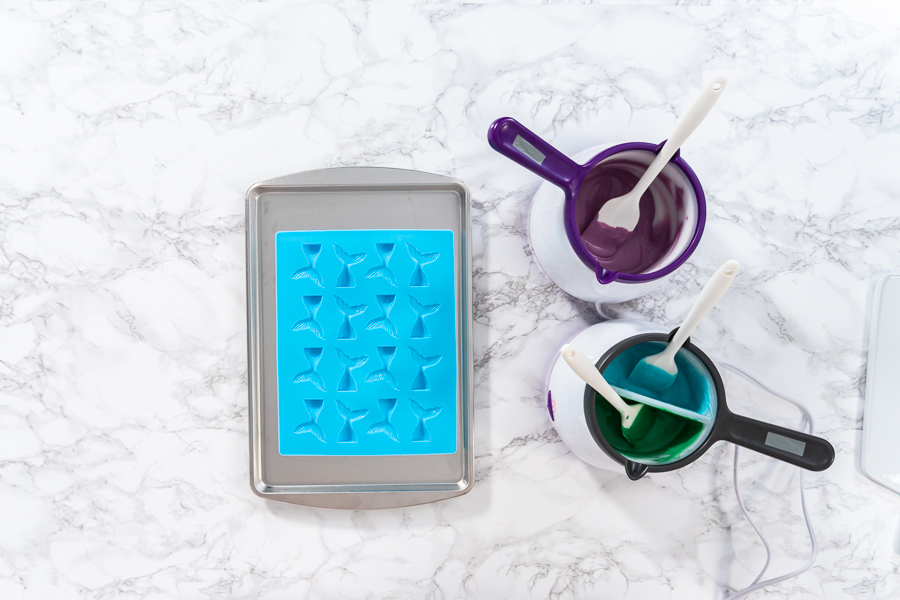
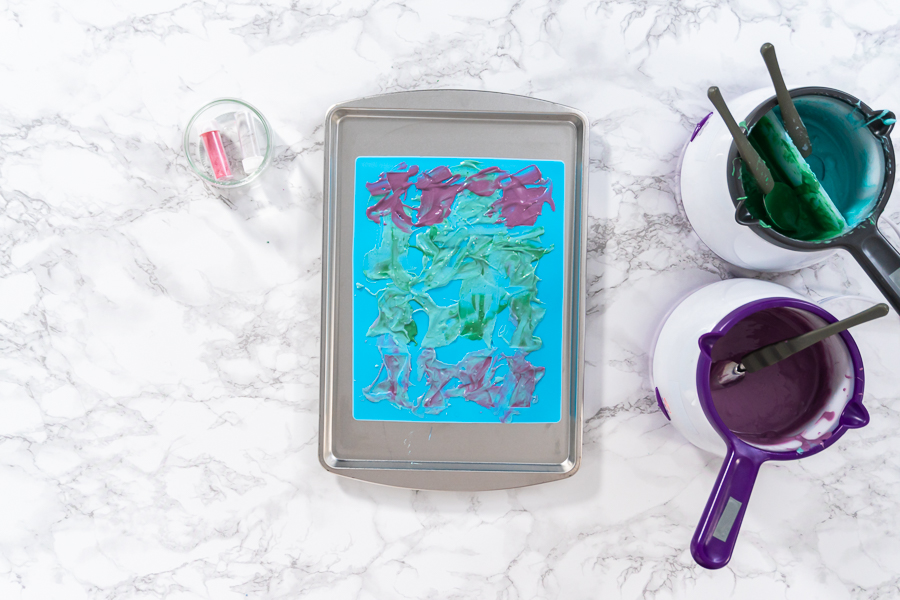
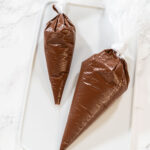
- Prepare your setup: Place the silicone mermaid tail mold on a baking sheet for stability.
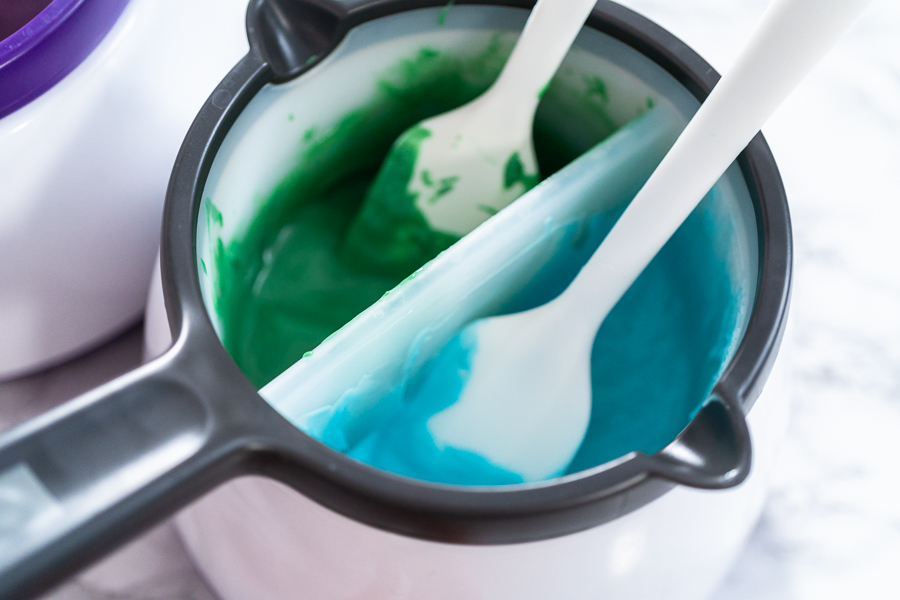
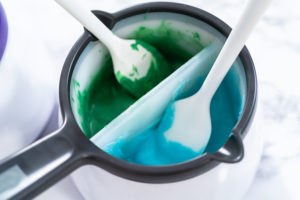
- Melt the candy melts: In a candy melt pot, combine the colored melts and coconut oil. Stir frequently until smooth.
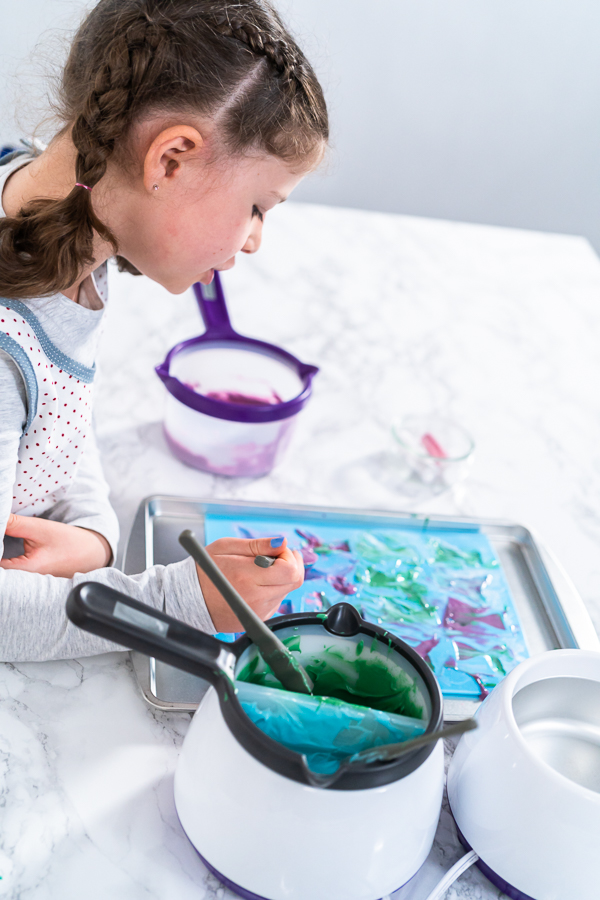
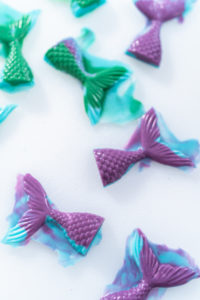
- Pour the chocolate: Use a drizzle spoon to carefully fill each mold cavity. For extra whimsy, swirl multiple colors together before the chocolate sets.
- Smooth the tops: Scrape off any excess chocolate with a cake spatula so the tails have a flat base.
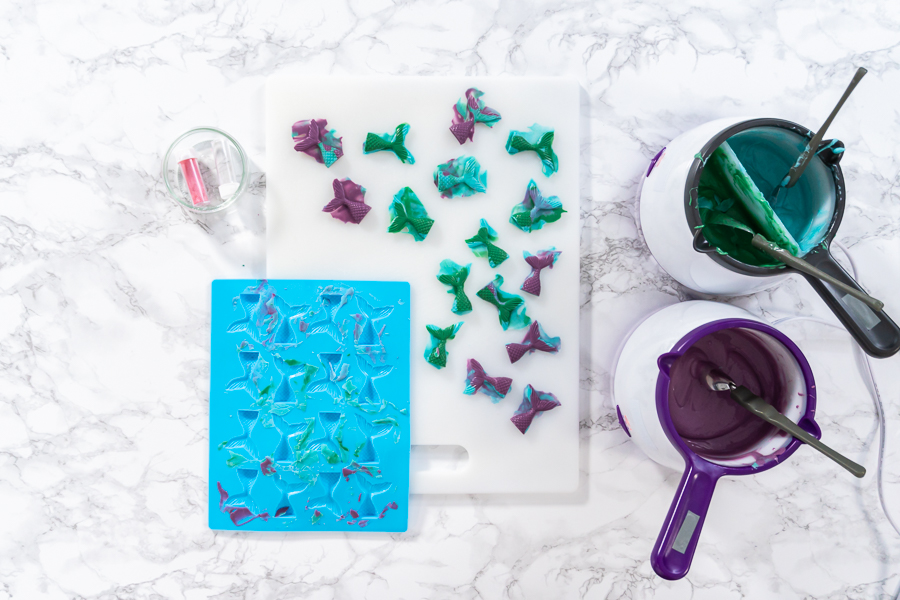
- Chill: Place the molds (on the baking sheet) in the refrigerator for 10 minutes, keeping them level.
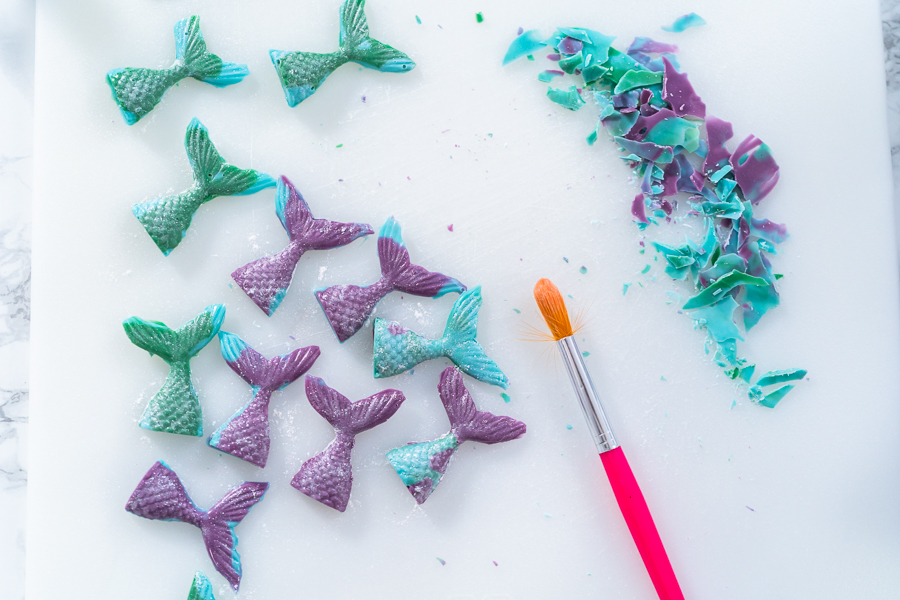
- Release and decorate: Gently remove the mermaid tails from the molds and brush each with edible glitter. Try not to handle them too much — the warmth of your hands can soften the chocolate.
Recipe variations
If you want to experiment beyond the classic turquoise, green, and lavender, try these fun variations:
- Chocolate Seashells: Use seashell molds with white and gold candy melts for a beachy vibe.
- Galaxy Mermaid Tails: Mix dark purple, blue, and black melts with silver glitter for a celestial twist.
- Mint Chocolate Tails: Combine mint candy melts with crushed peppermint for a refreshing flavor.
- Pastel Rainbow Tails: Use multiple pastel colors swirled together — perfect for spring birthdays or baby showers.
- Gold-Dusted Vanilla Tails: Melt white vanilla candy melts and brush with gold luster dust for an elegant touch.
Storage
- Always label the date so you know they’re still at their best.
- Store in an airtight container with parchment paper between layers.
- Keep in the fridge for up to 3 weeks or in a cool, dry spot away from sunlight.
Serving Ideas
These mermaid tails add instant charm to any dessert table. Here are a few of my favorite ways to use them:
- On top of Mermaid Cupcakes or a Mermaid 3-Layer Cake.
- With Mermaid Pretzel Rods for a themed dessert spread.
- As a finishing touch on Unicorn Chocolate Chip Cookies.
- Mixed into Homemade Star-Shaped Chocolates for a magical candy bowl.

More Recipes You’ll Love
If you enjoyed this fun project, check out these other playful desserts:
- Italian Buttercream Frosting – for topping mermaid cupcakes with ocean-like swirls.
- Chocolate Hearts and Lips – perfect for Valentine’s Day or romantic occasions.
- Homemade Star-Shaped Chocolates – great for birthdays or holiday gifts.
- Mermaid Pretzel Rods – sparkly and salty-sweet!
- Royal Icing for Sugar Cookies – to pipe sea shells or waves on cookies.
- Homemade Caramel – drizzle on ice cream or cupcakes for a buttery finish.
Chocolate Mermaid Tails
Video
Equipment
Ingredients
- ½ cup Wilton Turquoise Candy Melts or Wilton Blue Candy Melts
- ⅛ teaspoon Coconut oil
- ½ cup Wilton Green Candy Melts
- ⅛ teaspoon Coconut oil
- ½ cup Wilton Lavender Candy Melts
- ⅛ teaspoon Coconut oil
- Glitter Dust
Instructions
- First, gather up all the necessary equipment and measure out all of your mermaid tail ingredients.
- Next, get the candy melt pots ready, making sure to line one of the melting pots with a two- compartment silicone liner. Drop the colored candies into the separated sections and add in the coconut oil.

- While the candies and oil are melting together, make sure to stir each section frequently with a heat resistant spatula until the candies have melted completely.
- Then, set the mermaid tail silicone mold on a baking sheet to keep it flat. Use a saucier drizzle spoon to carefully transfer the melted candy into the mermaid tail molds. Tap the molds to remove any air bubbles. I like to mix the colors in the mermaid tails to give them a much more whimsical look.

- Next, scrape off the excess melted candy using a cake spatula and then transfer the whole baking sheet to the fridge and let them sit for 10 minutes. Remember to keep it totally flat!

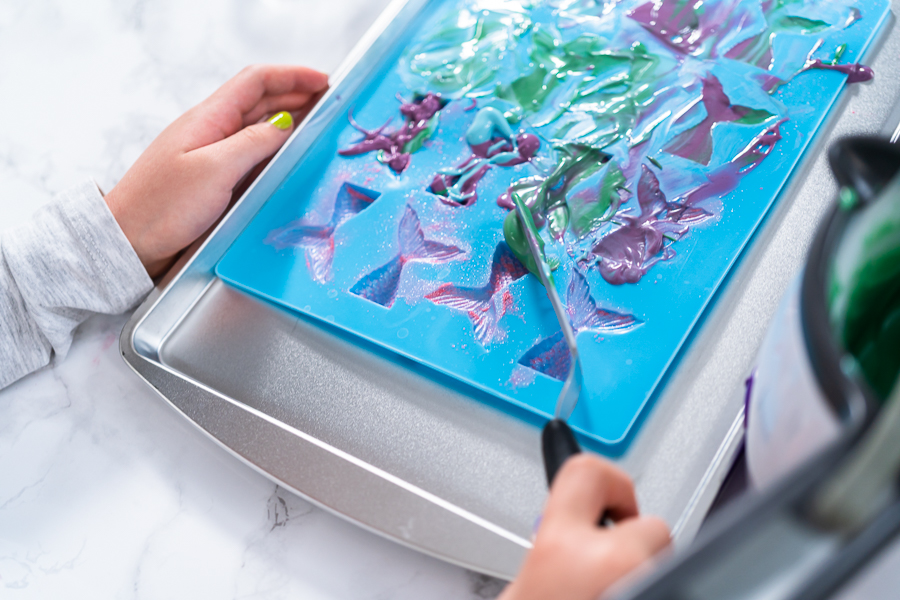
- When the chocolates are set, carefully pull the edges of the silicone mold to gently separate from the mermaid tail candies, then carefully pop the candies out from the molds. Try not to handle the homemade candies with your bare hands too much as the heat from your skin can make the chocolates melt.

- Then, carefully cut away any excess candy from the edges and move the candies to a cookie sheet or flat silicone mat.
- Finally, use the food brushes to apply the glitter dust to each of the mermaid tails.

Notes
- Transfer the chocolate mermaid tails to an airtight container or a ziploc bag.
- If desired, you can use small cuts of parchment paper or wax paper in between the layers to help keep the chocolates separated and intact.
- Homemade chocolates can be stored for up to 2 or 3 weeks, either stored in the fridge or in a cool, dry place out of the sun’s warm reach.
- Always note the date when storing so you can keep track of the freshness and quality.
Nutrition
From My Kitchen to Yours
Mermaid Theme
- Mermaid Pretzel Rods for Magical Under-the-Sea Parties
- 3-Layer Mermaid Cake with Pastel Colors in Under 1 Hour
- Vanilla Mermaid Cupcakes – Magical Ocean-Inspired Cupcakes for Birthdays and Special Celebrations
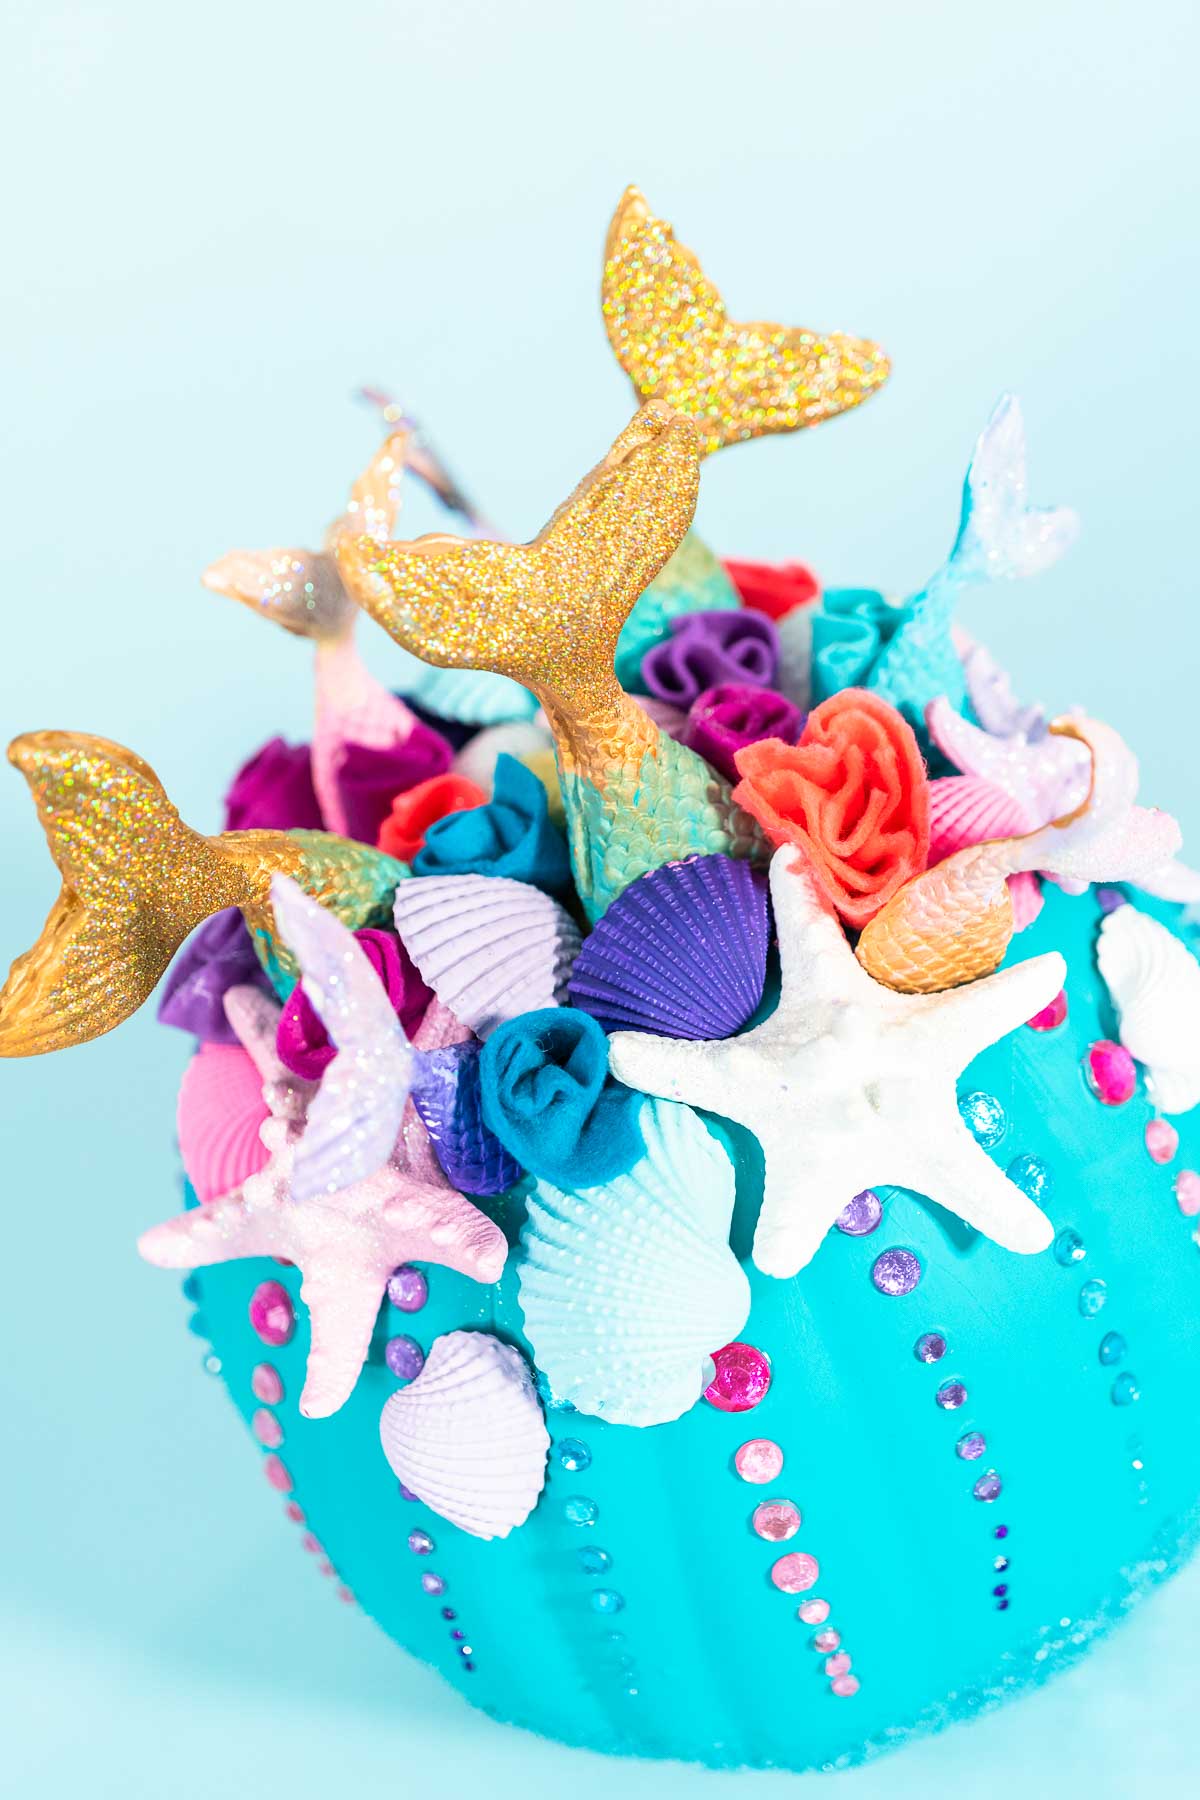
- DIY Mermaid Pumpkins with Glitter, Shells, and No-Carve Magic
- How to Make Mermaid-Themed Chocolate Covered Pretzels

I’ve Got Answers
Can I use regular chocolate instead of candy melts?
Yes, but you’ll need to temper it first so it sets with a nice shine. Candy melts are easier for beginners because they don’t require tempering.
What’s the best way to add more shimmer?
Apply a thin layer of edible glitter dust with a dry food brush right after unmolding. For extra sparkle, lightly mist with edible pearl spray.
How do I prevent air bubbles in the molds?
Tap the mold gently on the counter after filling to release trapped air before refrigerating.
Can I make these vegan?
Absolutely! Use dairy-free candy melts and coconut oil for a vegan-friendly version.
Can I store them at room temperature?
Only if your kitchen stays cool and dry — otherwise, keep them in the fridge to avoid melting or losing shape.
Pin It For Later

Food Photography & Video Tips from My Studio
Here’s a peek at the tools, gear, and camera setups I use to film my recipe videos and photograph food at home. Over the years, I’ve tested dozens of different setups, and now I’m sharing what actually works for me—whether I’m filming overhead shots for YouTube or styling still photos for my blog. If you’re curious about how I create the content you see here, these posts are a great place to start.

What is in my toolbox?

3 ways camera setup for Tasty-style video recipes


Leave a Reply