|
 |
This post contains affiliate links.
Why You’ll Love This Recipe
There’s nothing quite like a batch of warm, chewy peanut butter cookies fresh out of the oven. Soft in the center, lightly crisp around the edges, and packed with that deep roasted peanut flavor, these cookies are everything you want in a classic homemade treat. Whether you’re baking for a special occasion, prepping school lunches, or just need a cozy kitchen moment on a rainy afternoon, this recipe has you covered.
Over the years, I’ve experimented with all kinds of peanut butter cookie recipes—some too cakey, others too crunchy, a few too sweet. But this version is the one that checks all the boxes. It’s a reliable, no-fuss cookie that turns out soft, chewy, and delicious every single time. Plus, it comes together with simple pantry staples and no complicated steps.
They’re a go-to in my cookie rotation alongside favorites like Soft Chocolate Chip Cookies, Cream Cheese Frosting Sandwich Cookies, and Cranberry Orange Muffins. Bake a batch for your next cookie exchange or stash some in the freezer for when that peanut butter craving hits. Trust me—these cookies disappear fast.

Tools That Make It Easier
Want bakery-style results at home? A few basic tools go a long way:
- Measuring Cup
- Measuring spoons
- Glass mixing bowl
- Dough scoop
- Baking sheet
- Silicone mat
- Drying rack
- Kitchen Aid mixer
- silicone spatulas

What You’ll Need From Your Pantry
- 2 ⅔ cups All-purpose flour
- 1 tsp Baking Powder
- 1 tsp Baking Soda
- 1 tsp Cornstarch
- 1 tsp Salt
- 1 cup Butter Room Temperature
- 1 cup Granulated Sugar
- 1 cup Light Brown Sugar Packed
- 1 cup Peanut Butter
- 2 tsp Vanilla Extract
- 2 Large Eggs

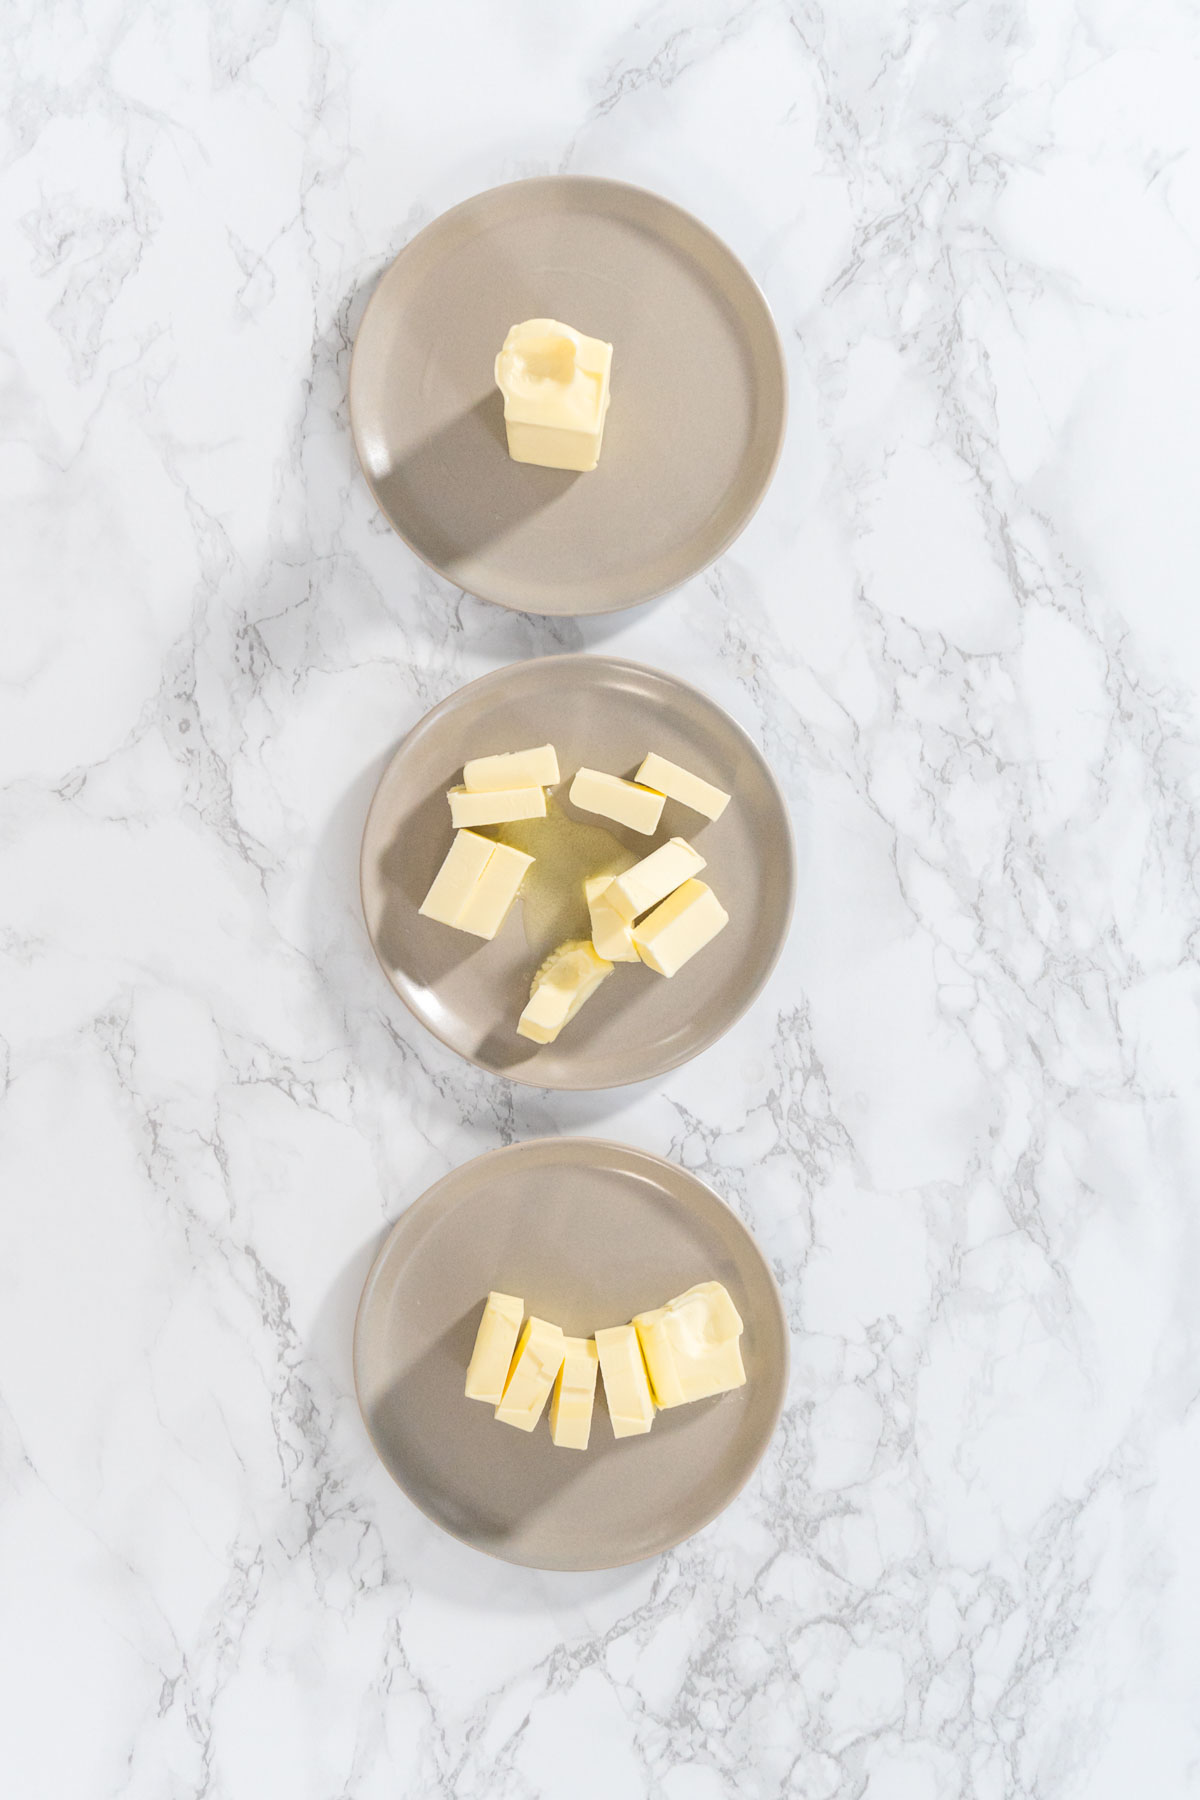
How to soften butter
Before You Start: My Quick Tip
Room temperature butter is essential here. Cold butter won’t mix well and can cause your dough to break or turn out lumpy. Forgot to leave it out? You can soften it in short bursts in the microwave, just don’t let it melt.
Also, if you’re using natural peanut butter (the kind with oil separation), stir it thoroughly before measuring. Otherwise, your dough may end up oily or inconsistent.
Want your cookies to bake up nice and thick? Pop the dough in the fridge for 15–20 minutes before scooping and baking. It helps control spread and enhances texture.
Latest Video
Let’s Make It Together
- Preheat oven to 350°F. Line baking sheets with parchment or silicone mats.
- Whisk together flour, baking powder, baking soda, cornstarch, and salt in a medium bowl.
- In a separate bowl, cream butter, granulated sugar, and brown sugar until light and fluffy (about 3 minutes).
- Mix in the peanut butter until smooth. Then add vanilla and eggs, one at a time, beating until combined.
- Slowly add the dry ingredients and mix just until the dough comes together—don’t overmix.
- Scoop dough onto your baking sheet. Use a fork to press a crisscross pattern onto each cookie.
- Bake for 10–12 minutes, until the edges are golden. Let cookies cool on the pan for 10 minutes before moving to a wire rack.
- For best results when baking in batches, rotate trays halfway through to ensure even browning.

Recipe variations
Mix it up to suit your taste:
- Use chunky peanut butter for added texture
- Fold in mini chocolate chips or chopped peanuts for extra crunch
- Dip cooled cookies in Chocolate Ganache or White Chocolate Ganache
- Sprinkle with sea salt right before baking for a gourmet bakery finish
- Roll dough in coarse sugar for sparkle and sweetness
Want to go all out? Make sandwich cookies with a layer of Buttercream Frosting, Chocolate Ganache Frosting, or even Cream Cheese Frosting in the middle.

Cut, Serve, and Store It Like a Pro
These cookies keep well in an airtight container at room temperature for up to 4 days. Slip in a slice of sandwich bread to keep them extra soft.
To freeze: allow cookies to cool completely, then transfer to a freezer bag. They’ll keep up to 3 months.
To reheat: bake frozen cookies at 350°F for 8–10 minutes or warm individual cookies in the microwave for 10–15 seconds.
You can also freeze raw cookie dough balls. Just portion, freeze on a tray, then store in a bag. Bake from frozen whenever you need a fresh cookie moment.
For more sweet inspiration, try:
- Classic Sugar Cookie Dough for Cutout Cookies
- Soft and Chewy Oatmeal Cookies
- Chocolate Cookies with Chocolate Hearts


Final Thoughts
Peanut butter cookies are one of those recipes that never go out of style. They’re cozy, crave-worthy, and full of nostalgic flavor. This recipe is simple, satisfying, and made for real life. No complicated steps. No rare ingredients. Just pure peanut butter bliss.
These cookies also make amazing gifts. Wrap them in parchment, slide into a cookie tin, or stack them in clear treat bags tied with twine. Add them to your holiday cookie boxes or bring to your next bake sale—they’ll go fast.
If you’re into batch baking, I highly recommend doubling the recipe. These cookies freeze beautifully, and trust me, future-you will be thankful you did.
Peanut Butter Cookies
Equipment
Ingredients
- 2 ⅔ cups All-purpose flour
- 1 teaspoon Baking Powder
- 1 teaspoon Baking Soda
- 1 teaspoon Cornstarch
- 1 teaspoon Salt
- 1 cup Butter Room Temperature
- 1 cup Granulated Sugar
- 1 cup Light Brown Sugar Packed
- 1 cup Peanut Butter
- 2 teaspoon Vanilla Extract
- 2 Large Eggs
Instructions
- Preheat your oven to 350°F and prepare your baking sheet with either parchment paper or a silicone baking mat.
- In a large bowl, whisk together the flour, baking powder, baking soda, cornstarch, and salt. Set aside.

- In a mixer fitted with a paddle attachment (or using a hand mixer), cream the butter, granulated sugar, and brown sugar together on medium speed until the mixture is fluffy and pale, about 3 minutes.

- Add the peanut butter and continue mixing until fully incorporated and smooth.
- Mix in the vanilla extract and eggs one at a time, beating briefly between each addition. Scrape down the bowl as needed.
- Reduce the mixer speed to low and slowly add in the dry ingredients. Mix just until the dough is smooth—do not overmix.
- Scoop the dough using a small batter scoop and place onto your baking sheet. Press a fork into each dough ball to flatten slightly and create the classic crisscross pattern. Leave about 2 inches of space between cookies.

- Bake for 10–12 minutes, or until the edges are lightly golden. Allow cookies to cool on the sheet for 10 minutes before transferring to a wire rack to cool completely.

- Enjoy!

Nutrition
From My Kitchen to Yours


Pin It For Later

Food Photography & Video Tips from My Studio
Here’s a peek at the tools, gear, and camera setups I use to film my recipe videos and photograph food at home. Over the years, I’ve tested dozens of different setups, and now I’m sharing what actually works for me—whether I’m filming overhead shots for YouTube or styling still photos for my blog. If you’re curious about how I create the content you see here, these posts are a great place to start.

What is in my toolbox?

3 ways camera setup for Tasty-style video recipes

Best camera for cooking videos


Leave a Reply