|
 |
This post contains affiliate links.
Why You’ll Love This Recipe
When I first spotted mini pancake cereal trending on TikTok, I couldn’t resist. I’ve always been a pancake person, and the idea of turning them into cereal-sized bites? Absolutely adorable—and perfect for my daughter! I tweaked my regular pancake batter, gave it a whirl, and it was an instant hit. They’re a bit more time-consuming than traditional pancakes, but the joy on her face was worth every extra flip.
Mini pancake cereal is more than just a fun trend—it’s a cozy, playful twist on a classic comfort food that brings smiles to breakfast or snack time. Whether it’s for a weekend treat or a fun surprise before school, these little pancakes make everyone feel like a kid again.
If you're already a fan of cozy breakfasts, check out my Pumpkin Pancakes or try my Coconut Banana Pancakes for a tropical twist. These mini pancakes fit perfectly into that lineup of fun, kid-friendly morning treats.
Watch how I make this recipe
Tools That Make It Easier
Making these adorable mini pancakes does not require fancy tools—but a few key items can make the process smoother (and way more fun). If you're already familiar with traditional pancake making, you're in luck—most of the equipment and ingredients are the same. You’ll just need a couple of extras to make sure your tiny creations are picture-perfect. Here’s what I grab from my kitchen before diving in:
- A frying pan
- Glass mixing bowls
- A blending whisk
- Pancake spatula
- Hand mixer - for ultimate batter prep
- Pastry piping bags - these will be used in place of scooping.
- Piping bag ties

What You’ll Need From Your Pantry

Before You Start: My Quick Tip
Want perfectly round minis without the mess? Use a piping bag. Trust me. Scooping batter doesn’t cut it here. Also, remember to spray the pan between batches to keep them golden and nonstick.

Latest Video

Let’s Make It Together
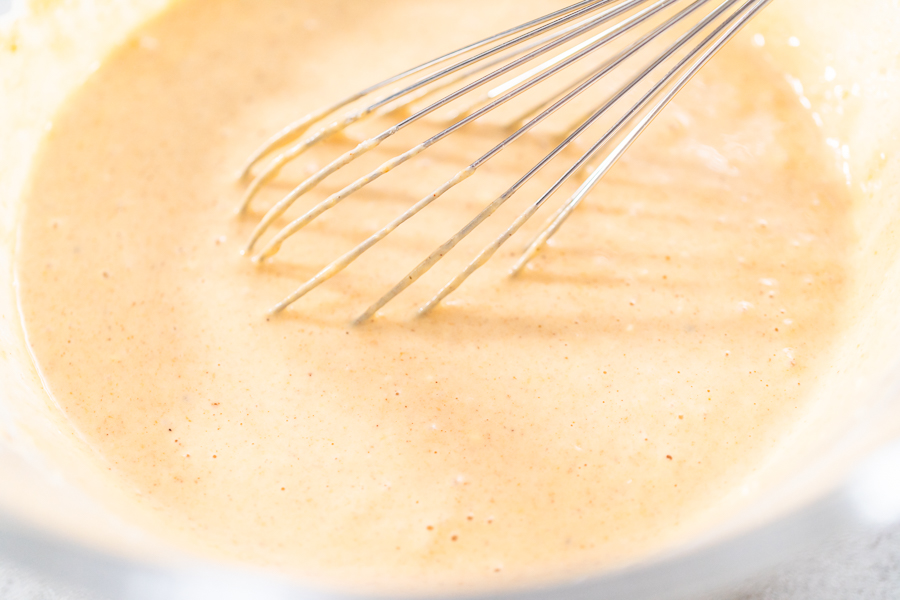
- Mix the wet ingredients: Whisk milk, egg, oil, and vanilla in a medium bowl.
- Mix the dry ingredients: In a separate bowl, whisk flour, sugar, salt, and baking powder.
- Combine them: Slowly add wet mix to dry and beat with a hand mixer until smooth.
- Prep your piping bag: Pour the batter into a piping bag and secure with a tie.
- Heat your pan: Spray your frying pan and preheat on medium.
- Pipe your minis: Cut a ¼-inch tip and squeeze tiny batter dots into the hot pan.
- Cook and flip: When bubbles form, flip each pancake gently with your spatula.
- Cook until golden: Once both sides are golden brown, transfer to a plate.
- Repeat: Keep going until all the batter is used.
- Serve: Top with syrup, fruit, or peanut butter—or serve them plain!

Recipe variations
- Chocolate Chip Mini Pancakes: Fold mini chocolate chips into the batter.
- Blueberry Pancake Cereal: Add fresh or dried blueberries for fruity bursts.
- Cinnamon Sugar Minis: Dust with cinnamon and sugar after cooking.
- Pumpkin Spice Minis: Sub milk for buttermilk and add ¼ cup pumpkin puree + pumpkin spice.
- Gluten-Free Version: Use a 1:1 gluten-free flour blend instead of all-purpose flour.
These small tweaks make it easy to customize mini pancakes to suit any craving or occasion!


Store It Like a Pro
In the fridge: Store in an airtight container for 2–3 days.
In the freezer:
- Lay flat on a baking sheet and freeze 30 minutes.
- Transfer to a labeled ziplock bag.
- Freeze up to 3 months.
To reheat: Toast them or microwave for a quick snack. Skip syrup if you're packing them to go.

Fun Ways to Serve These
- Weekend breakfast treat
- Packed into a school lunchbox
- After-school snack
- Birthday breakfast surprise
- Party platter for kids
- Road trip snack (no syrup!)
For more snackable fun, check out my Mini Cucumber Sandwiches—another favorite in our house for picnics and lunchboxes.
Kid-Approved & Parent-Approved
My daughter adored these little pancake snacks and ate them right up! I’m pretty sure your kids will too. They’re perfectly portioned for little hands and work beautifully as finger food for any time of day. Honestly, they’re so easy to pack into lunchboxes or snack containers—it’s a parenting win.
And while the process does take a bit more effort than traditional pancakes, the smiles, giggles, and empty bowls make it all worthwhile. I’ve found it’s also a fun weekend project to do with your little one—squeeze, flip, repeat. Kids love helping out!
Final Thoughts
Would I make these every weekend? Probably not. But when you’ve got a little extra time or want to surprise your kids with something fun—they’re totally worth it. These tiny pancakes feel like a personal, edible celebration. And yes, my daughter said, “They’re mini like me!” and honestly, that sealed the deal.
They’re fun, cute, customizable, and—let’s be honest—pretty Instagrammable too. 😉 Whether you top them with maple syrup, nut butter, whipped cream, or just fresh berries, they’re a guaranteed hit.
If you loved this, you’ll also like:
- Pumpkin Pancakes – Cozy, warm, and full of autumn flavor.
- Coconut Banana Pancakes – A tropical twist on a breakfast favorite.
- Chocolate Chip Pancakes – Sweet, fluffy, and loaded with melty chocolate chips.
- Mini Cucumber Sandwiches – Fun finger food idea for school or parties.
- Grilled Peaches with Cinnamon Butter – A warm-weather snack that’s sweet and elegant.
Mini pancakes cereal
Video
Equipment
Ingredients
- 1 cup All purpose flour
- ½ teaspoon Salt
- 2 teaspoon Baking powder
- 2 tablespoon Sugar
- ¾ cup Milk
- 1 Egg
- 1 teaspoon Vanilla extract
- 2 tablespoon Canola oil
- Cooking spray oil
Garnish
- Maple syrup
- Fresh fruits
Instructions
- In a medium bowl, whisk together the milk, egg, canola oil, and vanilla extract until fully combined.

- In a large bowl, whisk the flour, sugar, salt, and baking powder until well incorporated.

- Slowly pour the wet mixture into the bowl of dry ingredients, whisking as you go to form a smooth, lump-free batter.

- Pour the finished batter into a pastry piping bag and secure it with a piping bag tie.

- Cut ¼ inch from the tip of the piping bag.

- Pre heat the skillet on medium-high heat. Spray with cooking oil and pour a scoop of batter into the skillet.
- Heat a non-stick skillet over medium-high heat and coat it with cooking oil spray. Snip about ¼ inch from the piping bag tip to control the flow of the batter.Pipe out small dots of pancake batter onto the heated skillet.

- Let them cook until bubbles form and the bottoms are golden brown, then flip gently with a spatula. Each side should take about 5 minutes.Once both sides are golden, remove pancakes from the skillet and set aside.

- Remove pancake from the frying pan when both sides are golden brown.

- Repeat until all the batter has been used.
- Serve your mini pancake cereal warm with maple syrup and your favorite fruits!

Nutrition
From My Kitchen to Yours


Pin It For Later

Food Photography & Video Tips from My Studio
Here’s a peek at the tools, gear, and camera setups I use to film my recipe videos and photograph food at home. Over the years, I’ve tested dozens of different setups, and now I’m sharing what actually works for me—whether I’m filming overhead shots for YouTube or styling still photos for my blog. If you’re curious about how I create the content you see here, these posts are a great place to start.

What is in my toolbox?

3 ways camera setup for Tasty-style video recipes

Best camera for cooking videos


Leave a Reply