How to effectively store Boards, Backdrops, and Backgrounds
This post contains affiliate links.
As I started specializing in food photography, I realized that I needed more than one background when photographing food. After making my first board, I was excited to use it, and I started to create new boards very quickly. I have found that many beginner food photographers feel the same level of excitement and the same issue as I did- I started making way too many boards, and ended up with lots of bulky, heavy boards. As my food photography ramped up, so did my board collection, and it soon became a problem. With only two or three boards, it’s quite easy to just stack them against each other on the wall and pick which one you want to use. However, this quickly becomes unreliable as you gather more boards. First, there is only so much wall space that can be used when stacking boards. Second, after stacking more than a couple of boards onto each other, it is hard to look through them and find the specific board you’re looking for. I continued making a new board and adding it to my already large collection every few months, despite these issues.
How to Store Boards
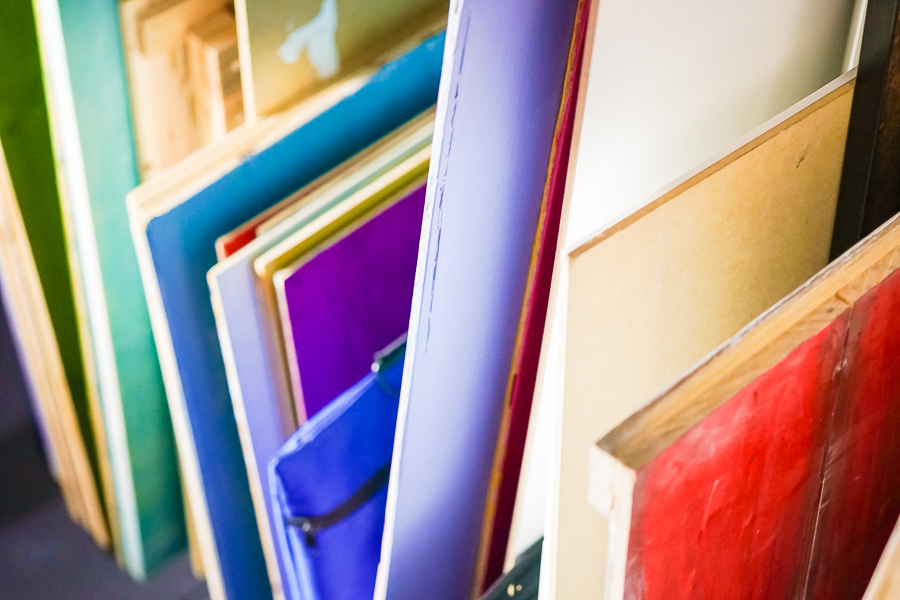
Storing boards are easiest with a metal shelf, using tension rods to divide up sections of the boards like a bookcase.
After moving into my latest studio space, I decided that I needed to change my system of board storage. I use plenty of wire shelves in my studio for the storage of props and equipment, so I found that using a wire shelf would be perfect for storing my boards. Stacking the boards onto one another like a bookshelf is the most effective use of the shelf, though the boards are quite heavy, so I used several tension rods to divide up a couple of sections of similar boards, to relieve some of the weight on the boards and organize them a bit better. This system is also extremely effective as the shelves can be used with wheels, so the whole shelf of boards can be quickly moved around my studio, something that would otherwise be extremely difficult due to the weight and size of the boards. I can also quickly look through and choose boards, given the amount of space between each board. Storage system for wood boards
How to Store Vinyl Backgrounds
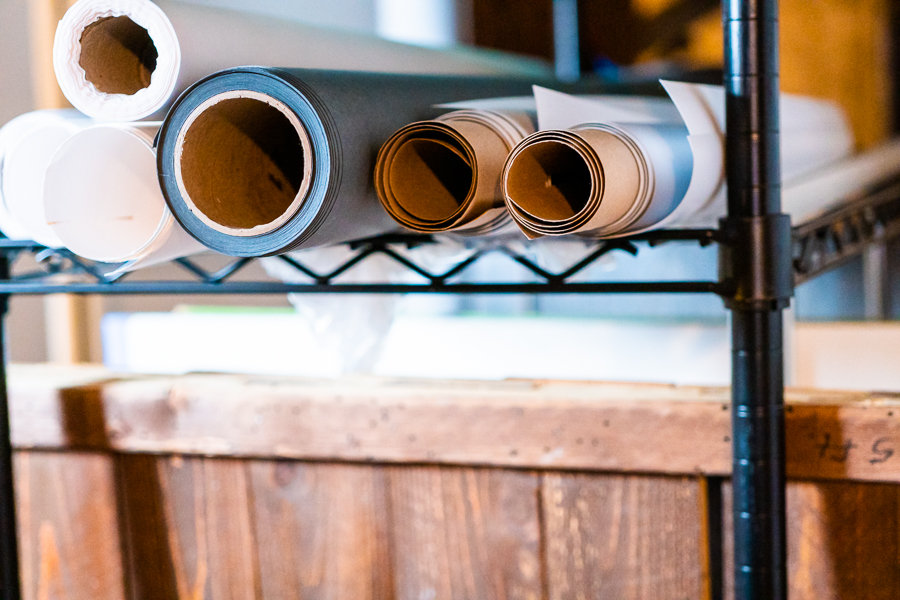
To store vinyl backgrounds, roll them up with an old gift wrap tube because they cannot be stored flat.
I’ve found that maximizing my use of space is key in having a well-organized studio, so after using the bottom level of a wire shelf for boards, the top portion is perfect for storing my vinyl backgrounds. This is a bit tougher, however, as vinyl backgrounds cannot be stored horizontally, as that would ruin the background as bubbles would begin to form on the vinyl. Vinyl must be stored rolled up, so I use old cardboard tubes from gift wrap is effective and convenient in storing these backgrounds. They cannot be rolled too tight, as they usually are bought. Putting these rolls on the shelf is as easy as stacking them, which makes them accessible and easy to pick out.
How to Store Photography Backdrops
Backdrops are a bit harder to store, but using metal garage hooks to mount backdrops is the easiest way for on-set backdrop storage.
Backdrops, however, aren’t as easily stored. They are much bigger, harder, and heavier to move around, so I prefer to keep them on-set. I use large metal hooks screwed into the wall, and I run a metal or PVC pipe through the backdrop to mount it onto the hooks, right behind my shooting area for easy access. Since they are so heavy, I try not to move them around too much. I always keep a few backdrops on-set because it’s so hard to move around, mostly backdrops that I use often, and place one or two backdrops behind it. I keep a couple of others on a similar storage system off-set, but since they are so heavy and hard to move around, I try not to change backdrops too often. Some people prefer to keep all of their backdrops on-set for convenience, but I find that keeping only two or three is the best way to store backdrops, as they can easily be moved around on this storage system, but it is hard to move them between off-set and on-set.
1 ½ inch 10 ft Electric metallic tube
Food Photography & Video Tips from My Studio
Here’s a peek at the tools, gear, and camera setups I use to film my recipe videos and photograph food at home. Over the years, I’ve tested dozens of different setups, and now I’m sharing what actually works for me—whether I’m filming overhead shots for YouTube or styling still photos for my blog. If you’re curious about how I create the content you see here, these posts are a great place to start.
#foodphotography photography #stockphotography #stockphotographer #foodbackgrounds #foodbackdrop #foodstyling #foodstylists #foodstyleguide #foodvideography #photobackdrop #photobackdrops #photostudio #foodstudio






Leave a Reply