Classic Gingerbread Cookie Dough combines warm spices and a hint of molasses, creating the perfect base for festive, cutout holiday cookies.

This post contains affiliate links.
Once you bake these, pair them with other holiday favorites from my cookie recipes list.
After you bake and decorate, my Christmas Cookie Box Calculator helps you plan how many gift boxes and dough batches you’ll need.
Classic Gingerbread Cookie Dough: A Holiday Tradition
Every holiday season, my kitchen transforms into a bustling bakery filled with the warm aromas of cinnamon, ginger, and molasses. It’s no exaggeration to say that the holidays truly begin for my family when the first batch of gingerbread cookies goes into the oven. This Classic Gingerbread Cookie Dough recipe isn’t just a family favorite—it’s the heart and soul of our holiday traditions.
I still remember the first time I baked gingerbread cookies with my kids. There was flour everywhere, a few mismeasured spices, and plenty of laughter. Over the years, those slightly chaotic baking sessions turned into cherished memories, and this dough became the foundation of it all. It’s the recipe we return to every year, whether we’re making simple gingerbread men or intricate snowflakes for gifting.
Now, here’s something you’ll notice in the video and photos for this blog: I’m making a double batch. Why? Because I’m not just baking for us—I’m preparing holiday gifts for family, friends, teachers, and pretty much everyone who deserves a little festive cheer. When you’re working with a double batch like I am, having the right tools makes all the difference. My 7-quart stand mixer is an absolute lifesaver for handling the extra dough. If you’re thinking of doubling your recipe, trust me on this one: invest in a mixer with a larger capacity to save yourself the stress (and potential motor burnout!).
This recipe, like many others on my blog, is written for a single batch to make it easy to follow. But if you’re diving into the world of holiday baking, I highly recommend checking out my other posts for even more gingerbread inspiration. From Amber Gingerbread Cookie Dough to Spiced Gingerbread Cookies, I’ve got you covered with plenty of options to keep your cookie tray looking and tasting amazing. You’ll also find tips and tricks, like how to decorate cookies with royal icing, or how to make the most of chocolate-dipped cookies for an indulgent touch.
So grab your mixing bowls and let’s get started! Whether you’re new to gingerbread or a seasoned pro, this recipe is sure to bring a little extra holiday magic to your kitchen.


Why Classic Gingerbread Cookie Dough is a Must-Bake
This Classic Gingerbread Cookie Dough is the heart of my holiday baking. The rich molasses and warm spices create the perfect festive flavor, while the dough holds its shape beautifully for any cookie design—gingerbread men, snowflakes, or even my kids’ quirky creations.
What I love most is how versatile this recipe is. Whether you’re baking for family, gifting, or making a big batch for a party, it never disappoints. Plus, the smell of these cookies baking fills the house with pure holiday magic.
If you’re looking to expand your gingerbread lineup, check out my other recipes, like Amber Gingerbread Cookie Dough or Spiced Gingerbread Cookies, for more festive fun. This dough is a must-bake—it’s simple, delicious, and packed with holiday cheer! Let’s dive in!


Tools You’ll Need for Classic Gingerbread Cookie Dough
Before jumping into the recipe, let’s make sure you have all the essential tools to make your gingerbread baking as smooth as possible. Here’s what I recommend for this dough:
• Measuring Cups and Spoons: Precision is everything when it comes to baking, and these will ensure your measurements are spot on.
• Glass Mixing Bowls: Clear bowls are perfect for keeping an eye on how well your ingredients are coming together.
• Blending Whisk: A must-have for evenly mixing the dry ingredients, ensuring those warm spices are perfectly distributed.
• Silicone Spatulas: These are my go-to for scraping every last bit of dough from the bowl and for folding ingredients together with ease.
• Kitchen Mixer: My trusty 7-quart stand mixer makes quick work of thick doughs like this one. If you’re doubling the recipe, a larger-capacity mixer will save you time and effort.
• Food Wrap: Essential for wrapping the dough disks and keeping them fresh while they chill in the fridge.
Having these tools ready ensures a seamless baking experience, so you can focus on enjoying the process and creating delicious holiday memories!

Let’s Talk Ingredients (with Healthier Substitutions)
The magic of this Classic Gingerbread Cookie Dough comes from its perfectly balanced blend of simple, flavorful ingredients. If you’re looking to lighten it up or make it suit specific dietary preferences, I’ve included some healthier substitutions for you to try. Let’s dive in:
• 3 cups All-Purpose Flour: The base of the dough. For added fiber and nutrients, substitute half the all-purpose flour with whole wheat flour. It gives the cookies a slightly nuttier flavor but keeps them sturdy and delicious.
• ¾ teaspoon Baking Soda: This leavening agent ensures the cookies bake up soft with just the right amount of rise. No substitutions needed here!
• ½ teaspoon Salt: A small amount of salt enhances the sweetness and balances the spices. For a low-sodium option, reduce the salt slightly.
• 1 tablespoon Ground Cinnamon: Adds that warm, cozy holiday flavor. Stick with cinnamon—it’s perfect as is!
• 1 tablespoon Ground Ginger: Ginger brings a gentle heat and zing to the cookies. It’s both flavorful and naturally anti-inflammatory—no need to swap this!
• ¾ teaspoon Ground Cloves: For a milder flavor, you can reduce this to ½ teaspoon if desired.
• ½ teaspoon Ground Nutmeg: Nutmeg adds a subtle warmth. You can experiment with allspice as an alternative if needed.
• 1 Large Egg: The egg binds the dough and adds structure. For a vegan option, substitute it with a flaxseed egg (1 tablespoon ground flaxseed + 2½ tablespoons water).
• 1 teaspoon Vanilla Extract: Enhances the flavor with a touch of sweetness. Use pure vanilla extract for a natural boost.
• ½ cup Molasses: This gives gingerbread its deep flavor and color. For a lower-sugar option, try unsulfured blackstrap molasses, which has less sugar and more nutrients.
• ¾ cup Unsalted Butter (at room temperature): Adds richness and tenderness to the cookies. Swap with coconut oil or a plant-based butter alternative for a dairy-free option.
• ½ cup Brown Sugar, packed: Adds a hint of caramel and sweetness. Substitute with coconut sugar for a lower-glycemic option or try a mix of brown sugar and a sugar-free sweetener for fewer calories.
Each ingredient brings its own charm to this recipe, and the healthier substitutions let you customize it to your needs while still delivering that festive, gingerbread magic. Whether you stick with the classic or try some swaps, your cookies will be a delicious holiday hit!

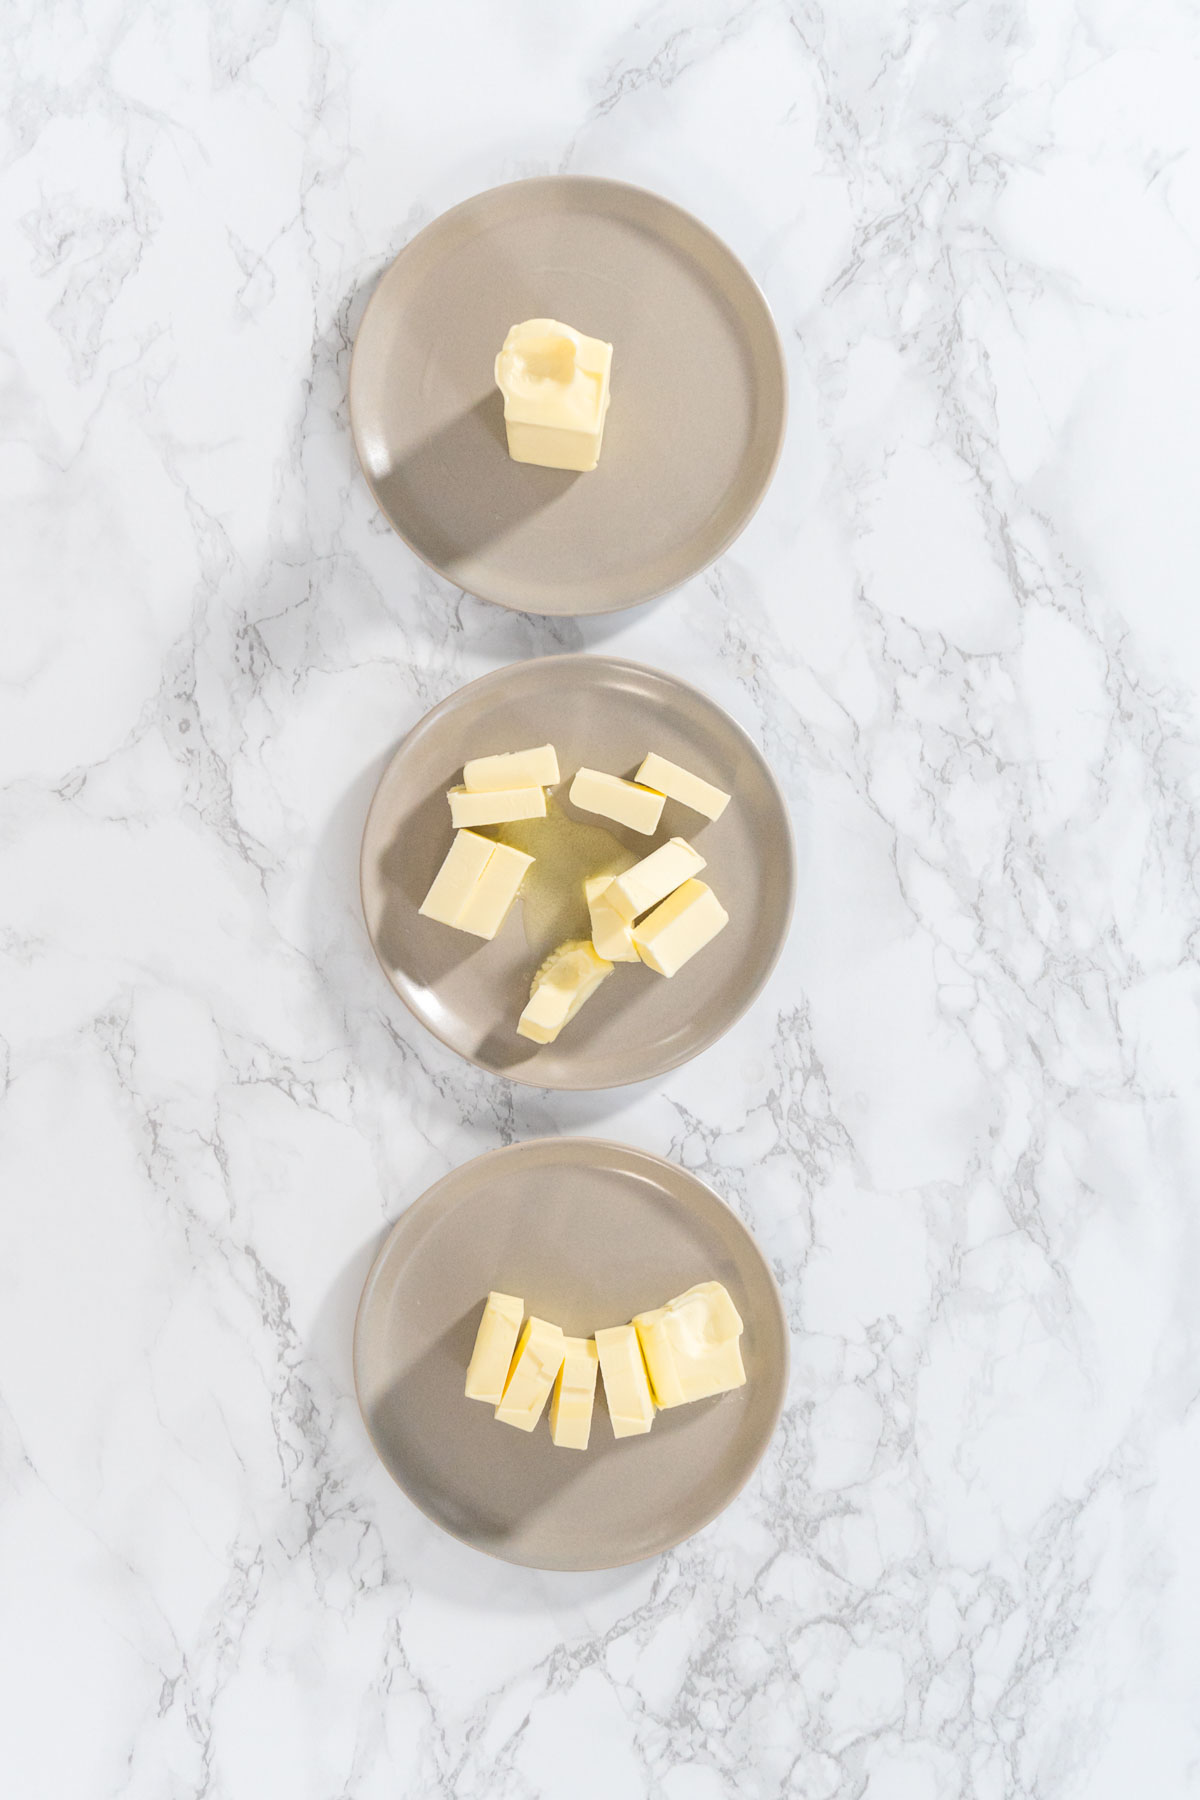
How to soften butter

Step-by-Step Instructions for Amber Gingerbread Cookie Dough
Creating this Amber Gingerbread Cookie Dough is a straightforward process, and with a little preparation, you’ll have perfect dough ready to bake festive treats. Here’s how to do it:
1. Prepare Your Ingredients
Before you begin, measure and prepare all your ingredients. This simple step ensures an organized and smooth baking process. I’m making a double portion in this post because I’m gearing up for my holiday baking marathon, but feel free to stick with a single batch if you’re baking smaller quantities.
2. Mix the Dry Ingredients
In a glass mixing bowl, whisk together the flour, cinnamon, ginger, baking soda, cloves, nutmeg, and salt until fully combined. This ensures the spices are evenly distributed throughout the dough, giving every cookie that classic holiday flavor. Once mixed, set the bowl aside.
3. Combine the Wet Ingredients
In a medium-sized bowl, whisk together the egg, molasses, and vanilla extract until smooth and well combined. This mixture not only adds flavor but also helps bind the dough. Set the bowl aside for now.
4. Cream the Butter and Sugar
In the bowl of your kitchen mixer, add the room-temperature unsalted butter and packed brown sugar. Using the paddle attachment, cream them together on medium speed for about two to three minutes, until the mixture becomes light and fluffy. This step is key for achieving that soft, tender texture in your cookies.
5. Combine Wet and Creamed Ingredients
Scrape down the sides of the mixing bowl with a silicone spatula to make sure everything is evenly incorporated. Then, add the egg, molasses, and vanilla mixture to the creamed butter and sugar. Continue mixing on medium speed until smooth and fully combined.
6. Add the Dry Ingredients
Gradually add the dry ingredients to the wet mixture, about a third at a time, mixing on low speed after each addition. This slow addition ensures the dough is evenly mixed without overworking it. By the end, the dough should be smooth and slightly firm, holding together without being sticky.
7. Shape and Chill the Dough
Divide the dough into two portions. Using a silicone spatula, scoop each portion onto a piece of food wrap. Loosely wrap each portion and then press it into a flat disk. This keeps your hands clean and makes the dough easy to handle later.
8. Refrigerate or Freeze the Dough
Place the wrapped dough disks in the refrigerator to chill for at least one hour. Chilling is essential for firming up the dough, making it easier to roll and cut into shapes. If you’re not planning to use the dough right away, you can freeze it for up to three months. To freeze, wrap the disks in an extra layer of plastic wrap or aluminum foil to prevent freezer burn. Don’t forget to label each disk with the date and type of dough using a Sharpie! When ready to bake, thaw the dough overnight in the refrigerator before rolling and cutting.
With your dough prepped and chilled, you’re ready to roll, cut, and bake delicious holiday cookies!

Decorating Your Classic Gingerbread Cookies
Now for the part where the magic truly happens—decorating! This step is where your Classic Gingerbread Cookies come to life, adding festive charm and your personal touch to every cookie. Whether you love intricate designs or prefer to keep things simple, there’s a decorating method for everyone.
Decorating Cutout Cookies: Techniques and Tips
Once my cutout cookies are baked and cooled, it’s time for my favorite part—decorating! This is where I can transform these tasty cookies into beautiful treats for any occasion. Whether I’m using royal icing, chocolate icing, or dipping them in chocolate, decorating is where creativity and tradition converge in my kitchen.
Getting Ready to Decorate
First, I always make sure my cookies are completely cooled before decorating. Trying to decorate warm cookies is a recipe for disaster—melting icing and smudged designs are no fun. Let them cool completely for the best results.
I like to set up my decorating area with everything I need organized and ready:
• Royal icing in piping bags with fine tips for detailed designs.
• Chocolate icing in piping bags, used just like royal icing for piping intricate patterns or designs.
• Dipped in chocolate for adding a glossy finish to cookies.
• Sprinkles, crushed nuts, or crushed peppermint candy canes for decorating dipped cookies.
• Edible markers for writing or drawing directly on the cookies.
I also line my workspace with parchment paper, which keeps cookies from sticking and makes cleanup easy.
Decorating with Royal Icing
Royal icing is my go-to for that smooth, polished cookie look. I start by outlining the cookie with a thicker consistency icing, then flood the center with a thinner icing. A toothpick is perfect for spreading the icing evenly and popping any air bubbles.
If I’m layering colors or adding details, patience is key! A light design or piping dries in about 24 hours, but fully flooded cookies can take up to 48 hours to dry completely. For a detailed guide on working with royal icing, check out my blog post How to Flood Cookies with Royal Icing. It’s packed with tips and tricks to make your cookies look professionally decorated!
Decorating with Chocolate Icing
Chocolate icing works similarly to royal icing—it’s piped on top of the cookies using a piping bag. It’s great for adding intricate patterns or creating fun, festive designs. You can use dark chocolate, milk chocolate, or white chocolate, depending on the look and flavor you’re going for.
Unlike dipped chocolate, chocolate icing dries with a slightly glossy finish and is ready to handle in about 30 minutes to an hour, depending on the thickness of the design. I go into more detail about working with chocolate icing in my blog post Chocolate Cookie Decorating Tips, so be sure to check it out for inspiration!
Dipped in Chocolate
Another fun and simple method is dipping cookies in melted chocolate. I dip half of the cookie into the chocolate for a two-tone effect, which looks both elegant and festive.
While the chocolate is still wet, I sprinkle the dipped side with holiday sprinkles, crushed nuts, or crushed peppermint candy canes. This method adds texture, color, and a burst of flavor to every bite. Unlike piped chocolate icing, dipped chocolate works as a base for these fun toppings. If you’re curious about how to achieve the perfect dipped cookie, check out my blog post How to Decorate Cookies with Melted Chocolate for a step-by-step guide.
Dipped cookies dry much faster than royal icing—typically within 30 minutes to an hour, depending on how thick the chocolate layer is.
Storing Decorated Cookies
Once decorated, I let the cookies dry completely before stacking or packaging. For royal icing, I allow up to 48 hours for flooded cookies to set, while chocolate icing or dipped cookies are usually ready in about an hour.
For gifting, I individually wrap each cookie in self-sealing plastic bags. This keeps them fresh, prevents decorations from smudging, and makes them look beautifully presentable.
Decorating Classic Gingerbread Cookies is one of my favorite parts of holiday baking. Whether you go with intricate royal icing patterns, a sprinkle of powdered sugar, or a decadent chocolate dip, these cookies are guaranteed to be a festive and tasty highlight of the season!

Storing Classic Gingerbread Cookies
Once your beautifully decorated Classic Gingerbread Cookies are ready, the next step is to store them properly so they stay fresh and delicious for as long as possible. Whether you’re keeping them for your own holiday treats or preparing them for gifting, here’s how I like to store my cookies to maintain their flavor and texture.
Preserving Cutout Cookie Dough: Storage and Freezing Tips
Proper storage and freezing are key to preserving the quality of cutout cookie dough, ensuring it’s just as good when you’re ready to bake as it was when you first made it. Whether you’re chilling dough for a short period or freezing it for future use, these methods are essential for maintaining flavor and texture. This section provides practical tips and techniques to help you efficiently store and extend the life of your cookie dough.
Storing Dough in the Refrigerator
If you’re planning to bake within the next few days, store the dough in the refrigerator. After dividing the dough into two portions, wrap each one tightly in plastic wrap and place it in the fridge. Chilling the dough for at least an hour firms it up, making it easier to roll and cut into shapes. You can store the dough in the refrigerator for up to three days.
Freezing Dough for Longer Storage
For longer storage, freezing the dough is a fantastic option. Here’s how I do it:
1. Wrap each dough disk in an extra layer of plastic wrap or aluminum foil to protect it from freezer burn.
2. Place the wrapped disks into a freezer-safe zip-top bag for extra protection.
3. Label the bag with the date and the name of the dough using a Sharpie. This avoids any confusion when you’re digging through the freezer later!
The dough will keep beautifully in the freezer for up to three months.
Thawing Dough for Use
When you’re ready to bake, simply transfer the dough from the freezer to the refrigerator and let it thaw overnight. By the next day, it will be chilled and ready to roll. If the dough feels too firm after thawing, let it sit on the counter for 10-15 minutes to soften slightly before rolling.
Freezing Baked Cookies
If you’re planning to bake ahead of time, you can also freeze the baked cookies. Once the cookies have cooled completely, layer them between sheets of parchment paper in a freezer-safe container. This prevents them from sticking together. Just like the dough, label the container with the date and flavor so you can stay organized.
When you’re ready to serve or decorate, let the cookies thaw at room temperature for about 30 minutes.
Staying Organized During Holiday Baking
My holiday baking season gets busy fast, so freezing dough and baked cookies is my secret weapon. I usually start making my dough in September, bake in October or November, and decorate in December. This timeline helps me stay ahead of the holiday rush while still having plenty of fresh, delicious cookies to share.
With these storage tips, you can make your holiday baking stress-free and enjoy the process just as much as the results!
Storing your Classic Gingerbread Cookies properly ensures they’re just as tasty days or weeks later as they were on baking day. Whether you’re savoring them with your family or sharing them with loved ones, these cookies are a holiday treat that keeps on giving!

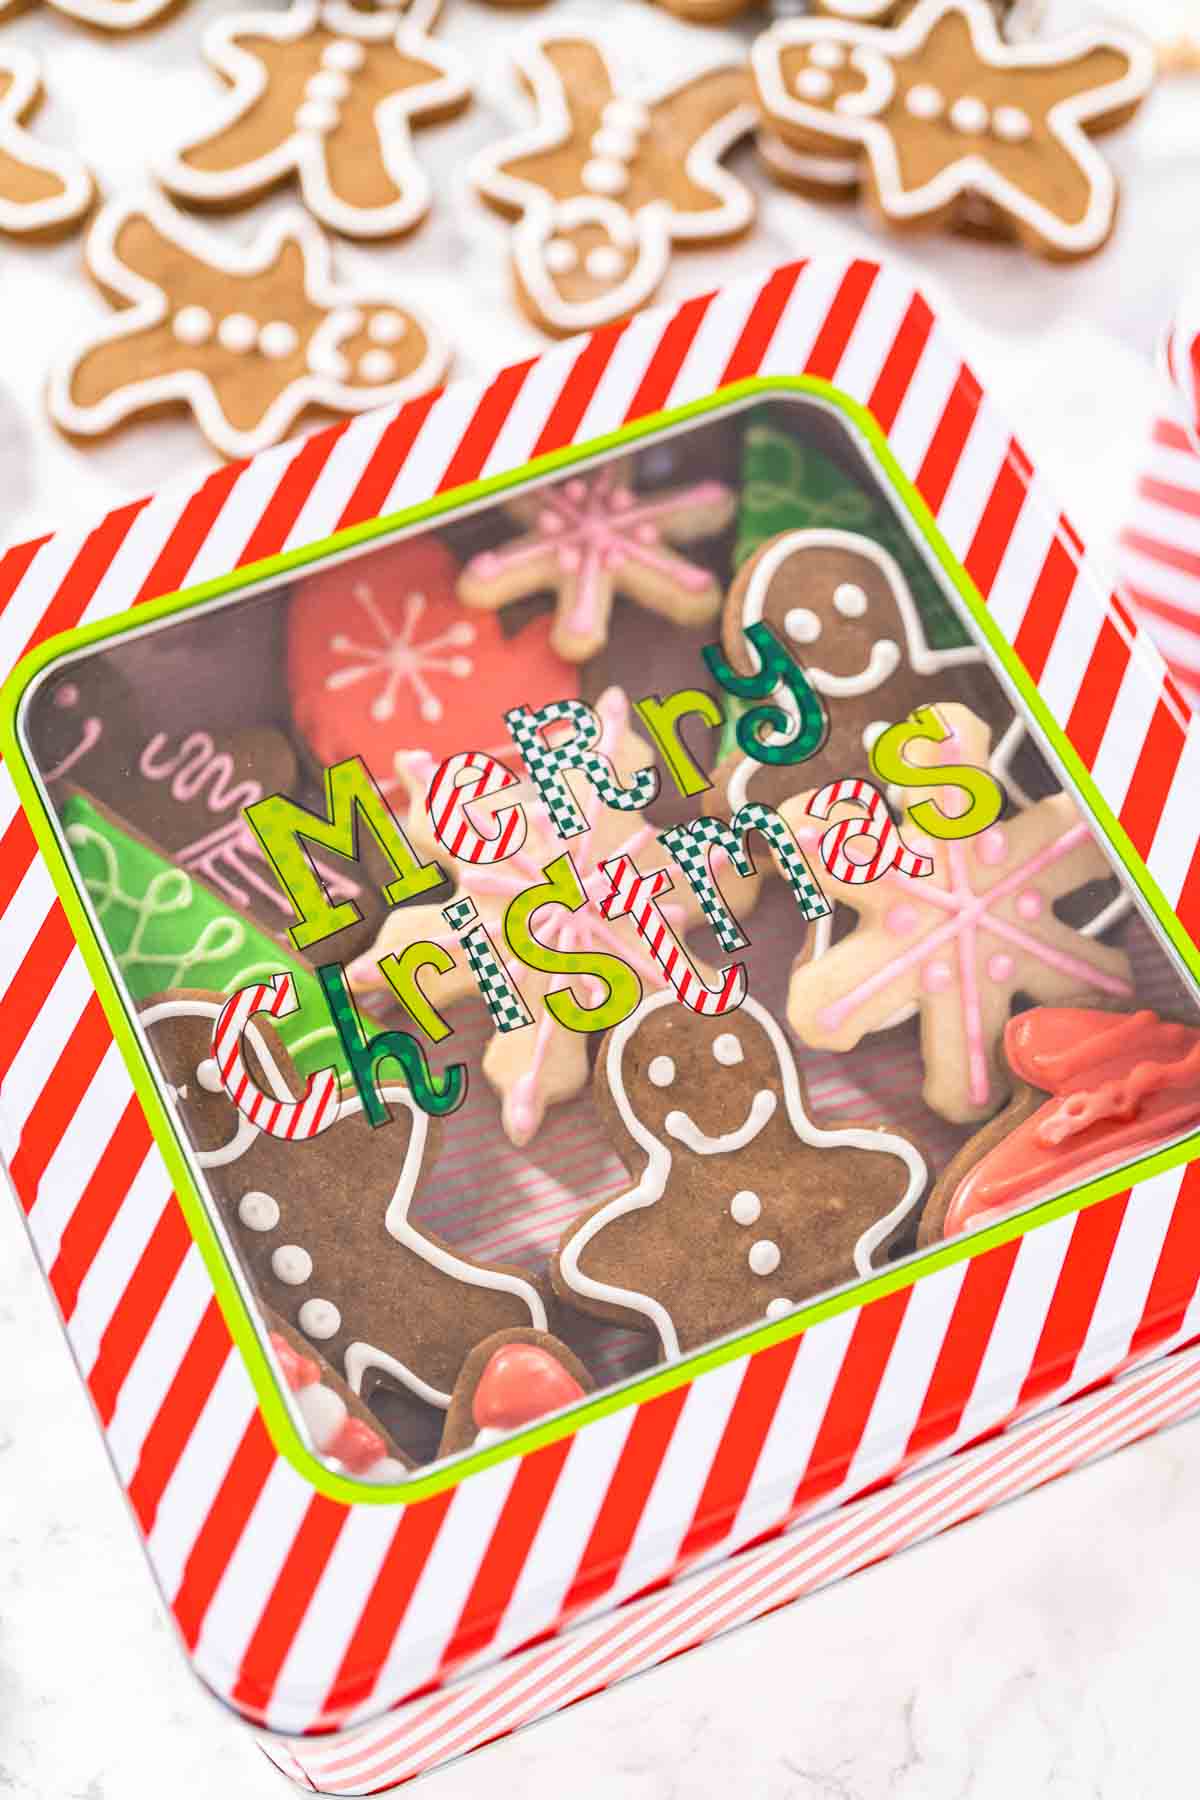
Package Homemade Cookies and Fudge

Troubleshooting Classic Gingerbread Cookies
No matter how experienced you are in the kitchen, baking comes with its challenges. But don’t worry—most issues with gingerbread cookies have simple fixes. Let me share a few common troubleshooting tips that I’ve learned over the years to help you achieve perfect Classic Gingerbread Cookies every time.
Troubleshooting Common Issues with Cutout Cookie Dough
Even with the best recipes and careful preparation, sometimes things don’t go as planned in the kitchen. But don’t worry! I’ve encountered plenty of baking hiccups, and I’m here to share some tips to help you troubleshoot common issues with cutout cookie dough.
Dough Too Sticky
If your dough feels sticky and hard to handle, it might need a little extra flour. This can happen due to slight measurement variations or even humidity in the kitchen. Start by adding one tablespoon of all-purpose flour at a time, gently kneading it into the dough until it’s firm but still pliable. Be careful not to add too much flour, as it can make the cookies dry.
Dough Cracking While Rolling
Sometimes chilled dough can feel a bit too stiff and crack when rolled out. If this happens, let the dough sit at room temperature for 10-15 minutes to soften slightly. The high butter content in the dough makes it firm when cold, but letting it warm up a bit will make rolling much easier.
Cookies Spreading During Baking
If your cookies lose their shape in the oven, it’s often due to insufficient chilling. After cutting out your cookies, place them back in the fridge or freezer for 10-15 minutes before baking. This step helps the dough hold its shape and prevents spreading.
Another trick is to add a teaspoon of cornstarch to the dry ingredients. Cornstarch reduces spreading during baking and keeps the cookies nice and sturdy for decorating.
Uneven Baking
Uneven baking can happen if the cookies are different sizes or if multiple trays are stacked in the oven. To avoid this, make sure your cutout cookies are all the same thickness and bake one tray at a time on the middle rack. This ensures even heat distribution and perfectly baked cookies every time.
Overbaked or Burnt Edges
If your cookies are coming out with dark edges, they may have baked too long. Keep an eye on them as they bake—most cookies are done when the edges are set but the centers still look slightly soft. Start checking a minute or two before the recommended baking time to ensure they don’t overbake.
Dough Too Soft to Cut
If the dough is too soft when you’re cutting out shapes, it likely hasn’t chilled long enough. Pop it back in the fridge for another 20-30 minutes to firm up before trying again. Patience is key for perfectly shaped cookies!
Personal Tip
Don’t get discouraged if things don’t go perfectly the first time. Baking is as much about learning as it is about enjoying the process. I’ve had my share of “oops” moments, but each one taught me something new. And honestly, even the imperfect cookies still taste amazing!
Troubleshooting is just part of the fun when baking, and with a little patience and these tips, you’ll have beautiful, delicious cut-out cookies ready to share. Let’s move on to the best part—enjoying these delightful creations!
Gingerbread Recipes
- How to Decorate Mitten Sugar Cookies (Simple Winter Design)
- How to Make Amber Gingerbread Cookies Without Molasses (Maple-Sweet and Spiced)
- Green Gingerbread Cookies – A Fun Twist on a Classic
- Moist Gingerbread Bundt Cake with Warm Caramel Hidden Inside
- Gingerbread Man Chocolates for Garnishing Cookies, Cupcakes, and Cakes
- Festive Holiday Cupcakes with Classic Gingerbread Flavor


Classic gingerbread cookie Dough
Video
Equipment
Ingredients
Gingerbread man cookies
- 3 cups All-Purpose Flour
- ¾ teaspoon Baking Soda
- ½ teaspoon Salt
- 1 tablespoon Ground Cinnamon
- 1 tablespoon Ground Ginger
- ¾ teaspoon Ground Cloves
- ½ teaspoon Ground Nutmeg
- 1 Large Egg
- 1 teaspoon vanilla extract
- ½ cup Molasses
- ¾ cup Unsalted Butter at room temperature
- ½ cup Brown Sugar packed
Instructions
- Measure and prepare all of your ingredients before starting. This ensures an organized and smooth baking process.I’m making a double portion here, so feel free to adjust if you’re making a smaller batch.

- In a glass mixing bowl, whisk together the flour, cinnamon, ginger, baking soda, cloves, nutmeg, and salt until fully combined. Set this bowl aside.

- In a medium-sized bowl, whisk together the egg, molasses, and vanilla extract until smooth and well combined. Set aside.

- In the bowl of your kitchen mixer, add the room-temperature unsalted butter and packed brown sugar. Using the paddle attachment, cream them together on medium speed for about 2-3 minutes, until the mixture becomes light and fluffy.

- Scrape down the sides of the bowl with a spatula, then add the wet ingredients (egg, molasses, and vanilla mixture) to the creamed butter and sugar. Mix on medium speed until fully combined and smooth.

- Gradually add the dry ingredients to the wet mixture, about ⅓ at a time, mixing on low speed after each addition. Continue mixing until a smooth dough forms. The dough should hold together but not be sticky.

- Divide the dough into two portions, flatten each into a disk, and wrap in food wrap.

- Place the dough in the refrigerator to chill for at least 1 hour. For longer storage, you can freeze the dough for up to 3 months. Just thaw in the refrigerator overnight before using.

- Bake at 350°F (175°C) for 8–10 minutes, until the edges are just set and the tops look dry. I always pull them early because overbaking gingerbread is the fastest way to lose that soft center (and nobody wants that!).
Nutrition
Food Photography & Video Tips from My Studio
Here’s a peek at the tools, gear, and camera setups I use to film my recipe videos and photograph food at home. Over the years, I’ve tested dozens of different setups, and now I’m sharing what actually works for me—whether I’m filming overhead shots for YouTube or styling still photos for my blog. If you’re curious about how I create the content you see here, these posts are a great place to start.

What is in my toolbox?

3 ways camera setup for Tasty-style video recipes

Best camera for cooking videos


Shelby says
This whole recipe,but no info on oven settings or time to cook?
Arina Habich says
Hi Shelby! Good catch — thanks for pointing that out 😊
The cookies bake at 350°F (175°C) for 8–10 minutes, until the edges are just set and the tops look dry. I always pull them early because overbaking gingerbread is the fastest way to lose that soft center (and nobody wants that!).
Hope that helps — happy baking! 🍪🎄