Unicorn sugar cookies with royal icing
This post contains affiliate links.
Making cookies have become a pastime for me, and I like to experiment during the process to see what looks good for the camera, makes the process easier, or what makes them taste better.
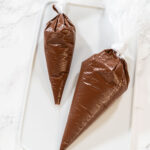
When making these cookies, I used special piping bags for royal icing. I use different size bags for different consistencies- I used a thicker icing for borders and a thinner icing for flooding these borders to ensure a smooth flooded surface. For this, I had to make two bags of each color I used.
After flooding, I use a heating gun for half a minute on the cookie for it to dry faster. This heating gun is pretty low heat, and I try to keep it around 6 inches away from the cookie to dry a perfect icing crust, preventing it from caving in and ruining the cookie. This technique is good for larger surfaces, as it usually would take quite a while for the thinner icing to dry. After letting the icing dry, I use a black food marker for the eyes.
After finishing the icing, I applied a layer of glitter for a sparkly effect on the cookies. The glitter is in a powder, but I mixed it with clear vanilla to make it more watery to make it easily paintable on the cookies. I applied this mixture to the horns, manes, hooves, and on clouds, which turned out quite well and added some extra depth to the cookies.https://www.youtube.com/watch?v=TcFiboP8zUI
Unicorn sugar cookies
Equipment
Ingredients
Royal icing
- 1 lbs Confectioner’s Sugar
- 3 tablespoon Meringue Powder
- 6 tablespoon Warm Water
- 1 teaspoon Vanilla Extract
- Food Coloring
Instructions
- In a medium bowl, combine flour and salt.
- In a large bowl, beat butter and sugar together in a stand mixer until smooth.
- Beat in the vanilla extract and the egg.
- Add in the rest of the dry ingredients slowly while beating the dough.
- After a while and the dough is stiff, finish kneading by hand.
- Roll the dough into a ball, then squeeze the dough into a ¾ inch-thick disk.
- Wrap the dough in saran wrap, and chill in the fridge for 2 hours before rolling.
- Preheat oven to 350°F.
- Roll the dough onto a lightly floured surface to ¼ inch thick, and cut with cookie cutters into desired shapes.
- Transfer cookies onto a baking sheet lined with paper or a silicone liner.
- Before baking, place the baking sheet of cookie cutouts in the fridge and let chill for 5-10 minutes. This is so the cookies will keep their form and not spread out while baking.
- Bake for 8-10 minutes, then cool on a cookie sheet, then transfer to a cookie rack to finish cooling.
Royal Icing
- In a large bowl, combine confectioner’s sugar and meringue powder.
- Add warm water, one tablespoon at a time, while mixing on low speed.
- Add vanilla extract, and continue mixing until the mixture is shiny.
- Mix at low speed and beat for 5-7 minutes, and add desired colors.
- Transfer to piping bag.
Notes
- For each color of icing, you need 2 different consistencies of icing. For a thinner consistency, add more water to the mixture. Thinner icings are used for flooding, and thicker icing is used for borders and edges.
- For thicker icing, cut the piping bag very thinly, around a 1/16 of and inch. For thinner icings, cut ⅛ of an inch. If this is too small, you can always cut more bag.
- After decorating cookies, dry the icing with a craft heat gun 10 inches away, so the flooded icing does not cave on itself.
- I like to let my cookies air dry in a cool space for 2 days, then they’re ready for packaging.
- The cookies can be frozen in any part of the process: the dough, decorated and undecorated cookies. Decorated cookies must be frozen slowly, placing a cookie on a baking sheet for half an hour, then stacking similar shapes, putting parchment paper in between. Then wrap the stacked cookies in press n’ seal and then aluminum foil, date the cookies, and the cookies stay good for four months.
Nutrition
Food Photography & Video Tips from My Studio
Here’s a peek at the tools, gear, and camera setups I use to film my recipe videos and photograph food at home. Over the years, I’ve tested dozens of different setups, and now I’m sharing what actually works for me—whether I’m filming overhead shots for YouTube or styling still photos for my blog. If you’re curious about how I create the content you see here, these posts are a great place to start.
#bakingwithkids #sugarcookies #baking #kidscookies #unicorn #unicornfood #unicorncookies #royalicing















Leave a Reply