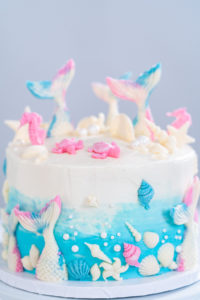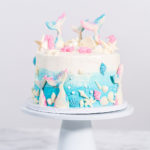
Mermaid 3 layer cake
Servings: 14 People
Ingredients
Cake
- 3 cans Vanilla buttercream frosting 16 oz
- 2 cans Strawberry buttercream frosting 16 oz
- Powdered sugar 4-6 cups, as needed
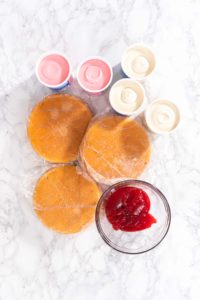
- 3 layers Uniced 8 inch cake layer vanilla
- 2 cups Strawberry cake filling
- food coloring blue
Mermaid tails and seashells
- 2 cups Bright white Candy Melts
- 1 teaspoon Coconut oil
- ½ cup Wilton pink candy melts
- 1 teaspoon Coconut oil
- ½ cup Wilton Candy Melts Blue
- 1 teaspoon Coconut oil
- Food glitter
Garnish
Instructions
Cake assembley
- First, gather up all of your cake ingredients and all 3 of the prepared chocolate cake layers.
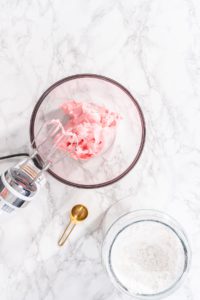
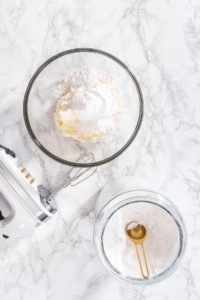
- Then, transfer both tubs of the strawberry frosting to a large glass mixing bowl and whip with the electric hand mixer until smooth, about 5 minutes. If needed, mix in small amounts of powdered sugar until the frosting is stiff.Remember, the frosting and crumb coat layers will need to be thick, otherwise, the cake layers will move and slide.
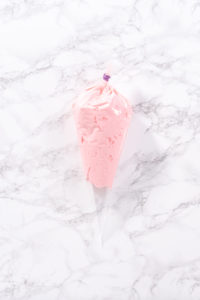
- Next, use a silicone spatula to scoop the whipped frosting into a pastry piping bag and close it off with a piping bag tie. Cut off ½ inch from the tip of the pastry bag to make an opening.
- Next, line the revolving cake stand with the 10-inch white cake drum and gather the strawberry frosting and filling.
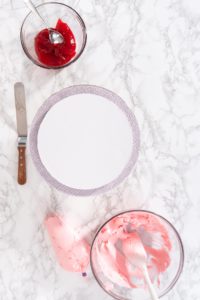
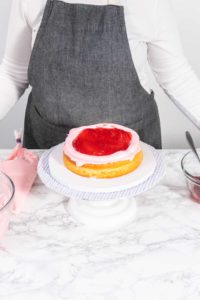
- Then, unwrap the first cake layer and position it in the center of the cake drum.
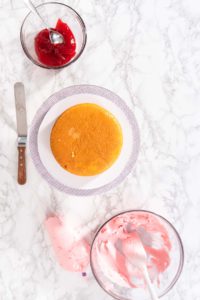
- Squeeze some strawberry frosting onto the top of the first cake layer and spread it out evenly over the top using the cake spatula. Then, squeeze a border of frosting along the top outer edge, this border will hold in the filling.
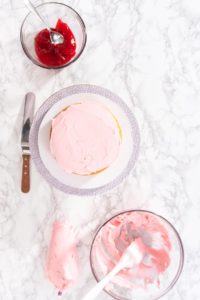
- Then, spoon the strawberry filling inside the frosting border and spread it around to fill in.
- Carefully add the second layer of vanilla cake and repeat the frosting and filling process.
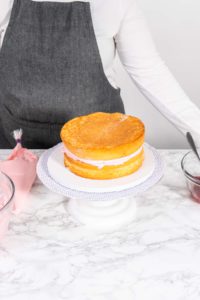
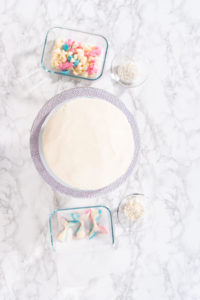
- Next, place the final layer of cake upside down to create a flat top and frost the top and sides completely. Smooth the outside layer of frosting with a cake scraper.
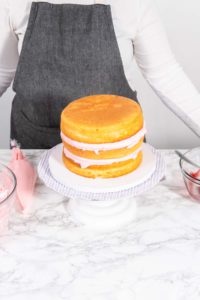
- Transfer the stacked cake to the refrigerator and let it chill for 30 minutes.
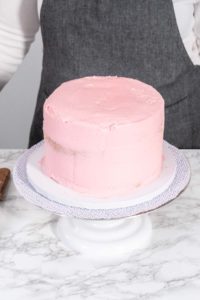
- Then, transfer 2 tubs of the vanilla frosting to a large mixing bowl. Gradually add in some powdered sugar and whip with the electric hand mixer until stiff, about 5 minutes. This crumb coat layer frosting needs to be a thick consistency, otherwise, the cake layers will start sliding around.
- In a separate mixing bowl, add the last tub of vanilla frosting. Mix in powdered sugar to make the frosting stiff.
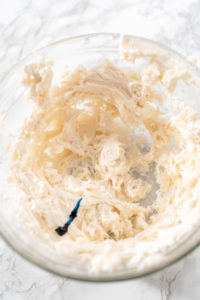
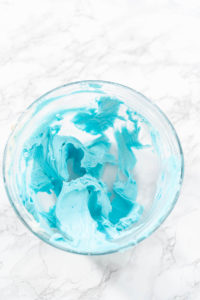
- Then, use a toothpick to add in a little bit of blue food coloring and mix until the desired color is reached.
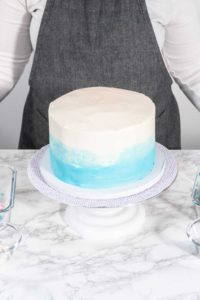
- Remove the stacked cake from the fridge and transfer it back to the revolving cake stand. Spread the white frosting over the top of the cake and down over about ⅔ of the sides. Then, spread the blue frosting along the bottom part of the cake up to meet the edge of white frosting.
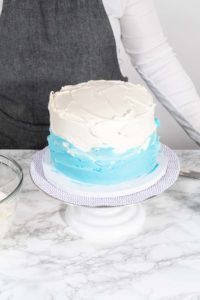
- Finally, smooth the entire outside frosting layer with the cake scraper, just barely blending the part where the blue and white frosting meet.
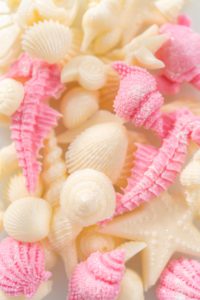
Mermaid tails and seashells
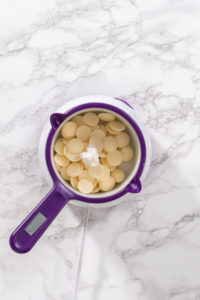
- First, measure out all of the colored candy melts and the coconut oil.

- Then, combine the bright white candy melts and the coconut oil in the candy melt pot. Melt them together on high, while stirring continuously with a heat-resistant spatula.
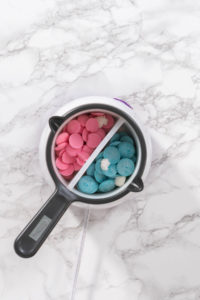
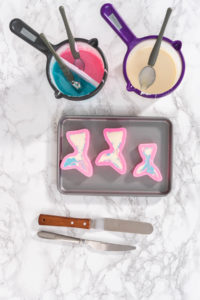
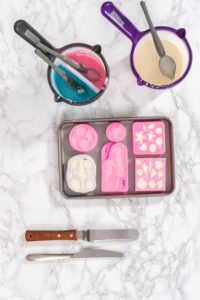
- Next, get another candy melt pot ready with a two-compartment silicone liner. Drop the pink and blue candies into the separated sections and add coconut oil to each one. Heat on high while continuously stirring.
- Then, set the mermaid tail silicone mold and the seashell silicone mold on baking sheets to keep them flat and grab the other candy-making tools.
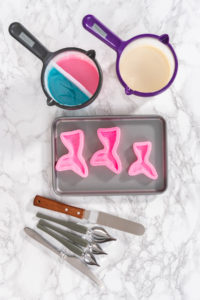
- Use separate drizzle spoons to carefully pour the white, blue, and pink melted candy into the mermaid tail mold. Tap the mold gently to remove any air bubbles.I like to mix the colors in the mermaid tails to give them a much more whimsical look.
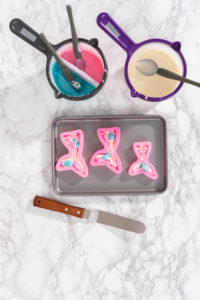
- Next, scrape off the excess melted candy using a cake spatula. Spoon the rest of the melted candy into the seashell silicone mold, tap the tray, and scrape off the excess candy.
- Then, transfer the baking sheets either to the fridge or the freezer and sit the trays completely flat. Refrigerate the candies for 15 minutes or freeze them for 5 minutes.
- When the chocolates have hardened completely, carefully pull the edges of the silicone molds to gently separate from the candies, then carefully pop the candies out from the molds.Try not to handle the chocolate candies too much, your body heat can make them start to melt.
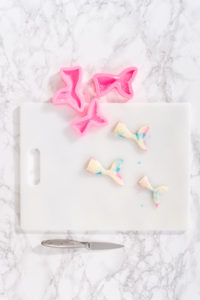
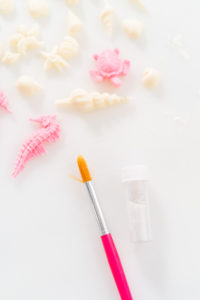
- Cut away any excess candy from the edges and use a food brush to apply the glitter dust to each of the candies.
- Refill and repeat the melting and candy-making process 3 more times.These homemade chocolates can be prepared ahead of time and stored until it’s time for cake decorating. Keep reading for candy storage instructions.
Garnishing
- First, set out the freshly frosted cake and the homemade candy cake toppers.
- Then, before the frosting has a chance to harden, start decorating the cake with the colorful chocolate mermaid tails.
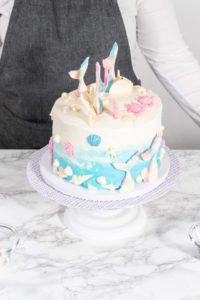
- Finally, finish the cake decorating and assembly by adding the chocolate seashells and the sugar pearls. Serve and enjoy!If you need to transport the cake to a different location, then wait to add the top decorations until you’ve made it to the party destination.