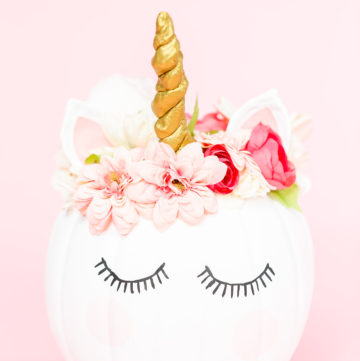
DIY Unicorn Pumpkin
Make your own DIY Unicorn Pumpkin with this simple no-carve Halloween craft! Using pastel paints, gold glitter, faux flowers, and a unicorn horn, this magical pumpkin is perfect for kids and teens. Great for Halloween parties, school crafts, or as a sparkly centerpiece for your fall decor. Quick, easy, and fun to customize with your favorite colors and accessories.
Video
Equipment
- Kids Painting Aprons Optional
Ingredients
- 2 Large White Foam Pumpkin
- Acrylic paint White, Black, and Pink
- Modeling clay
- Wood skewer sticks
- Silk Flowers
- Gold acrylic paint
- Sharpie black
Instructions
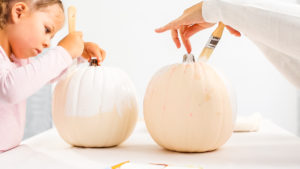
- Start by painting the foam pumpkin white with a paintbrush. Allow it to dry for at least 24 hours. (If you already have a white pumpkin, you can skip this step.)
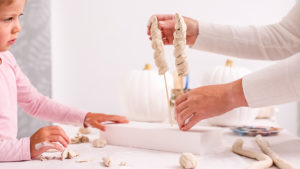
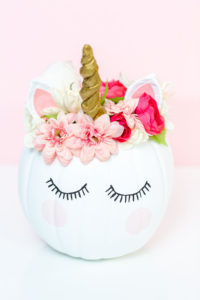
- Use modeling clay to create the unicorn ears and horn, then set them aside to dry for about 72 hours.
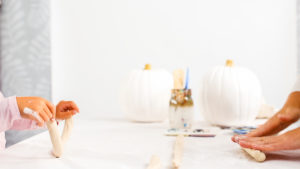
- To shape the horn, roll out two clay strips, twist or braid them together for a spiral look, and insert a wooden skewer into the base while it’s still soft.

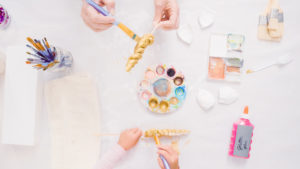
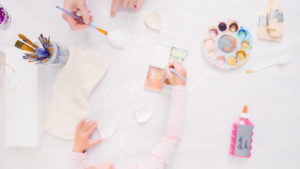
- Once the clay pieces are dry, paint them in the colors you like. I used metallic gold for the horn and pink or gold for the ears. Let them dry fully.
- Insert the horn into the pumpkin by poking a small hole with the skewer end, then use hot glue to secure both the horn and ears in place.
- When everything has dried, draw the unicorn’s face. Use a black Sharpie or fine brush with black paint to add eyelashes.
- Cut the stems off the silk flowers with wire clippers, since they usually have metal inside.
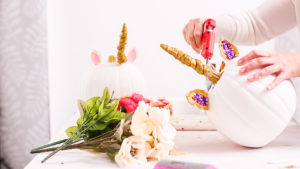
- Arrange and hot glue the flowers around the horn and ears however you’d like.
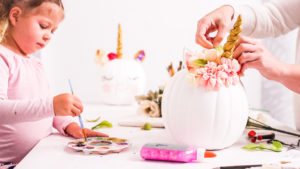
- (Optional) Add details like rosy cheeks with pink paint, or any other features you’d love to include.
Tried this recipe?Let us know how it was!